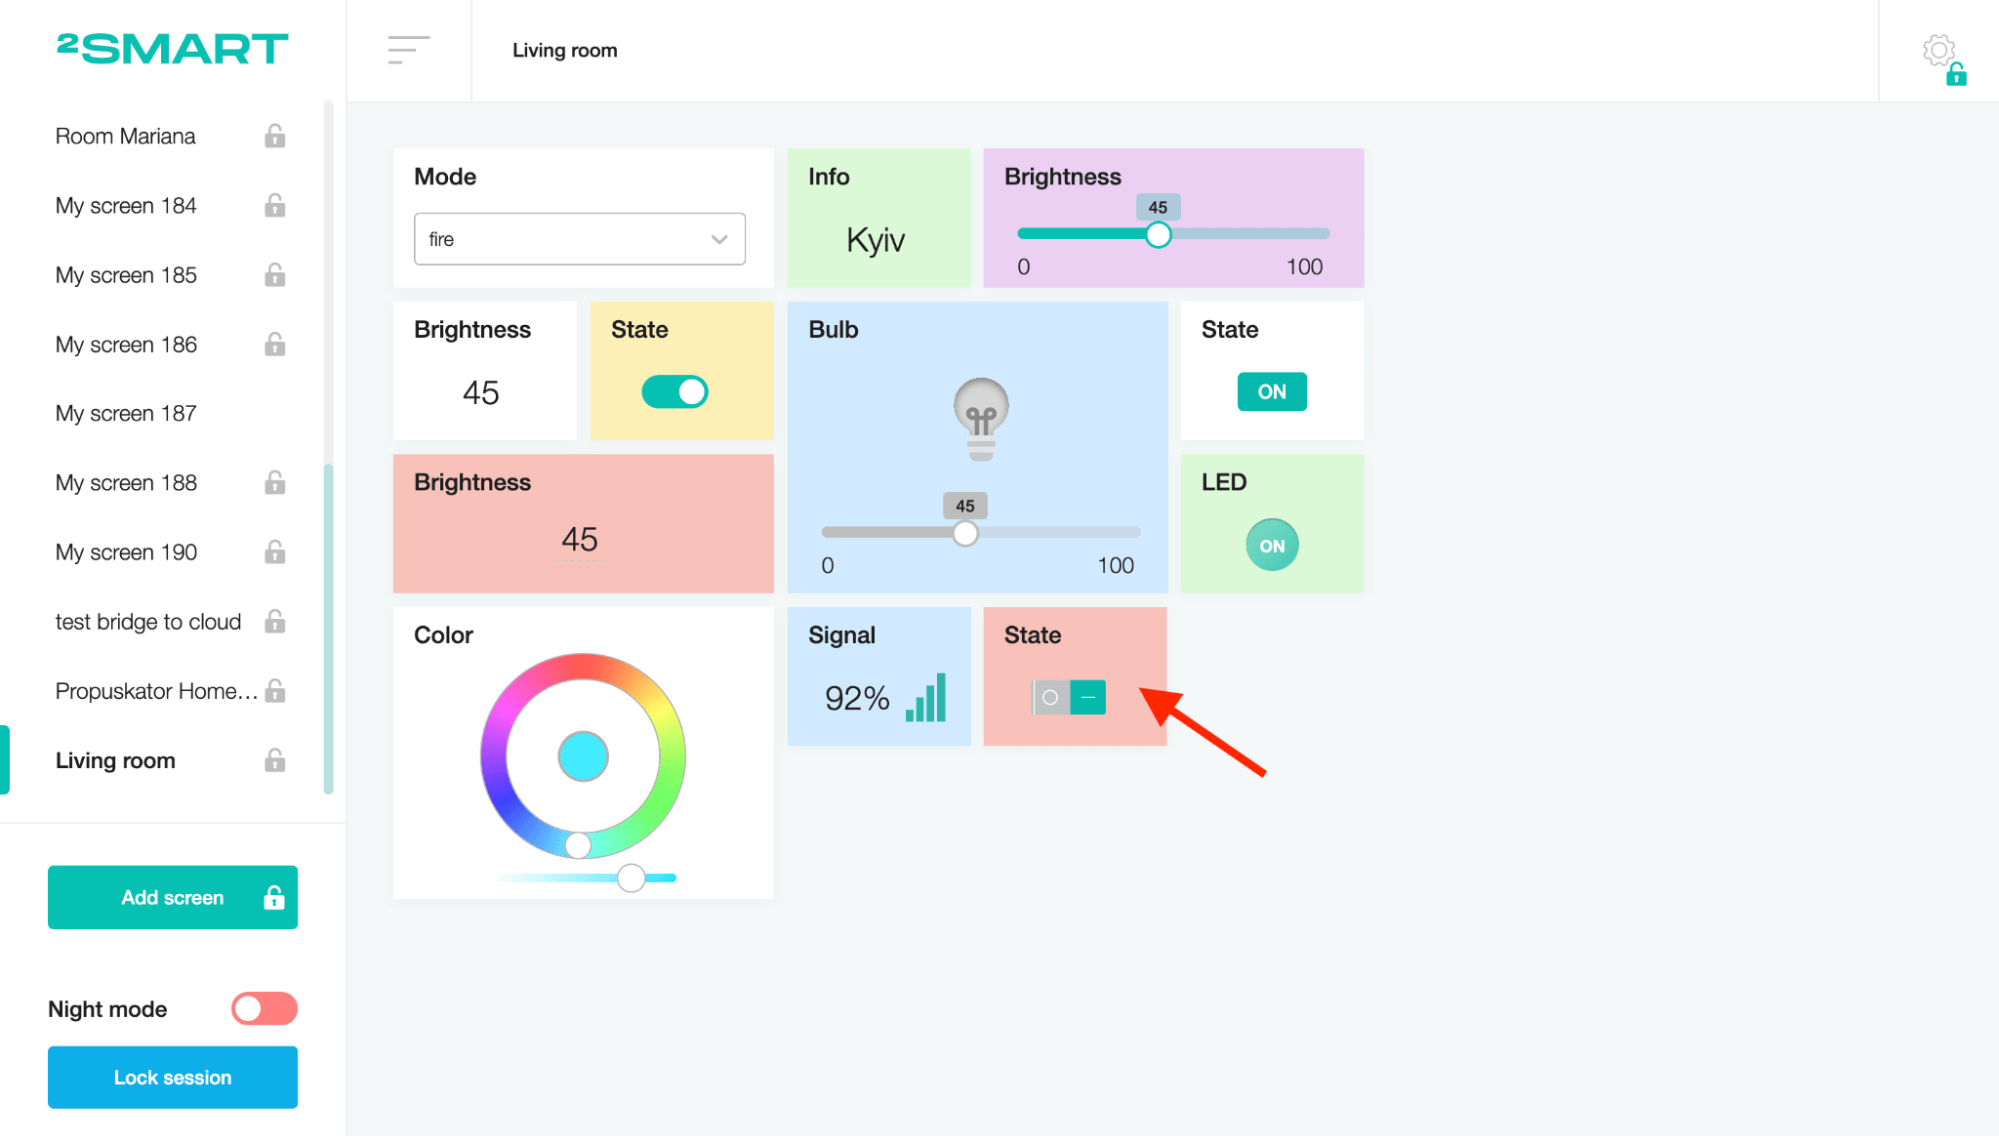
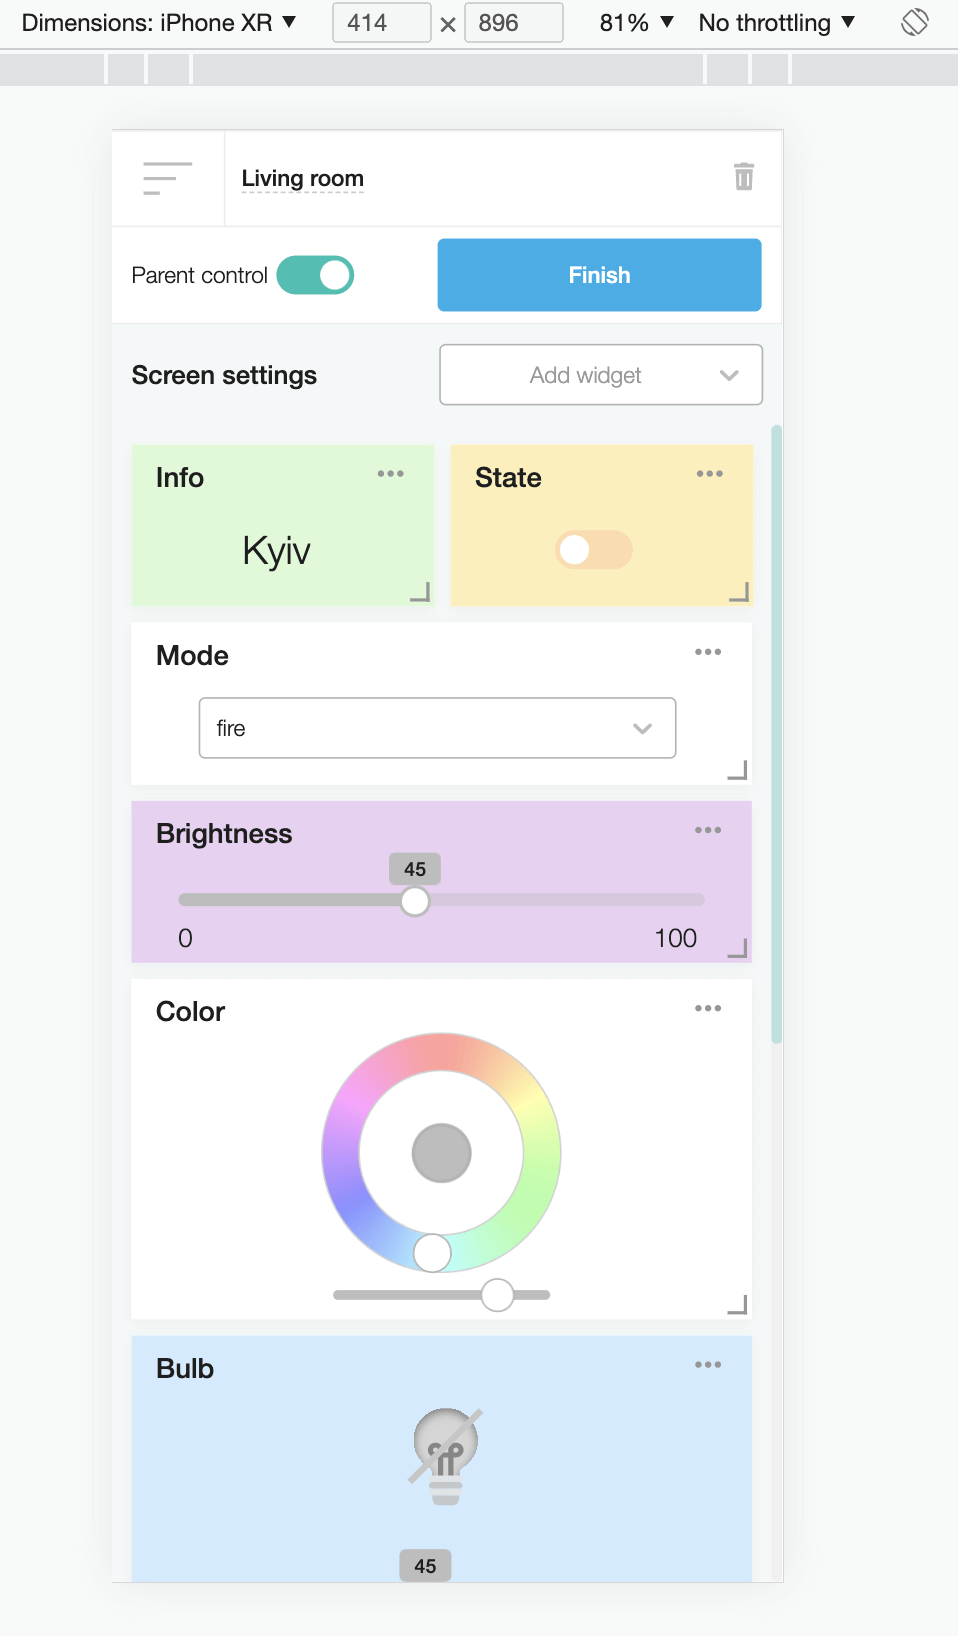
Client panel
The 2Smart Standalone client panel allows users to control their devices using widgets. To start managing the system, log in to your 2Smart Standalone account.
The client part of the application allows you to add screens to control the "smart home". The user can create widgets on each screen to conveniently control their devices. Widgets allow you to view and control sensor readings, set the required values for them, manage automation scenarios and display all the necessary information on the screen.
Overview
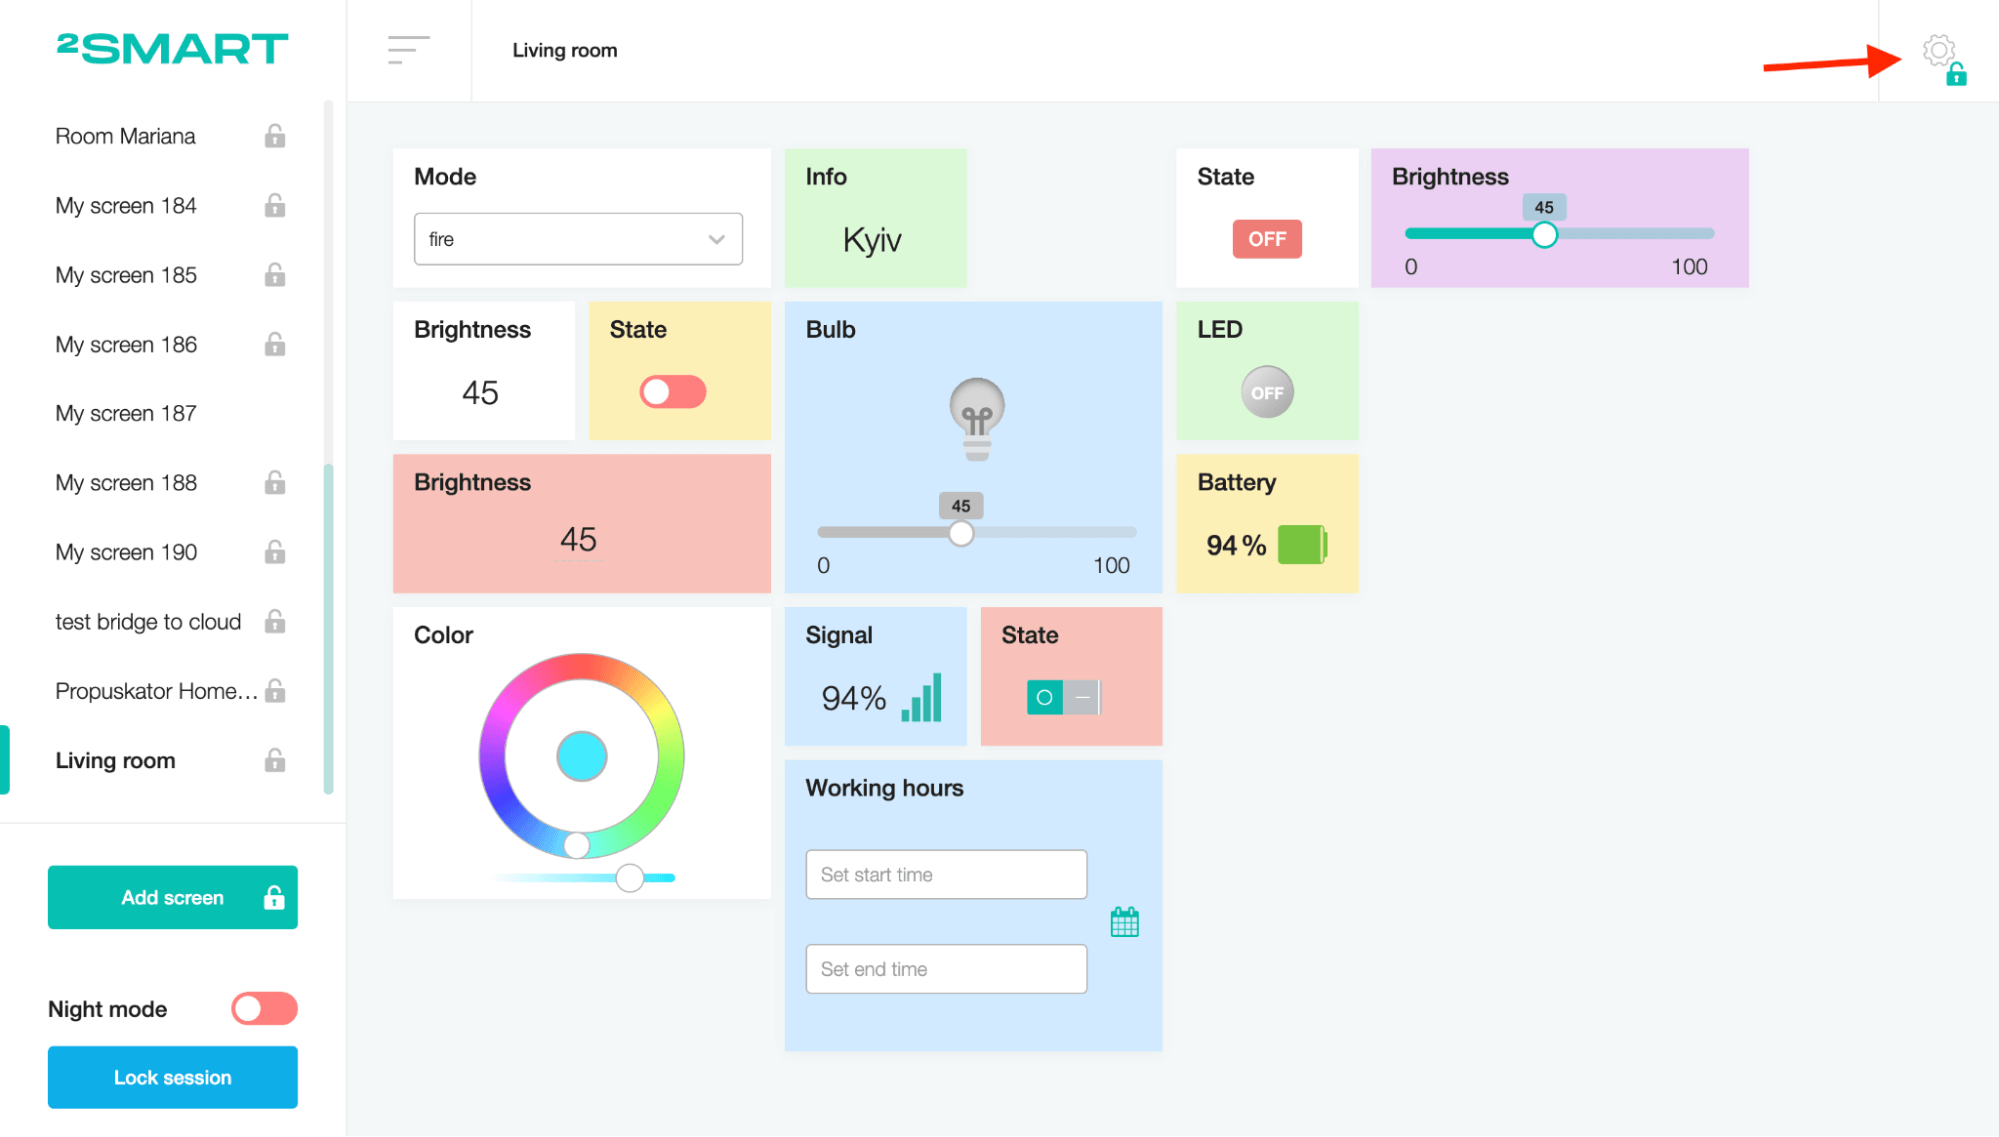
The client part consists of smart home control screens. Each screen is configured using widgets. To switch between screens, use the side menu.
The server interface allows you to create unlimited screens (displays) with various combinations of widgets. It makes it possible to independently organize screens by any logic defined by the user, without strict reference to room types (ground floor, bedroom, bathroom).
Any screens configured in the system can be used to display on an external monitor. For example, for a smartphone of each resident of the house, you can create your screen with the indicators of interest to them; for a wall tablet near the front door, use only security widgets, and for a display in the greenhouse, only the values of the greenhouse sensors.
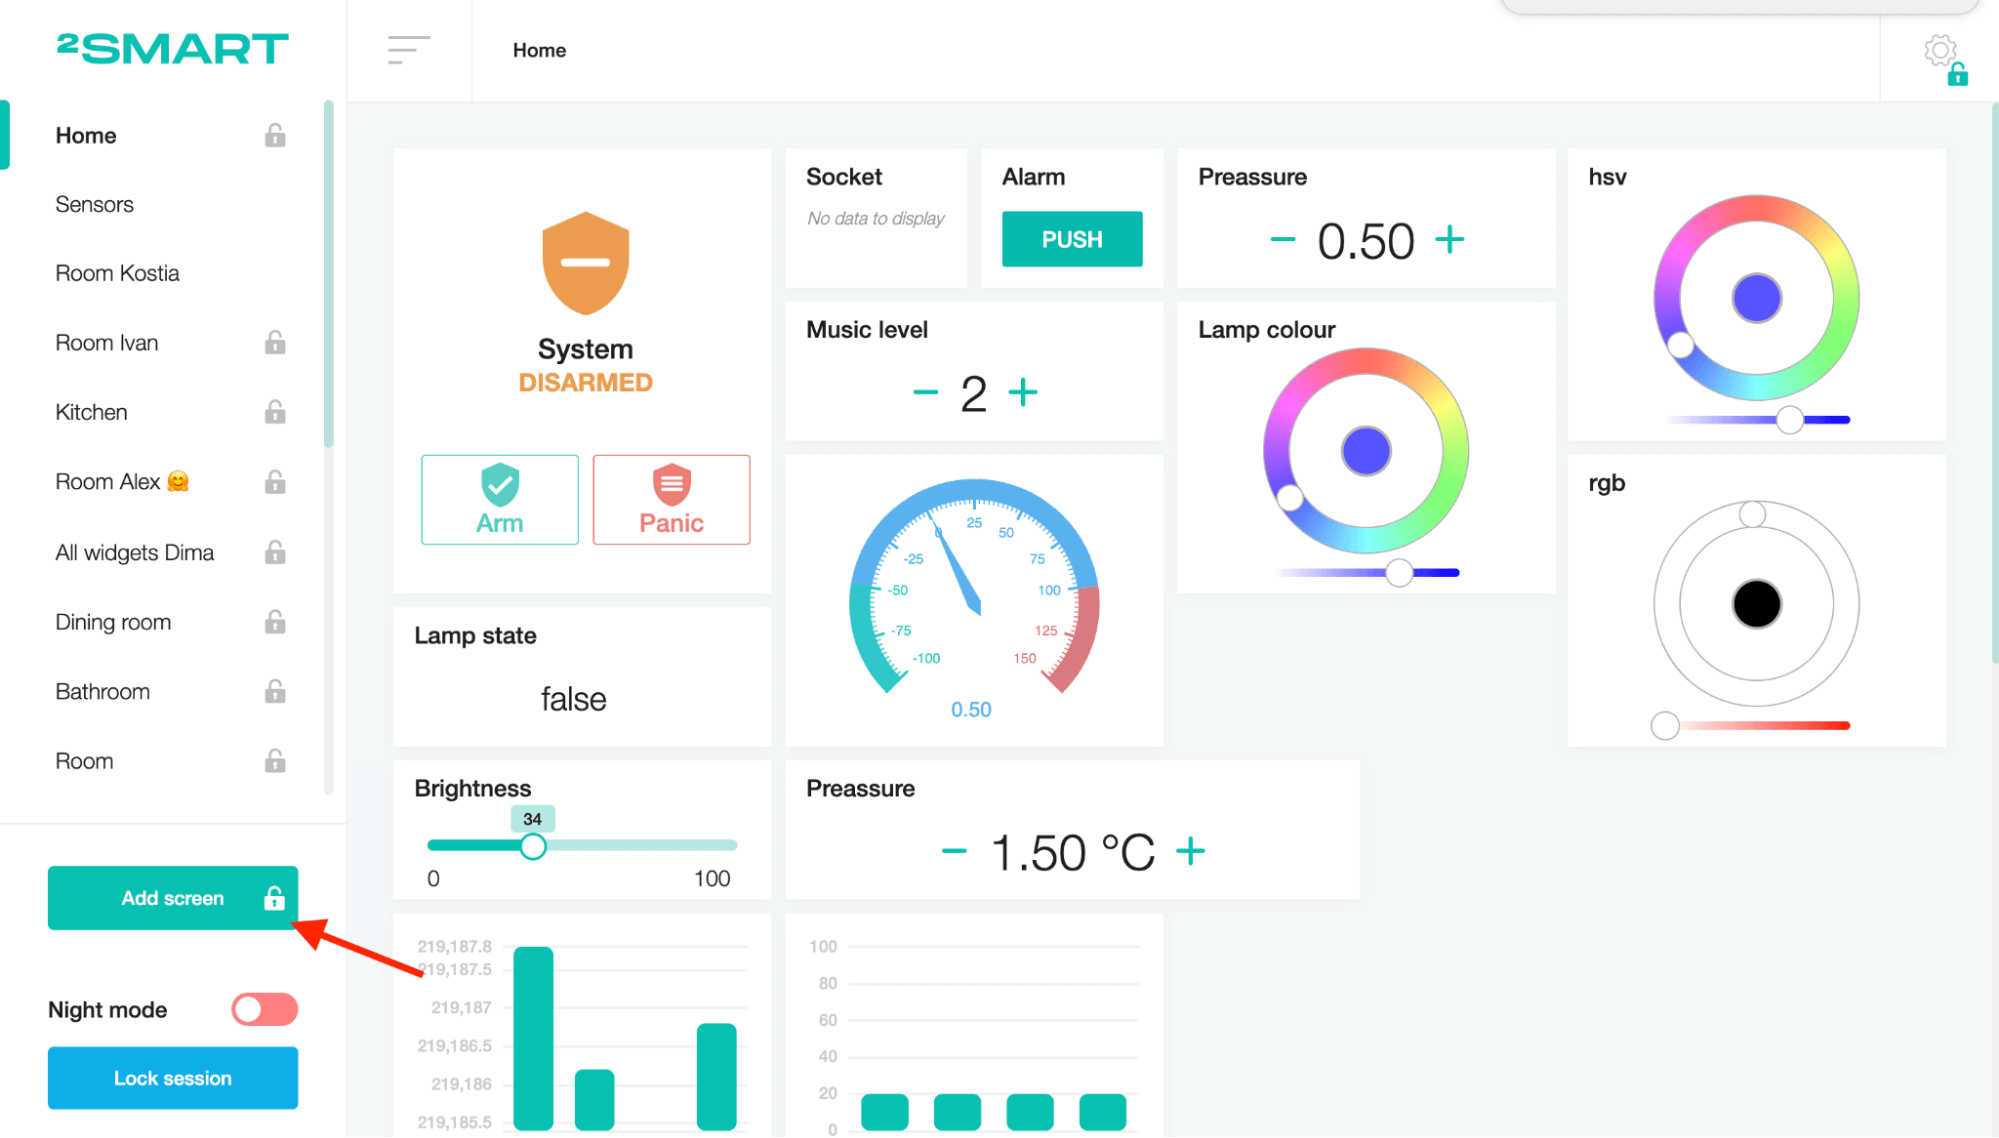
Adding a new screen
Click on the “Add screen” button on the side menu.
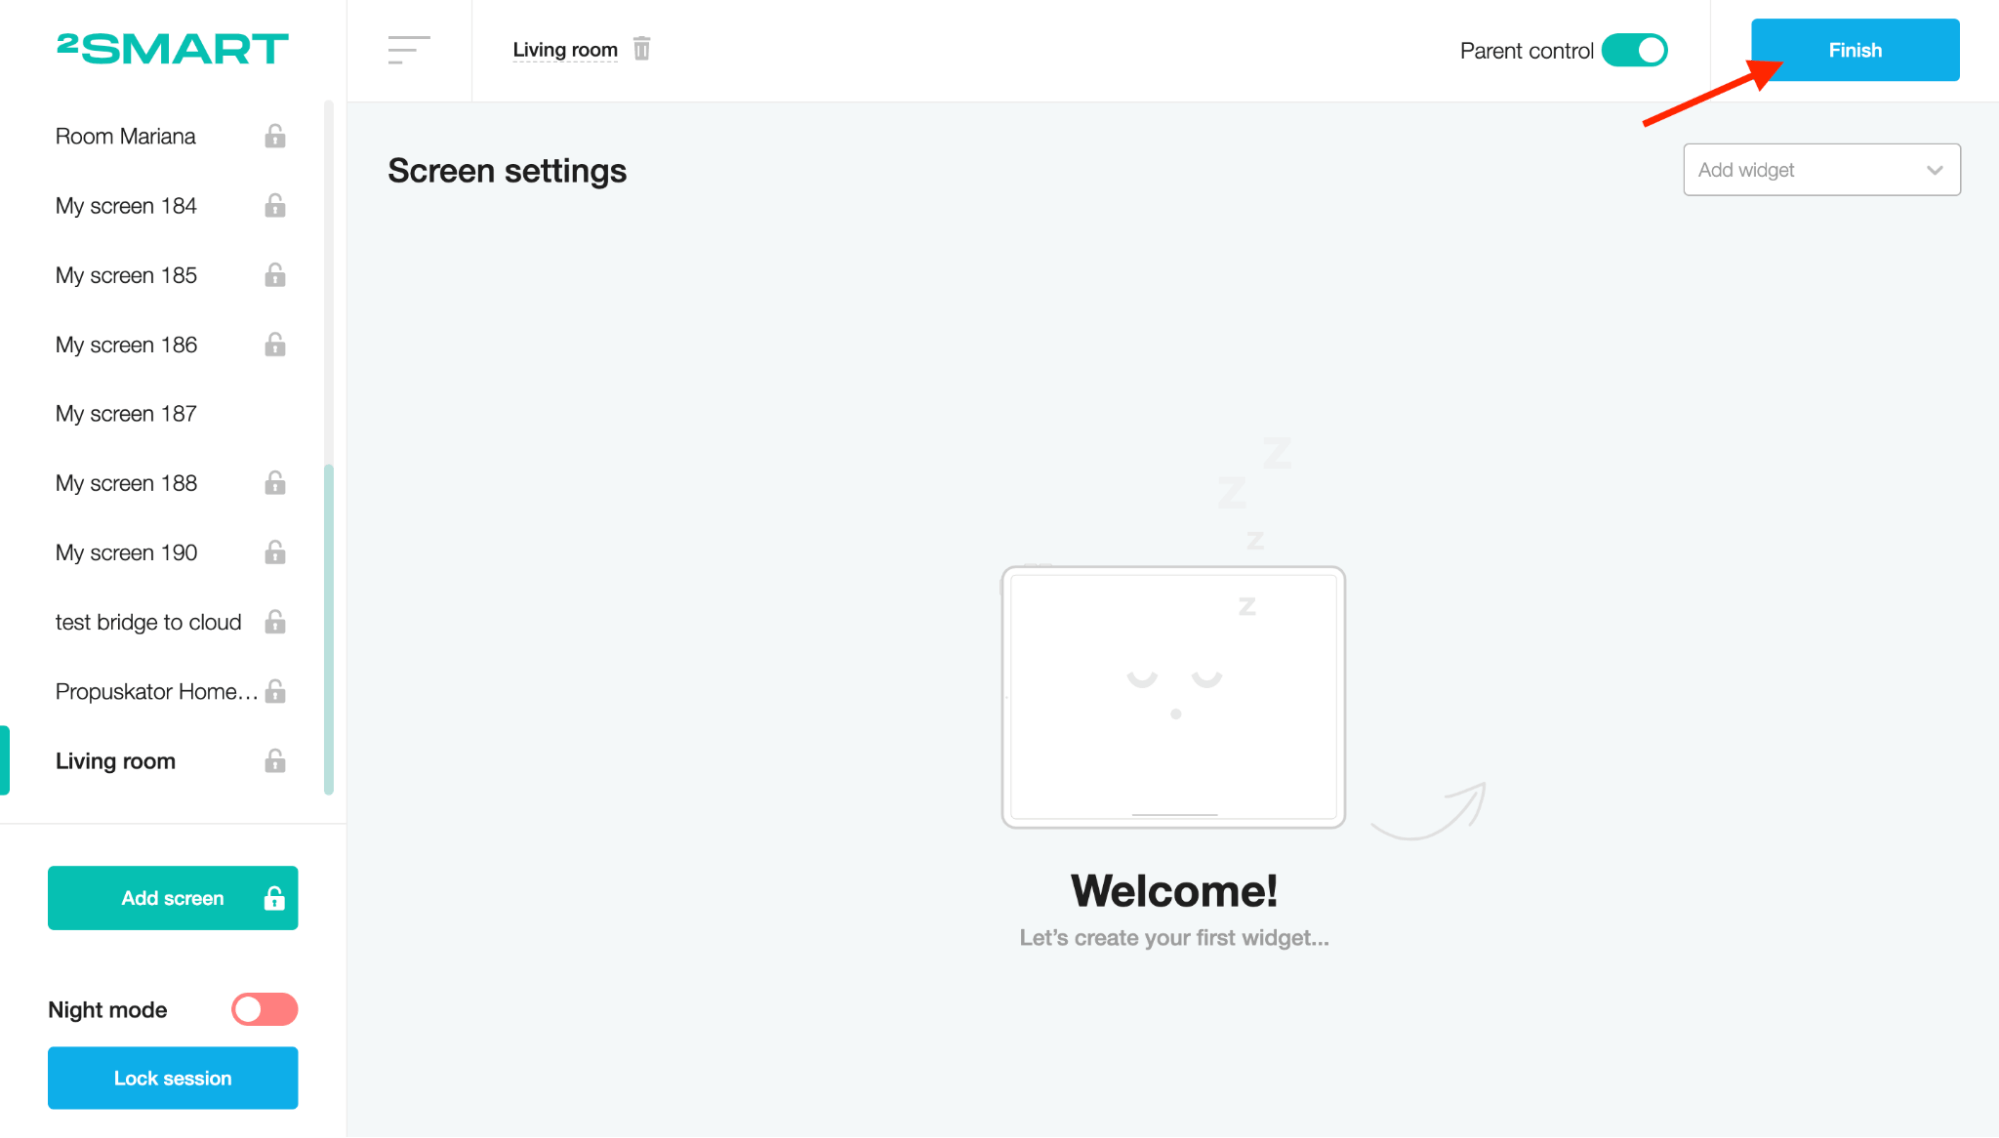
Set the name of the screen on the header menu and click on the check mark button.
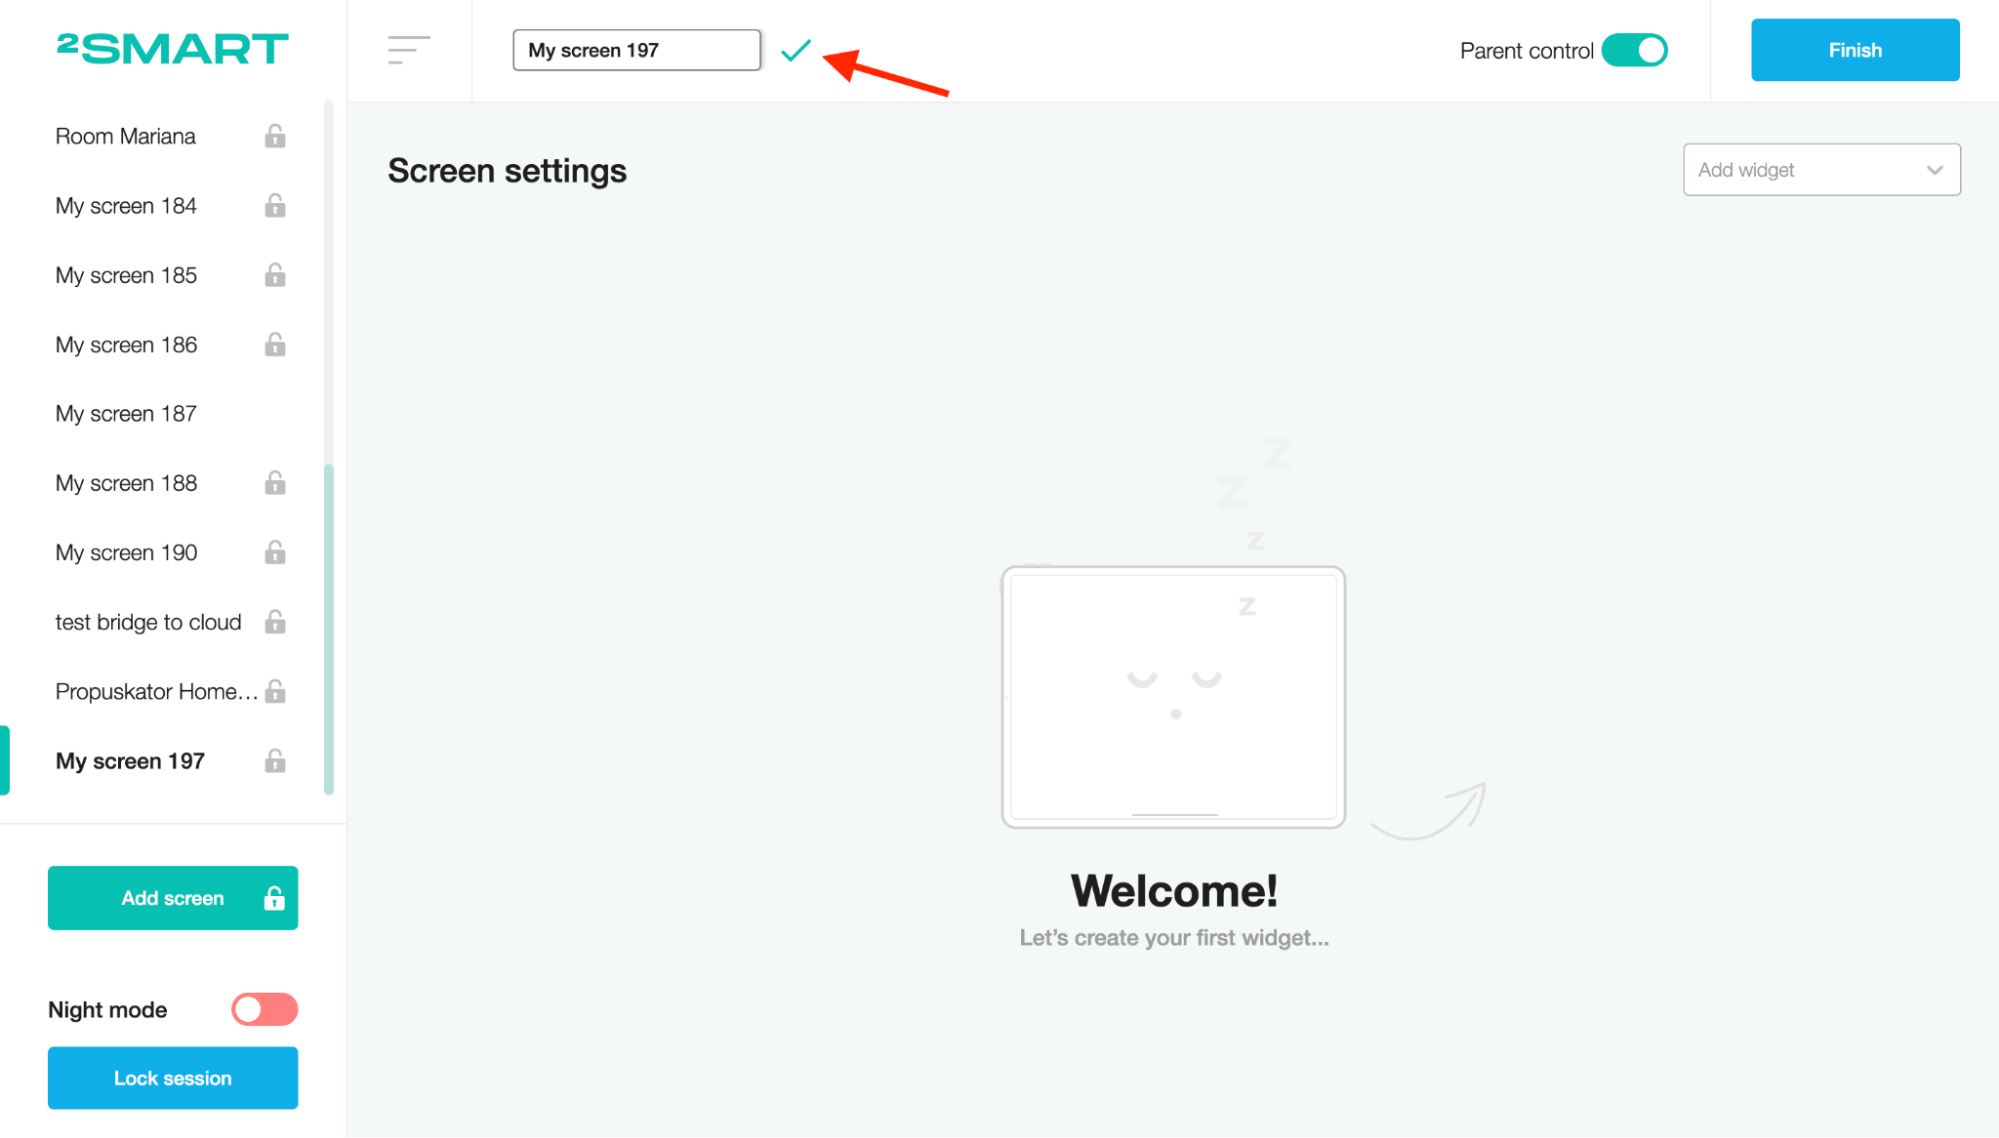
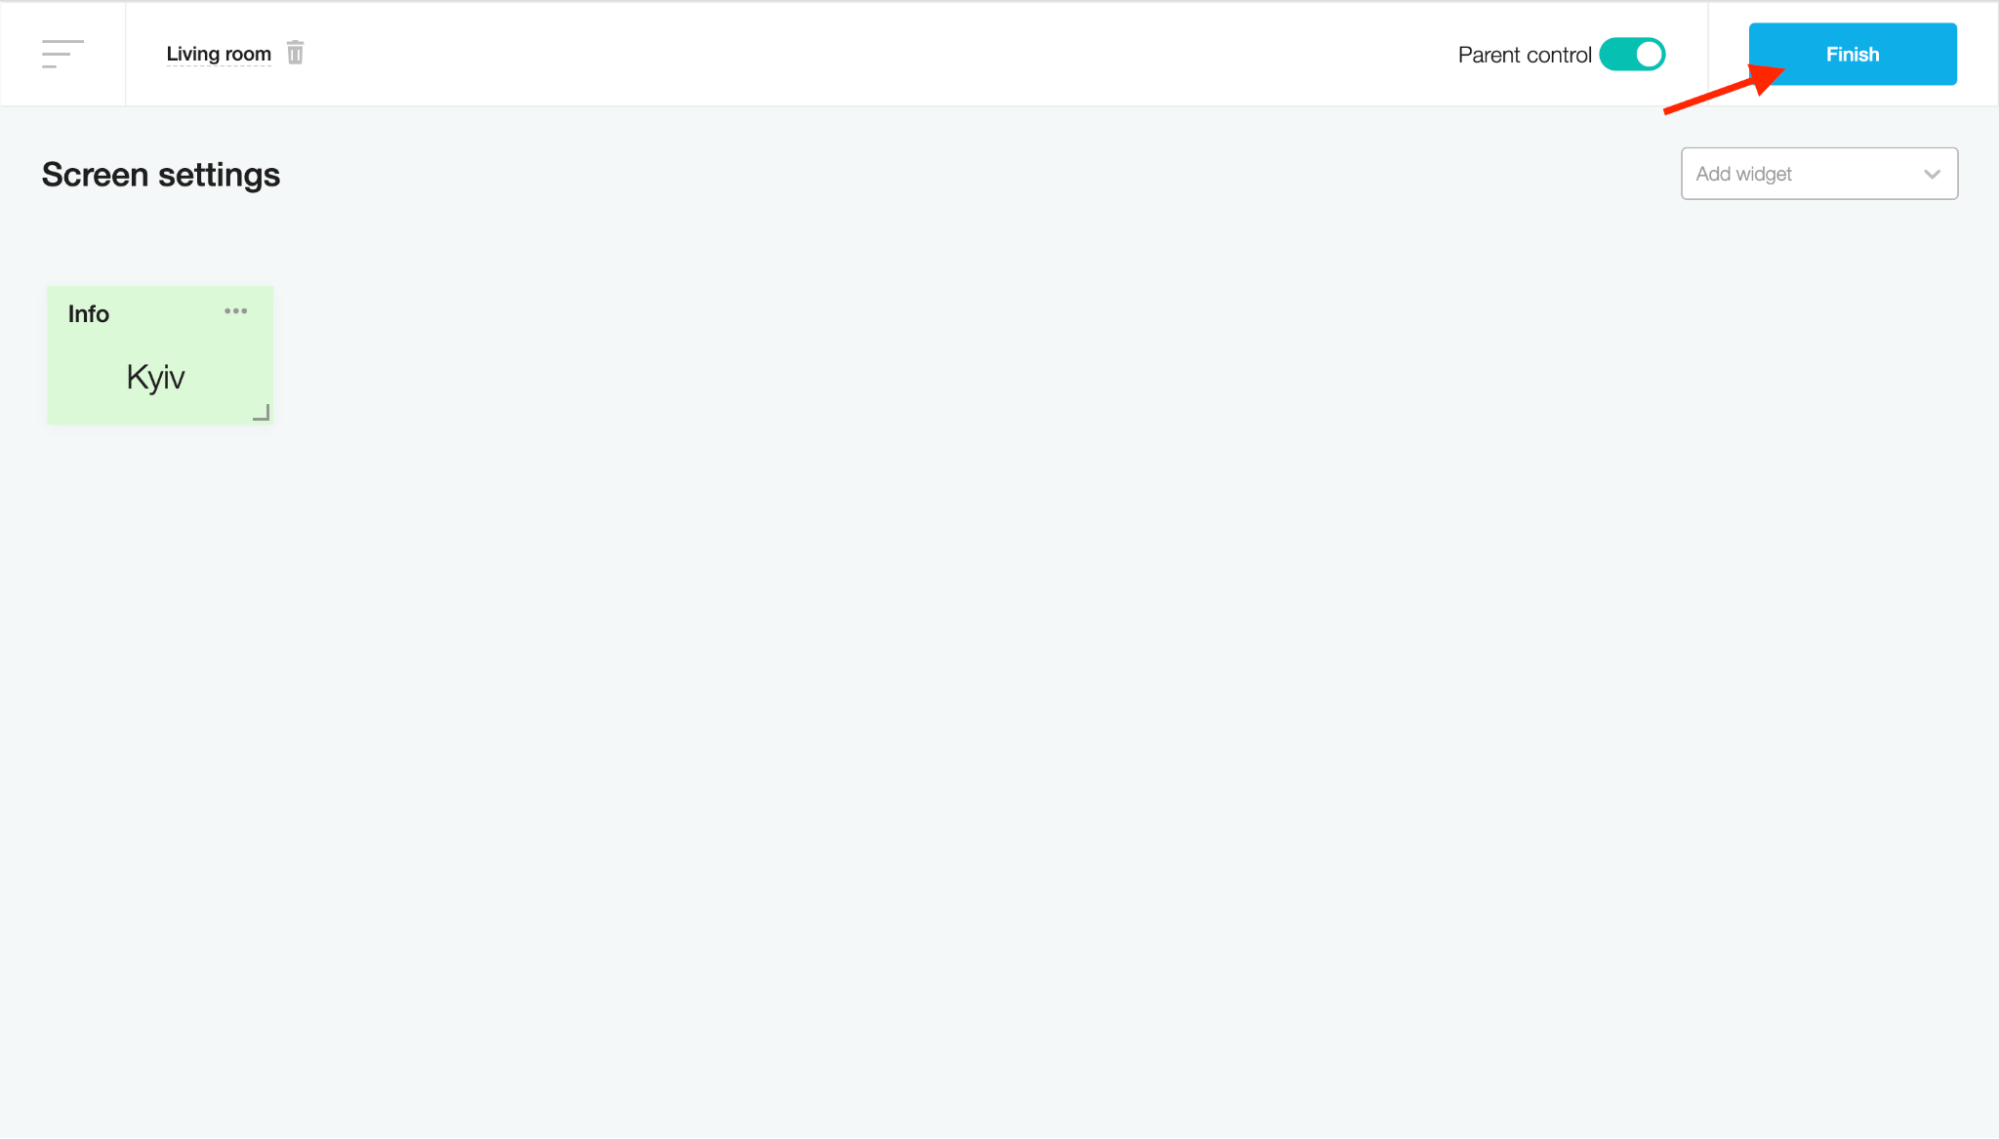
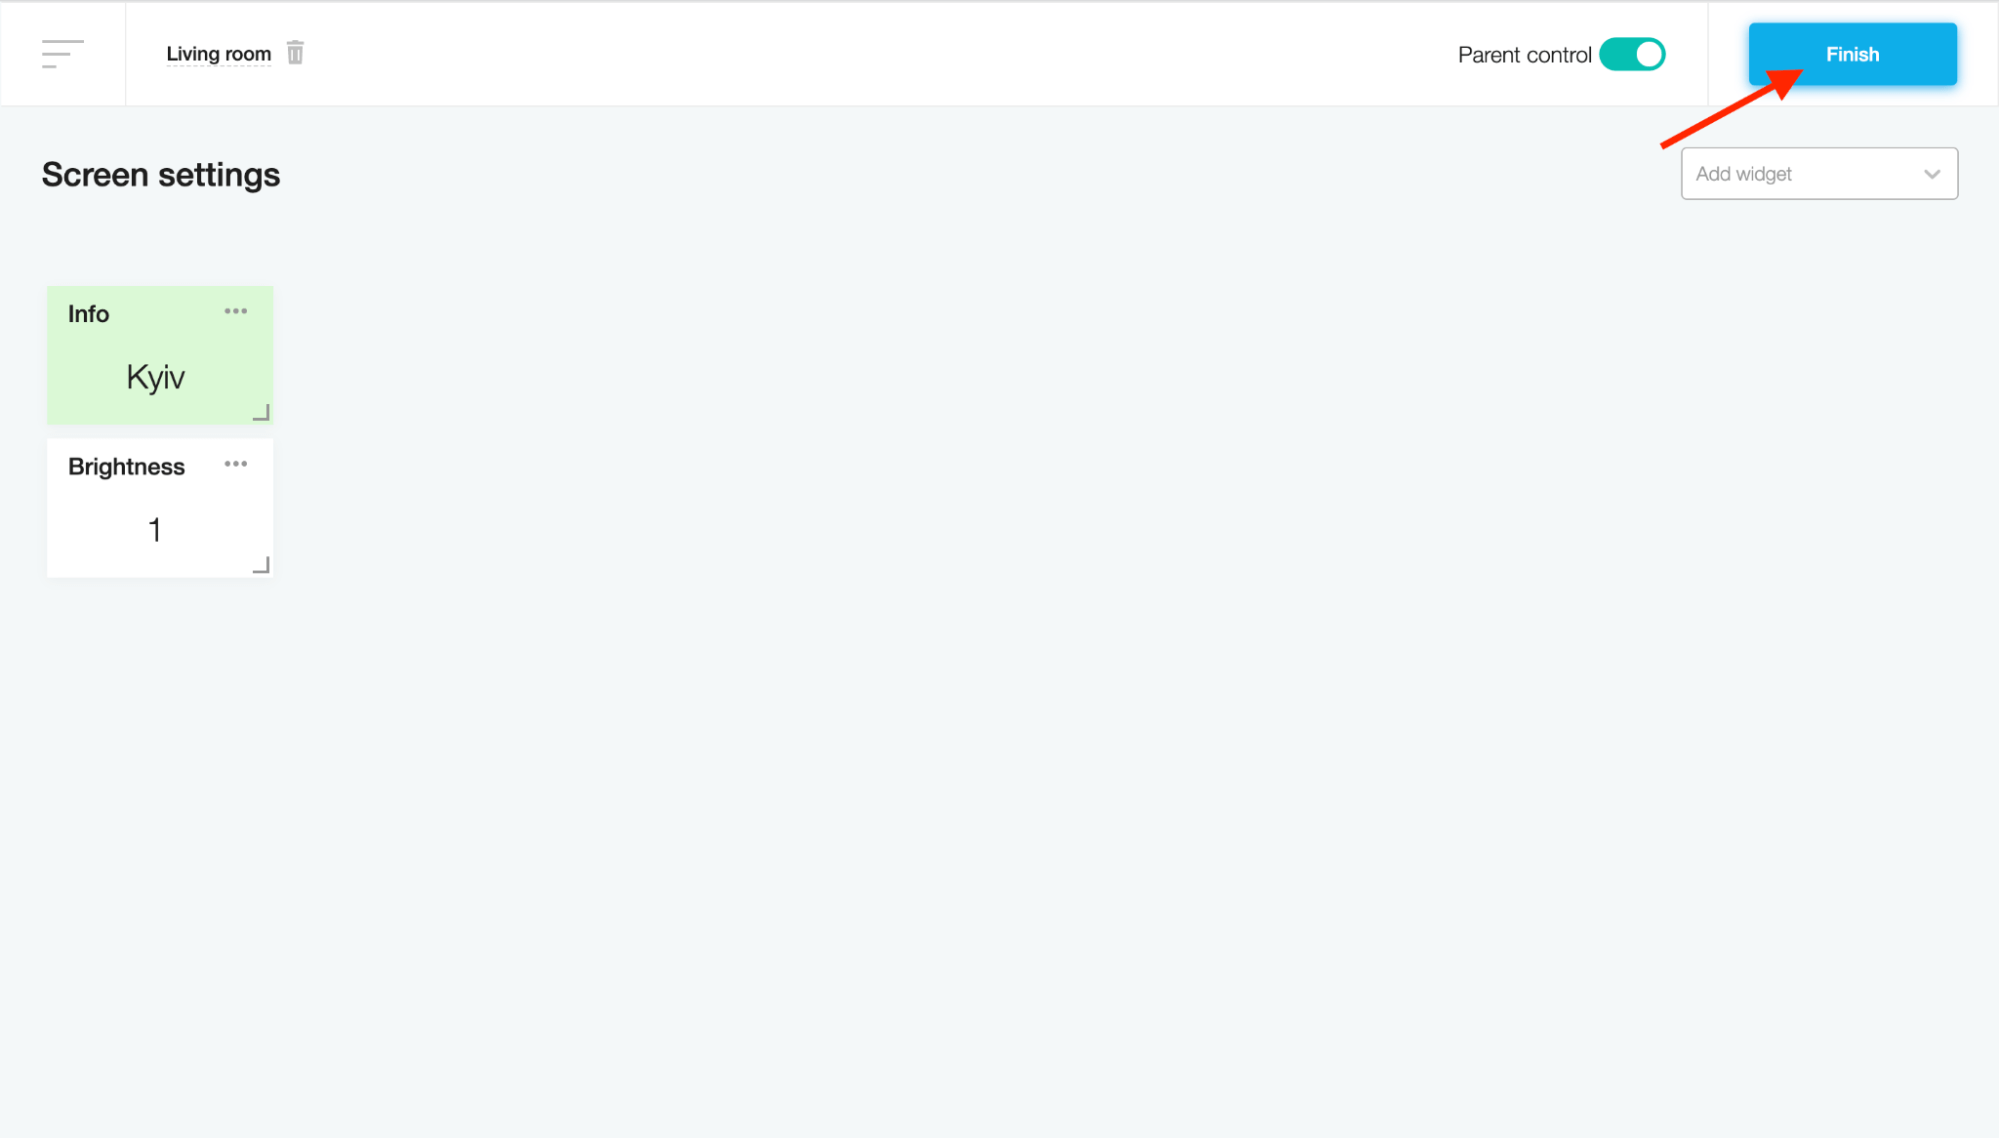
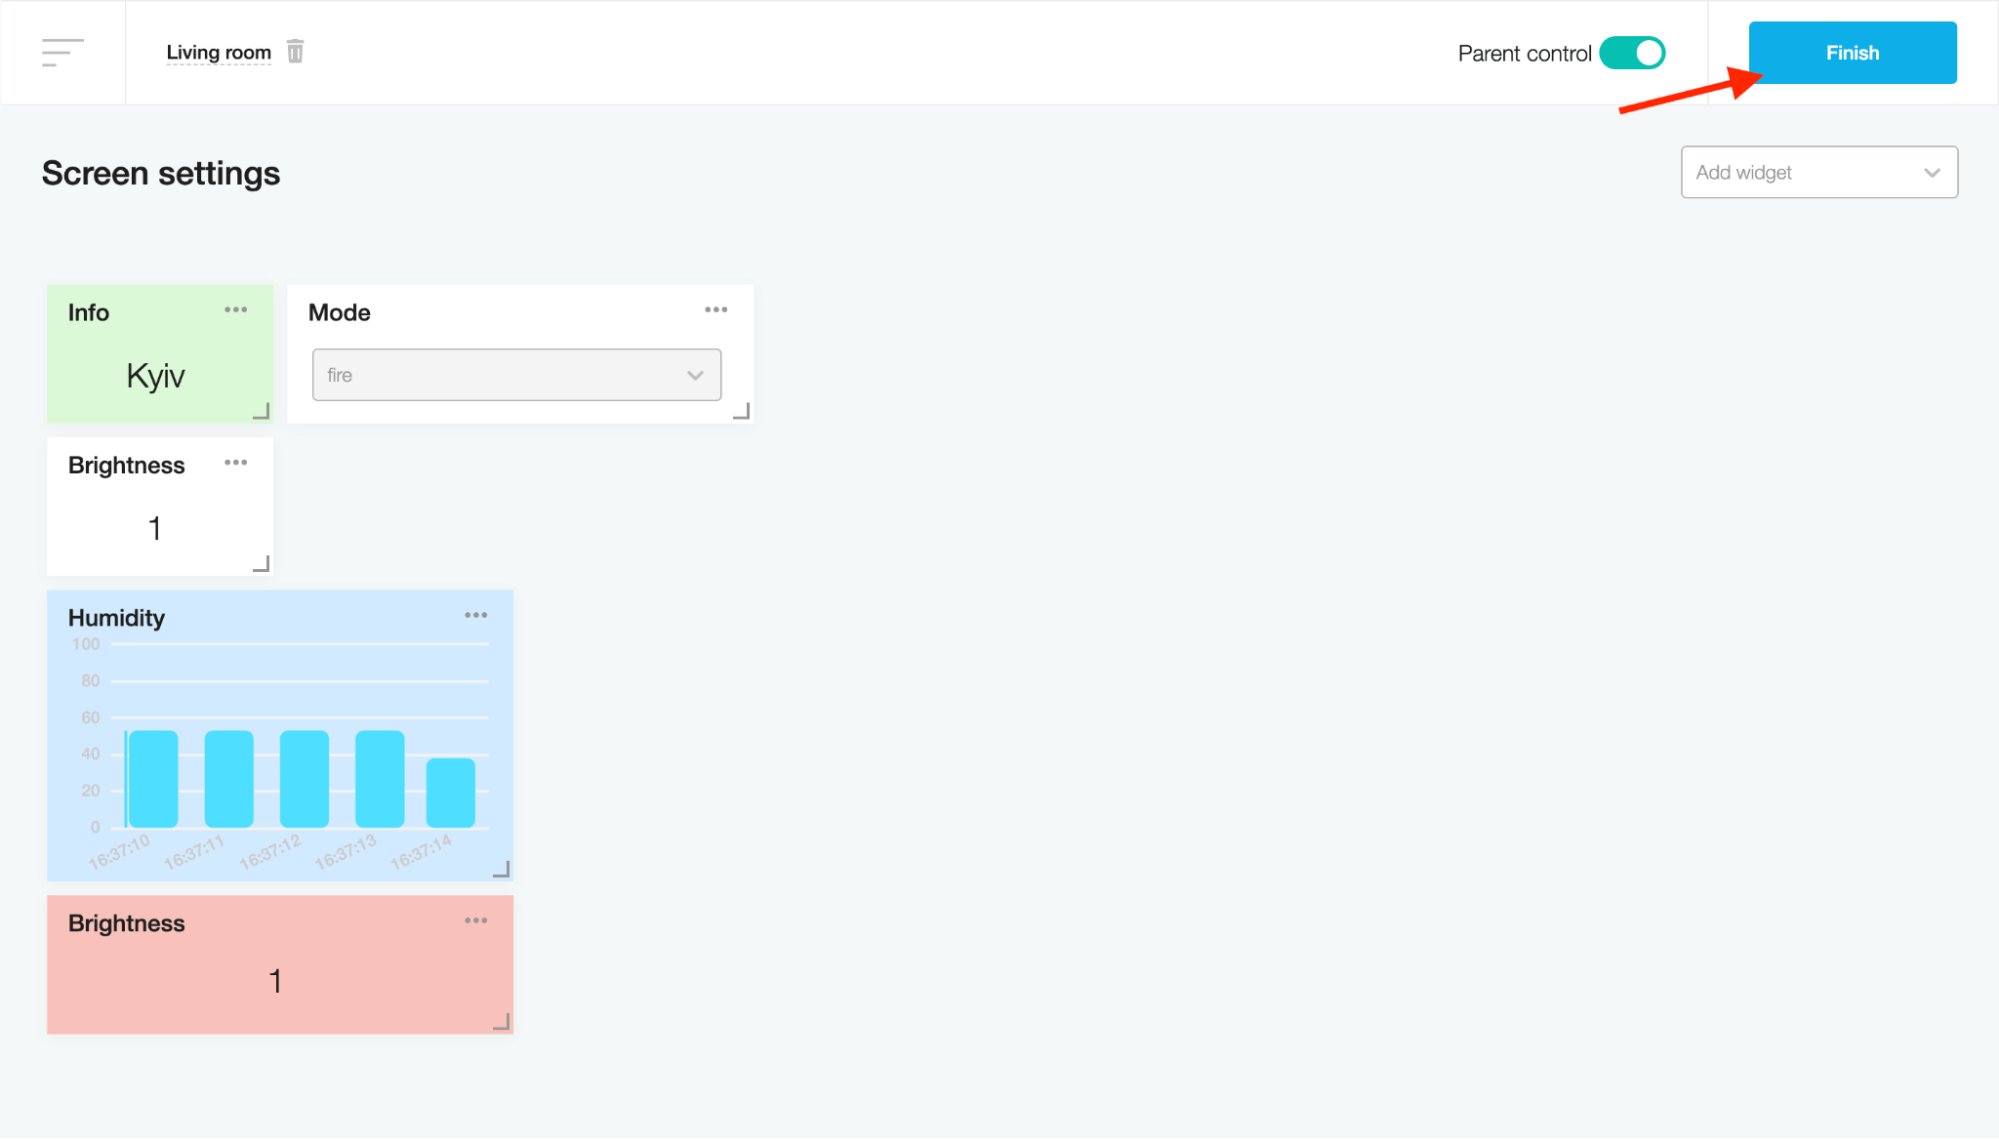
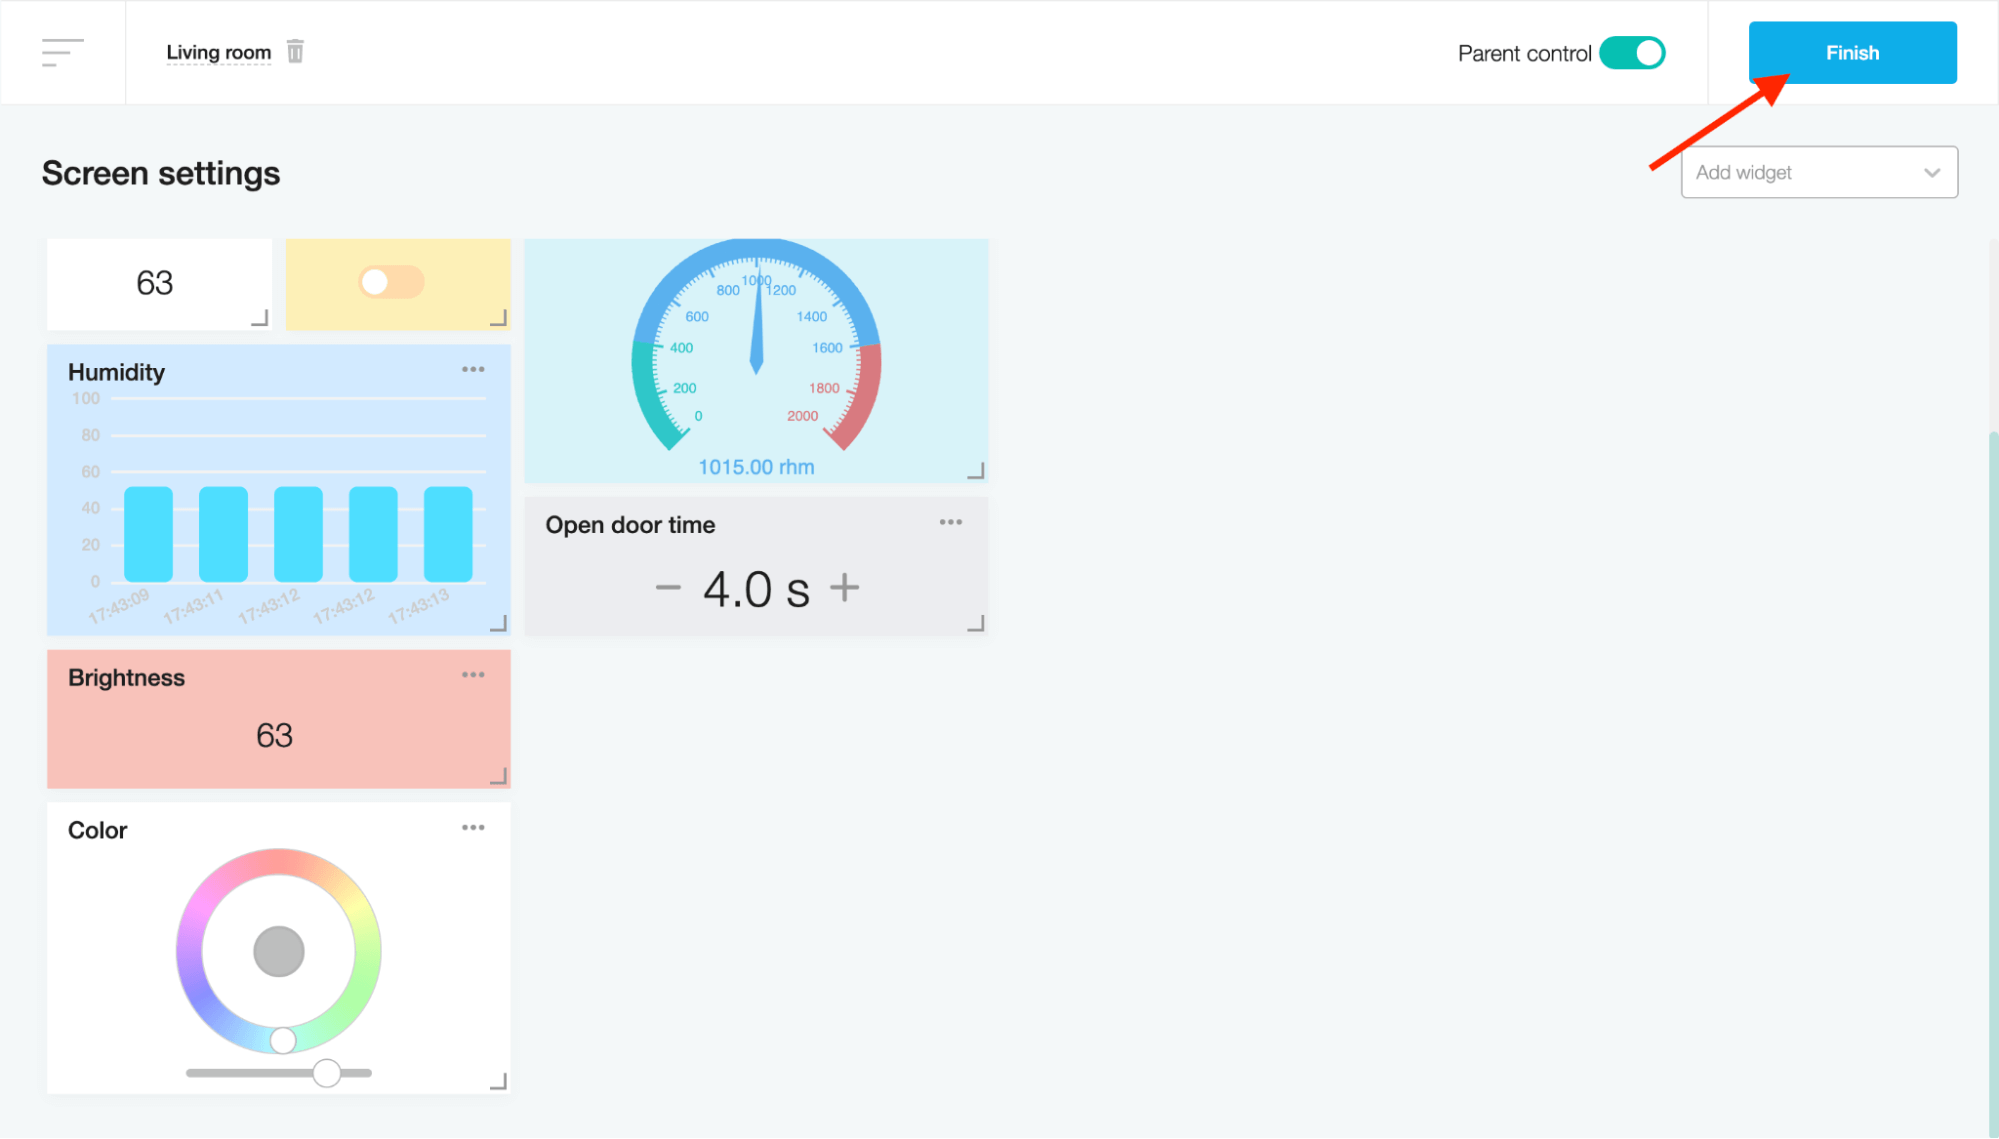
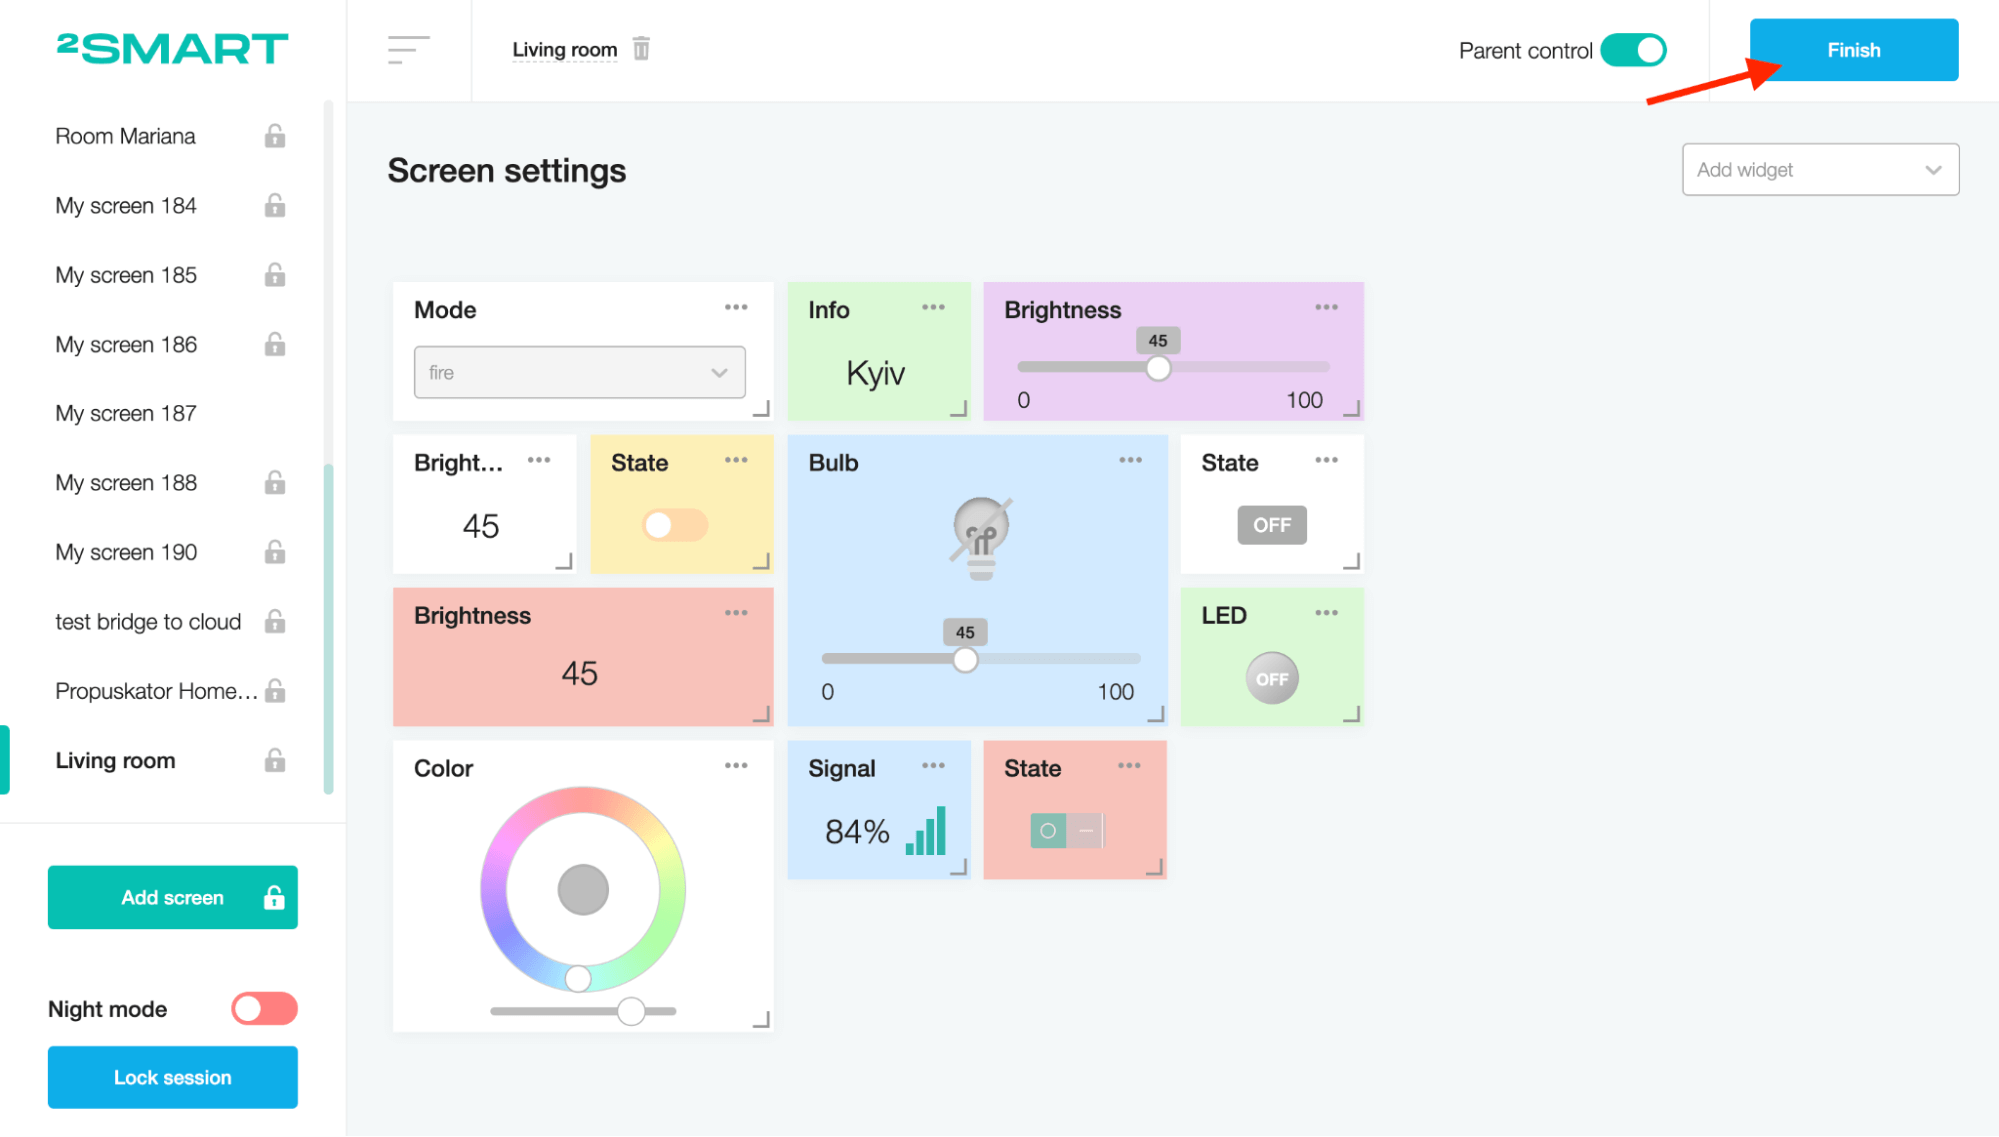
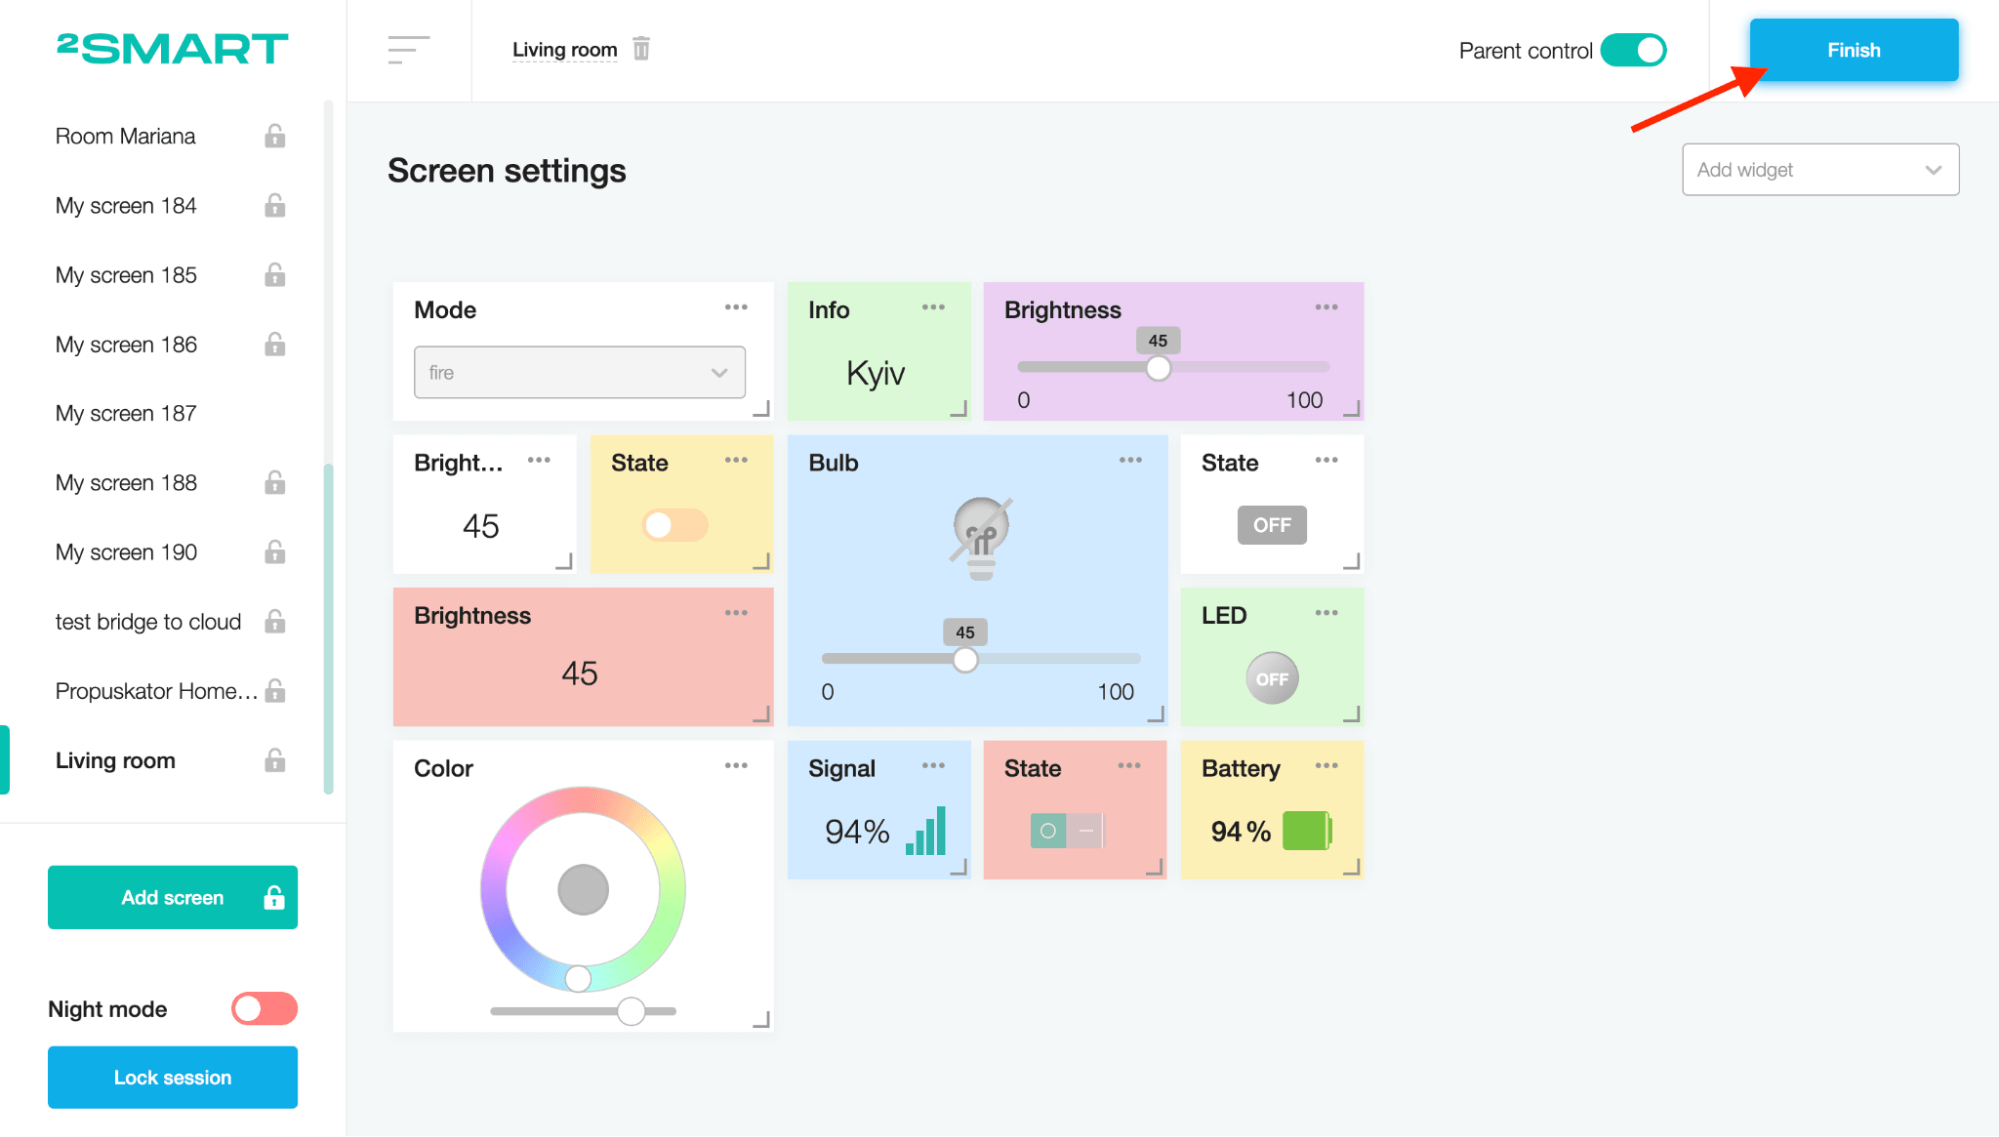
Click on the “Finish” button to create a new screen.
Adding a new widget to the screen
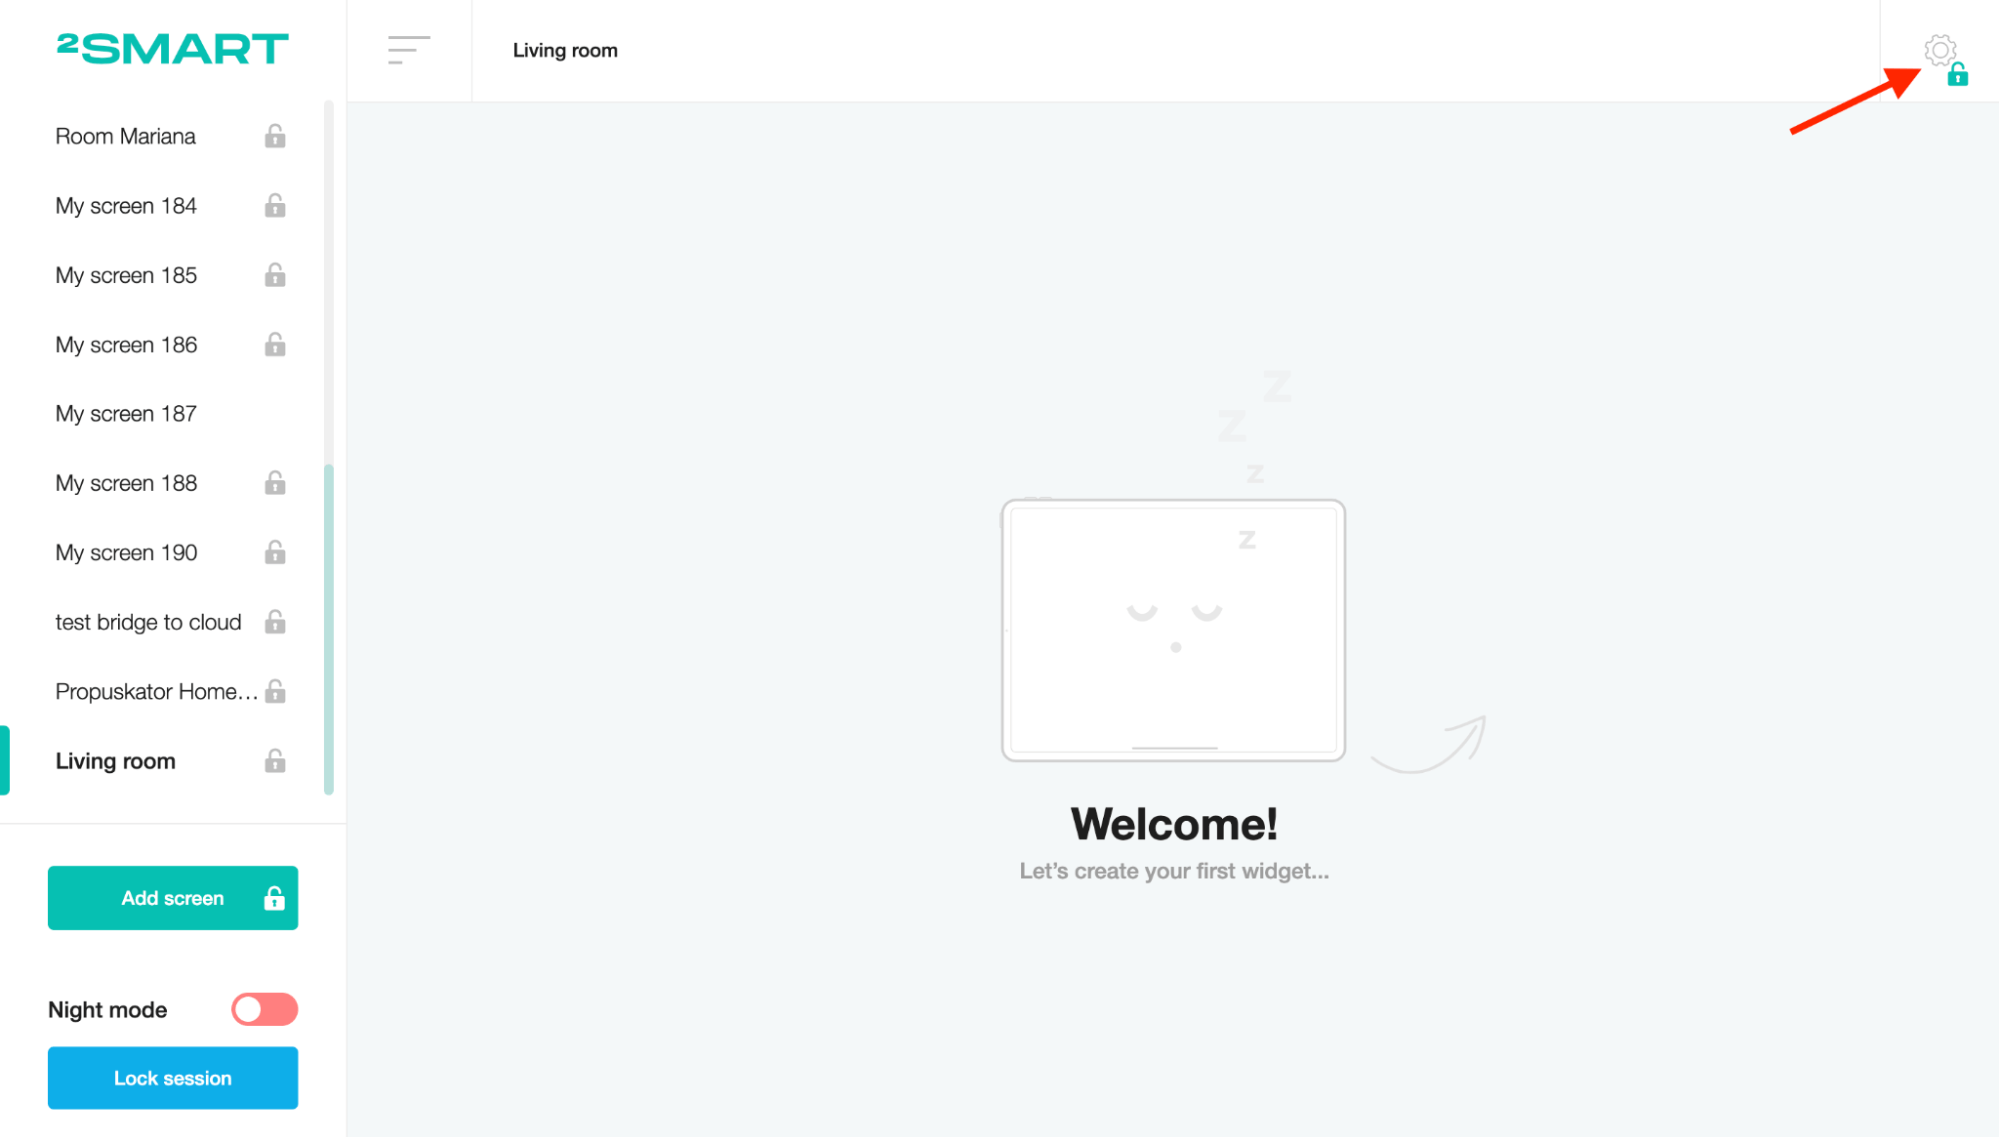
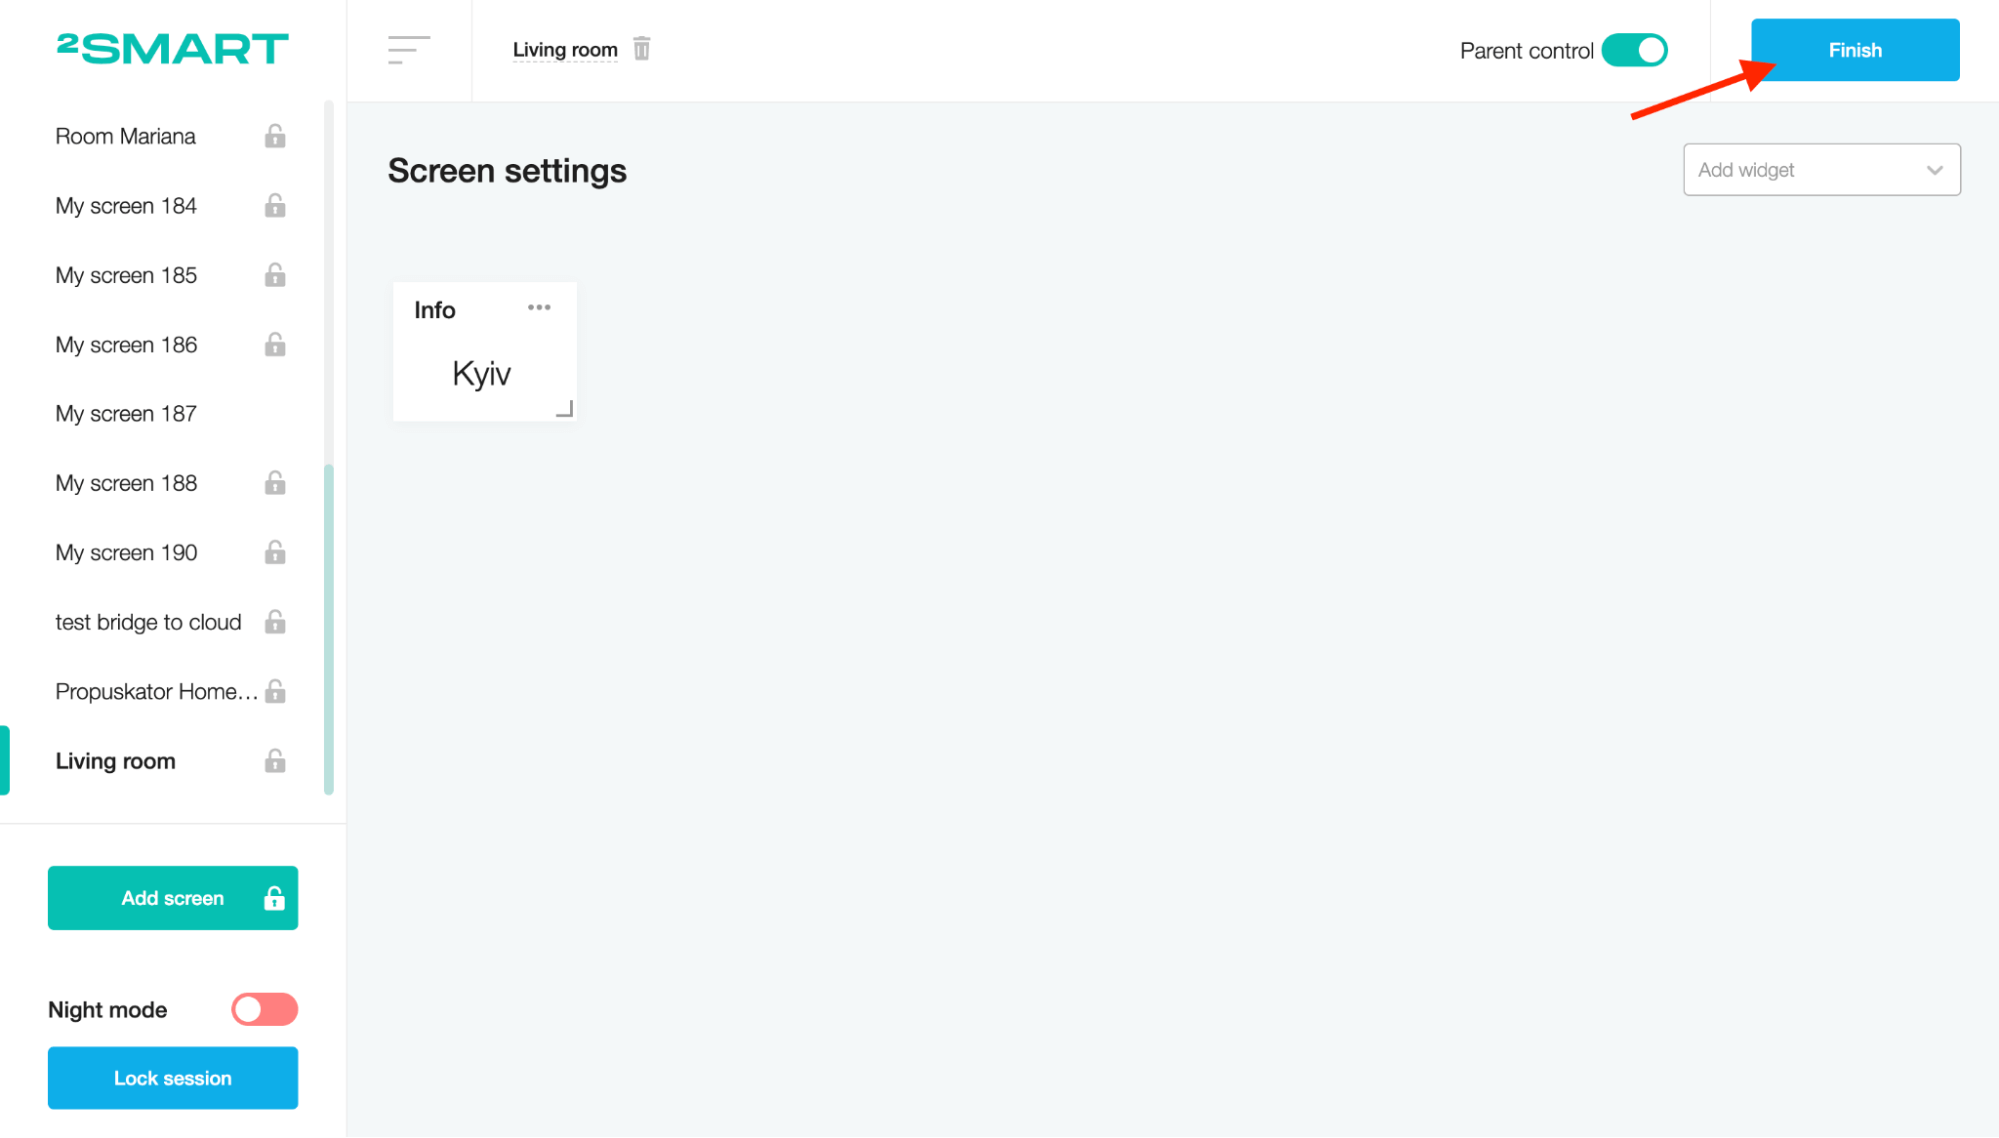
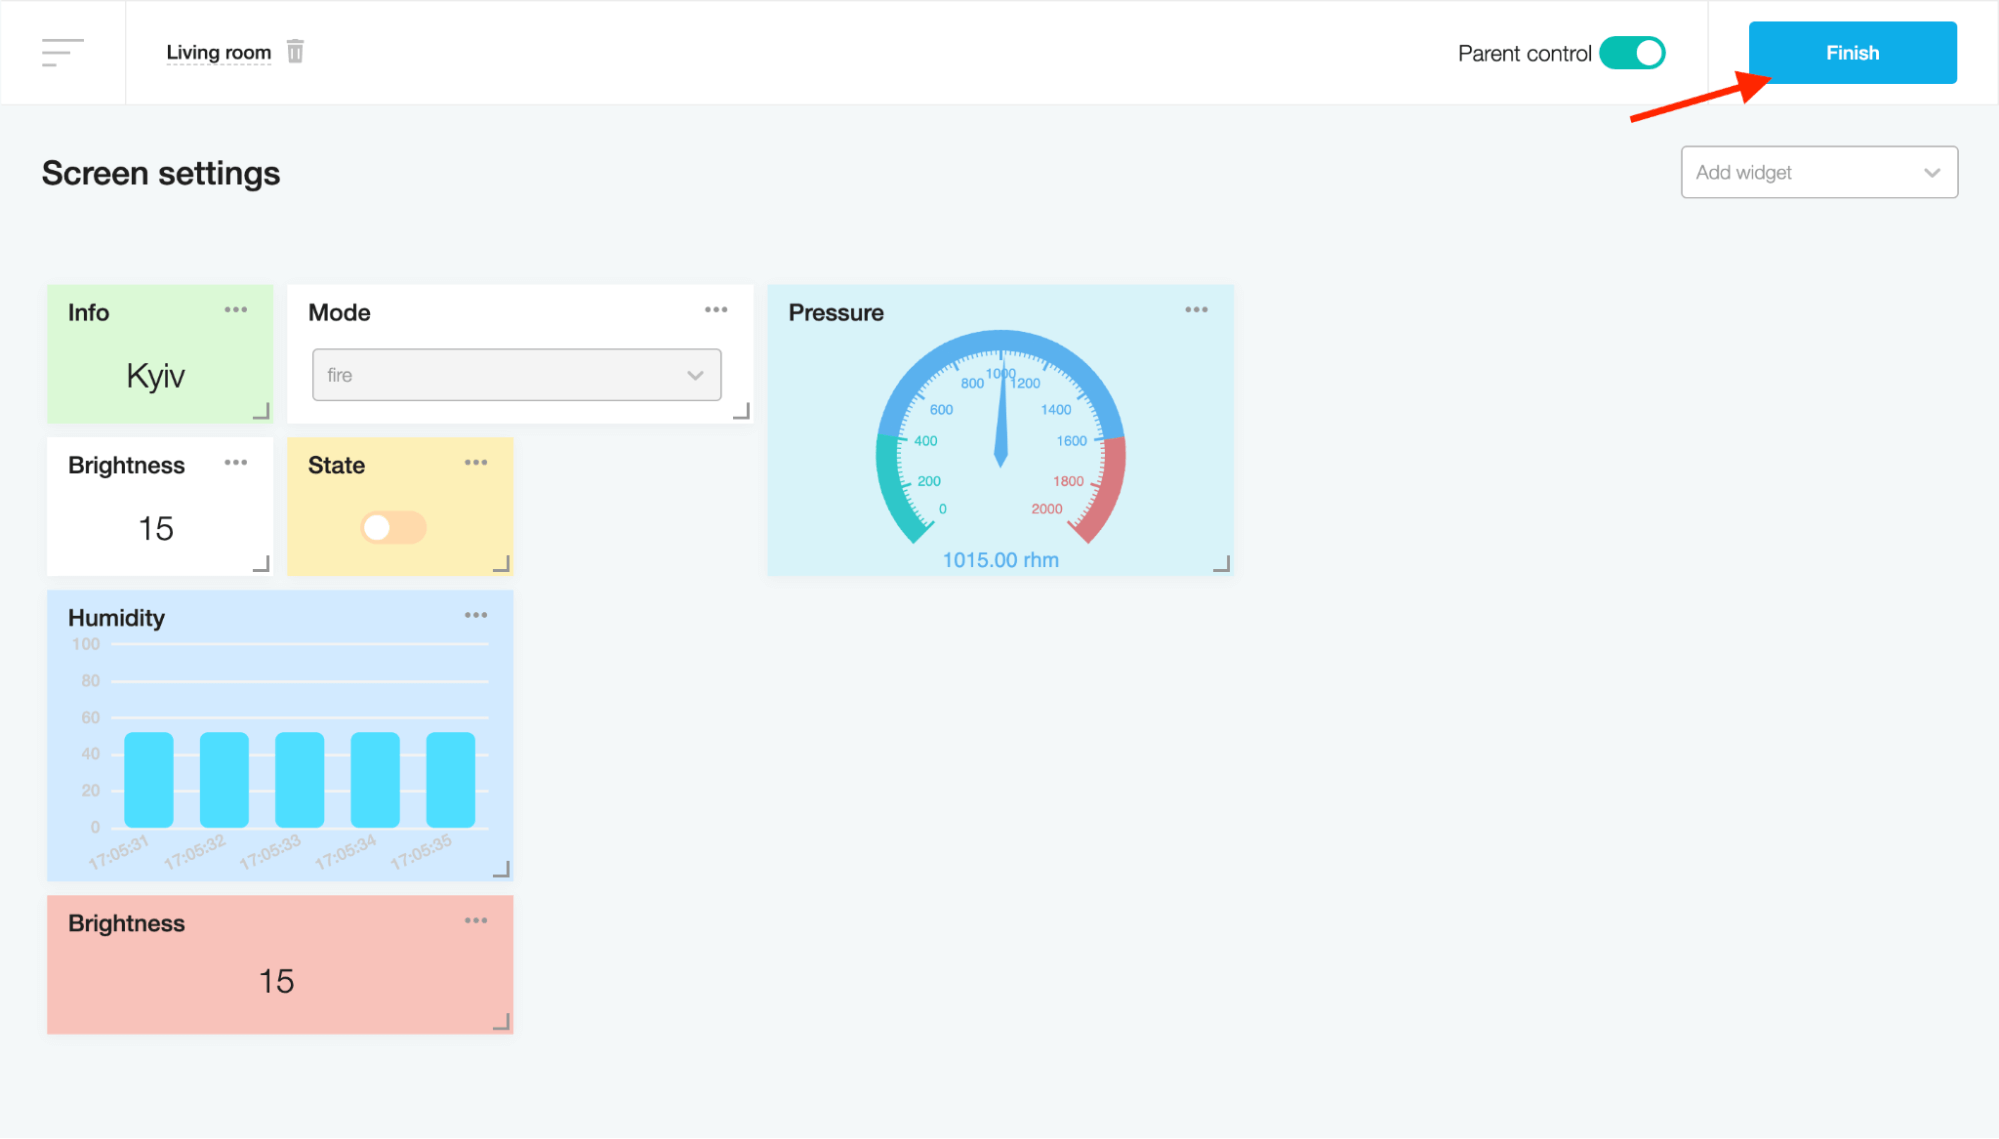
Click on the gear icon in the upper right corner of the screen. The screen settings will appear.
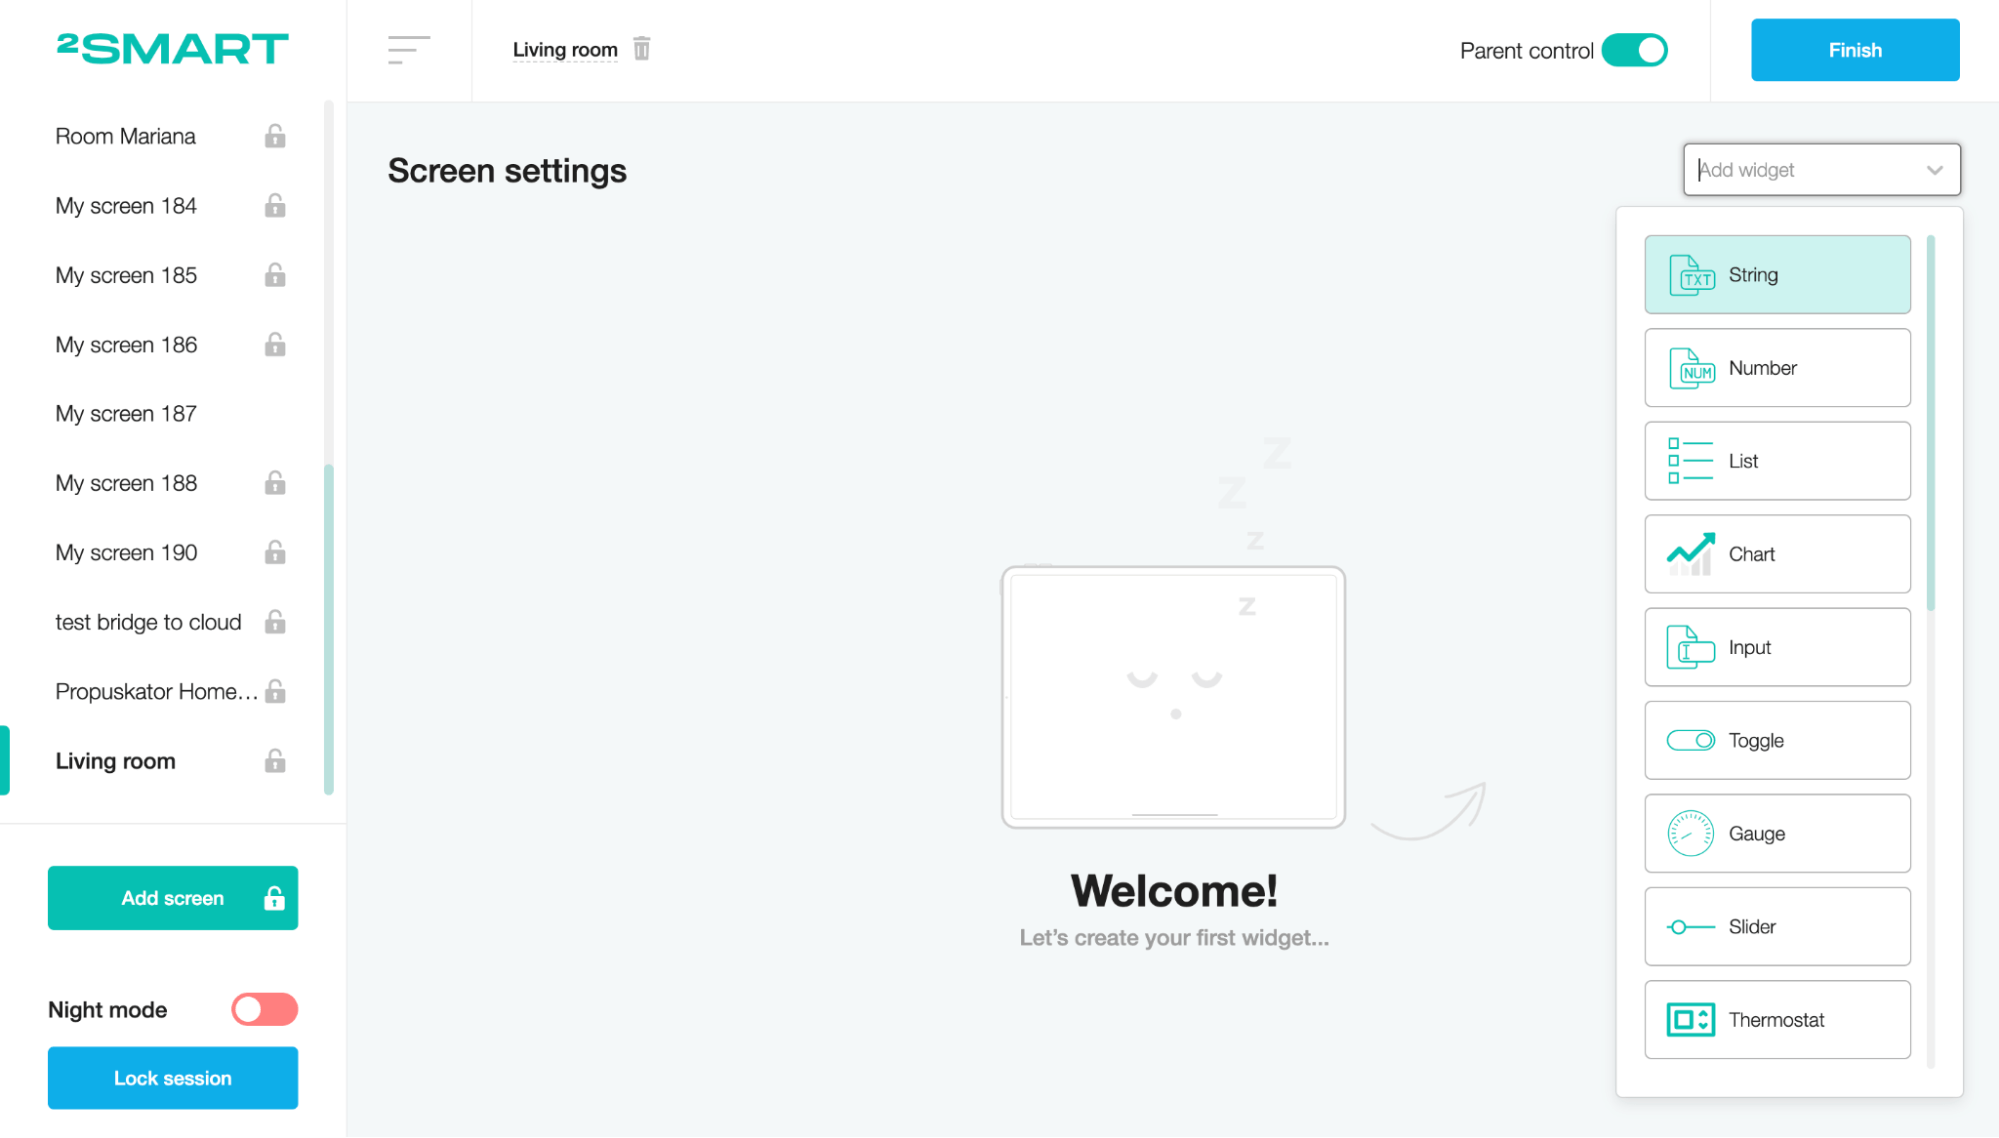
Click on the “Add widget” list and choose the widget type.
Fill in all the fields to configure the widget in the window that appears, save the settings, and click the "Finish" button.
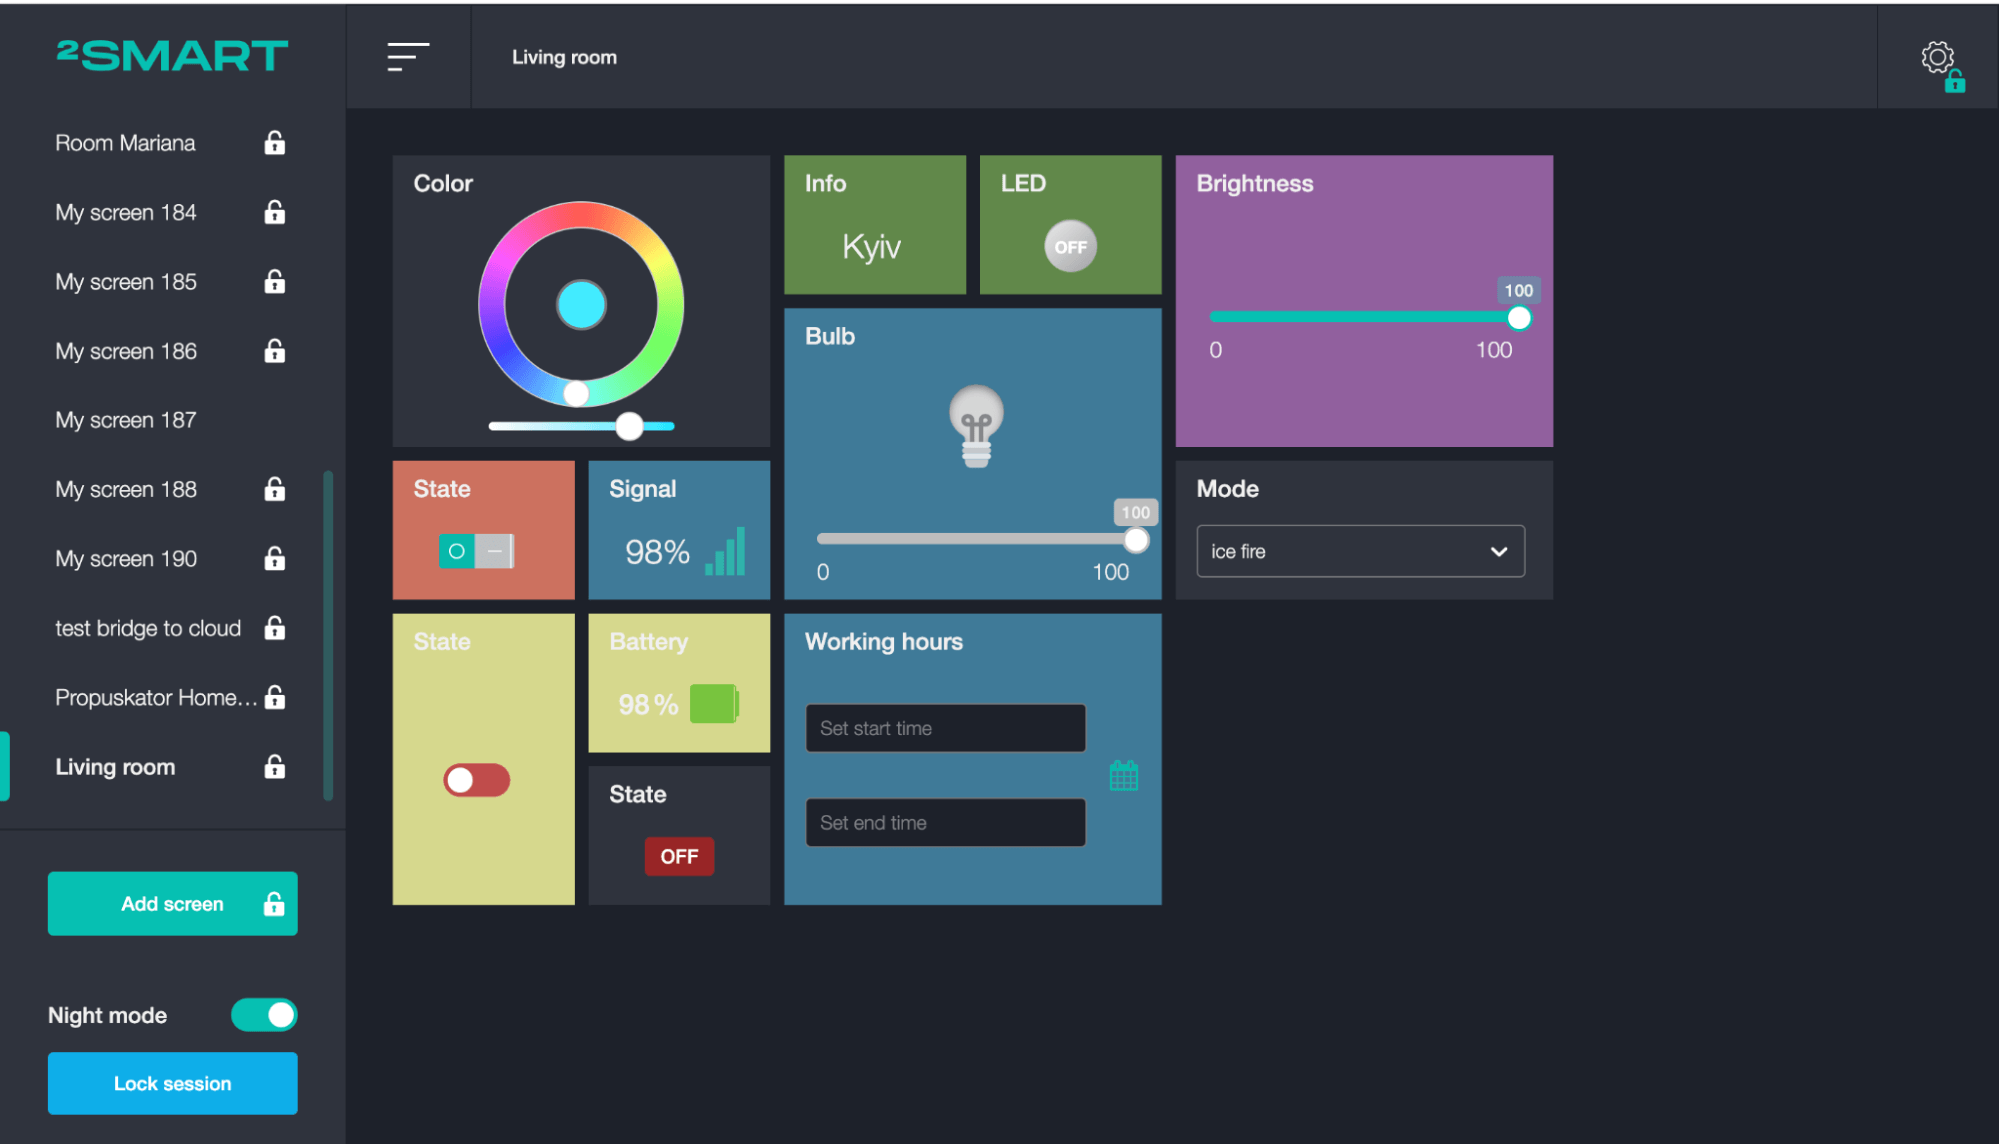
Types of widgets
There are three types of widgets: displaying sensor values, a control element, and a graph that shows historical or real-time data.
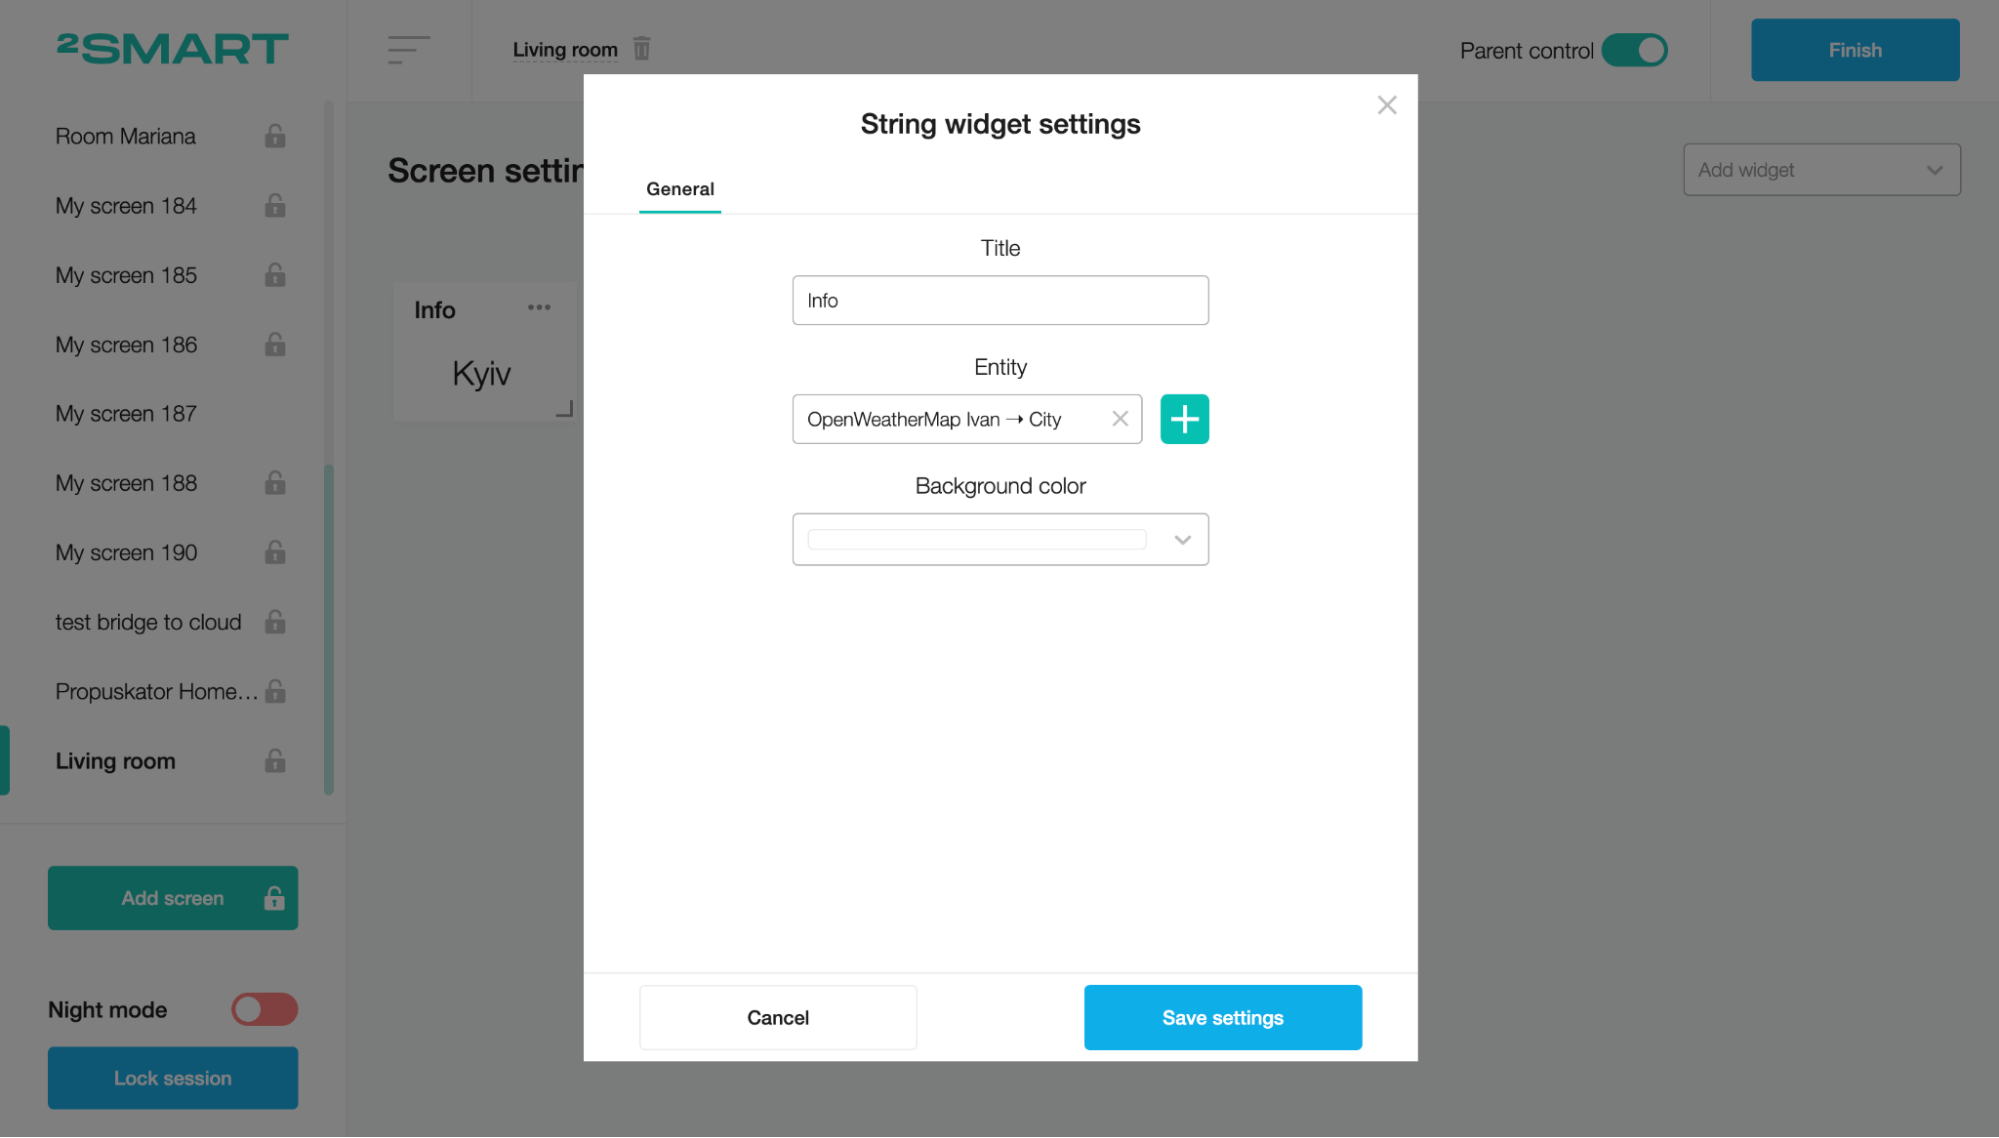
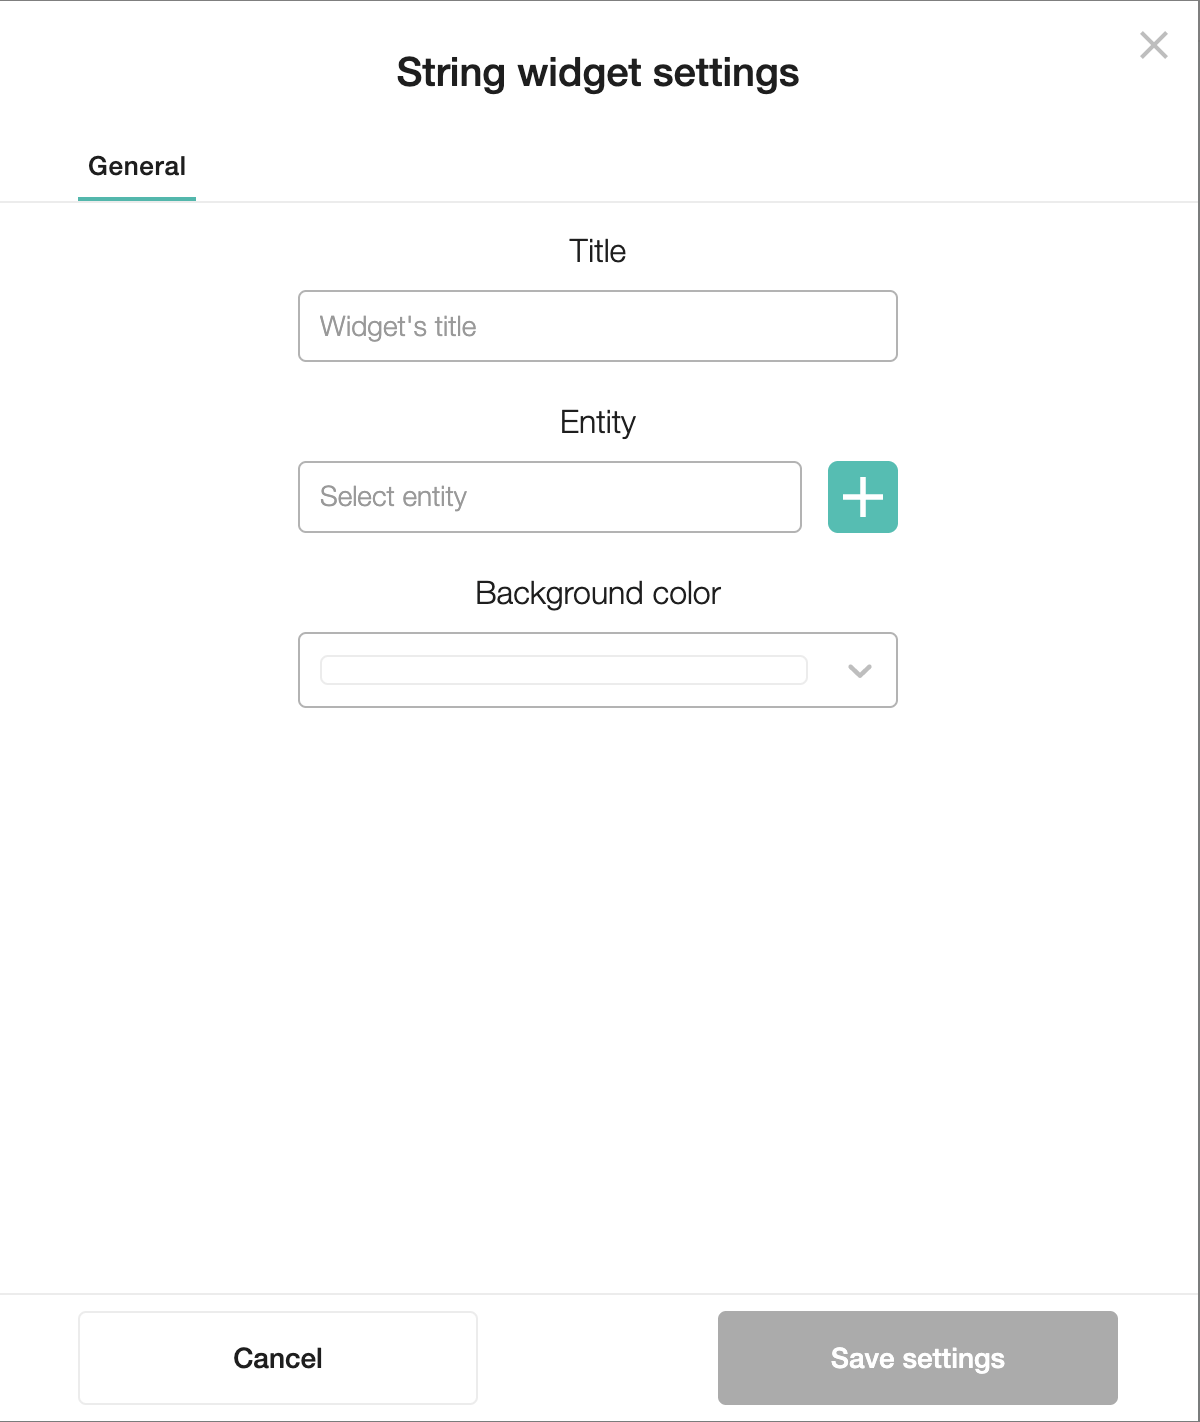
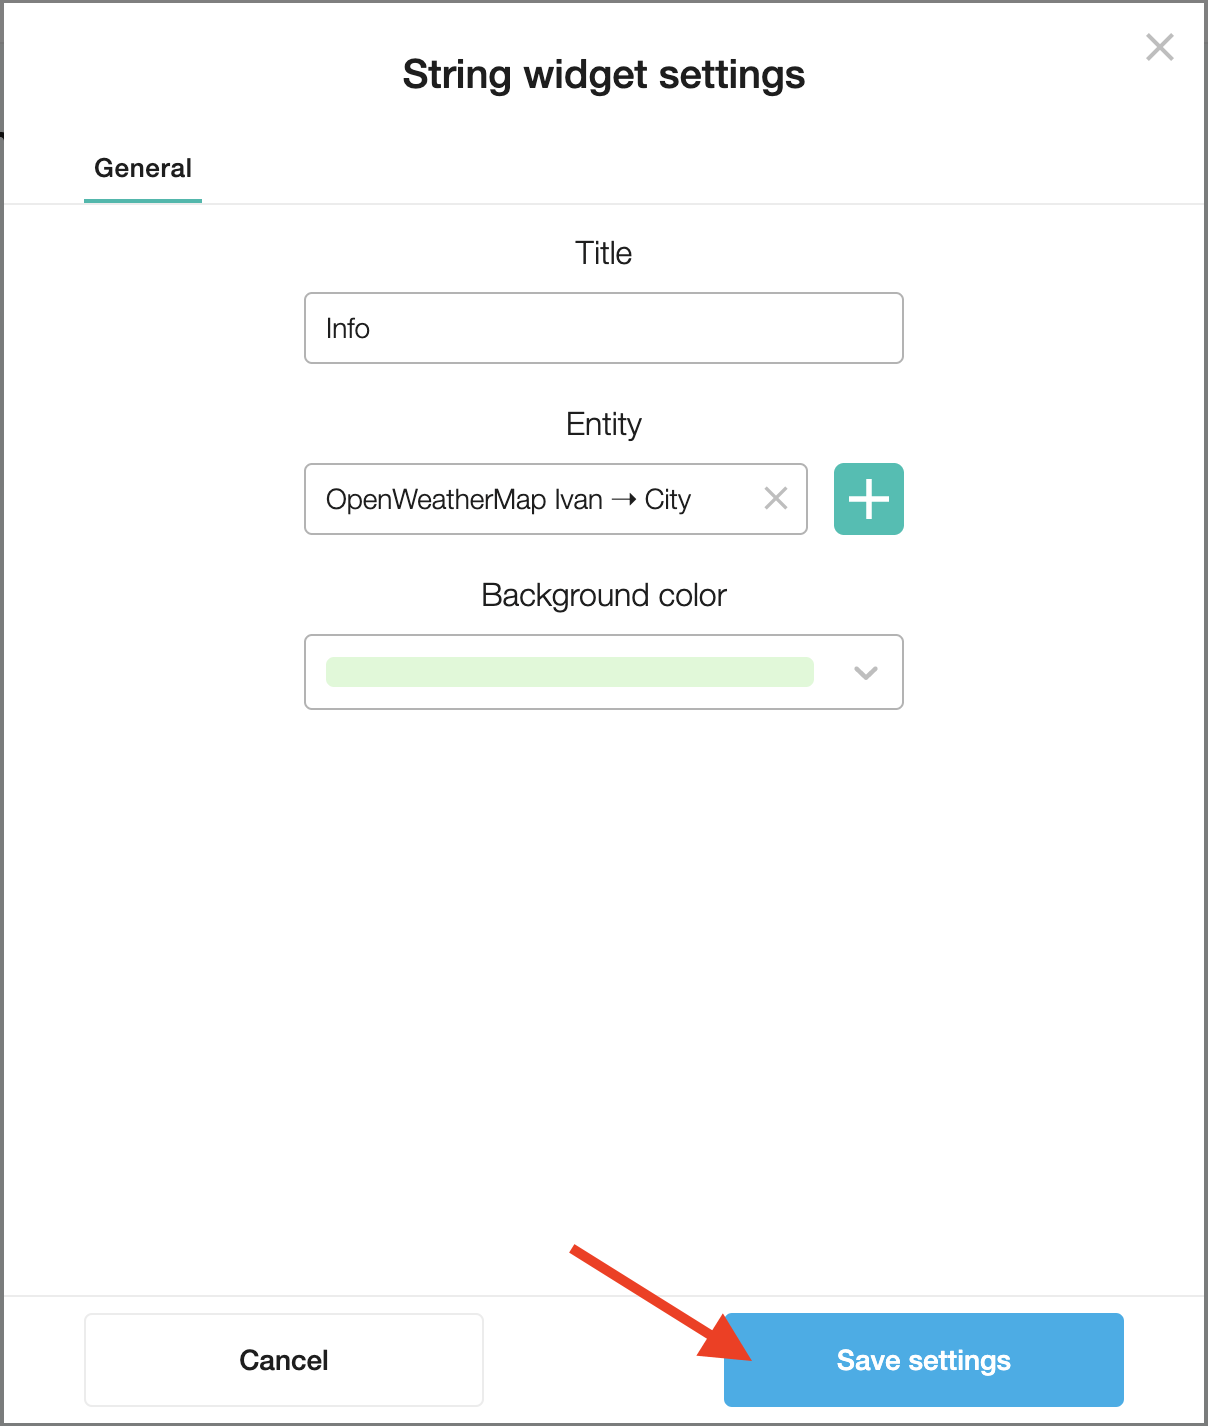
String
This widget represents device text data.
To create a String widget, fill in the Title field on the “String widget settings” modal window.
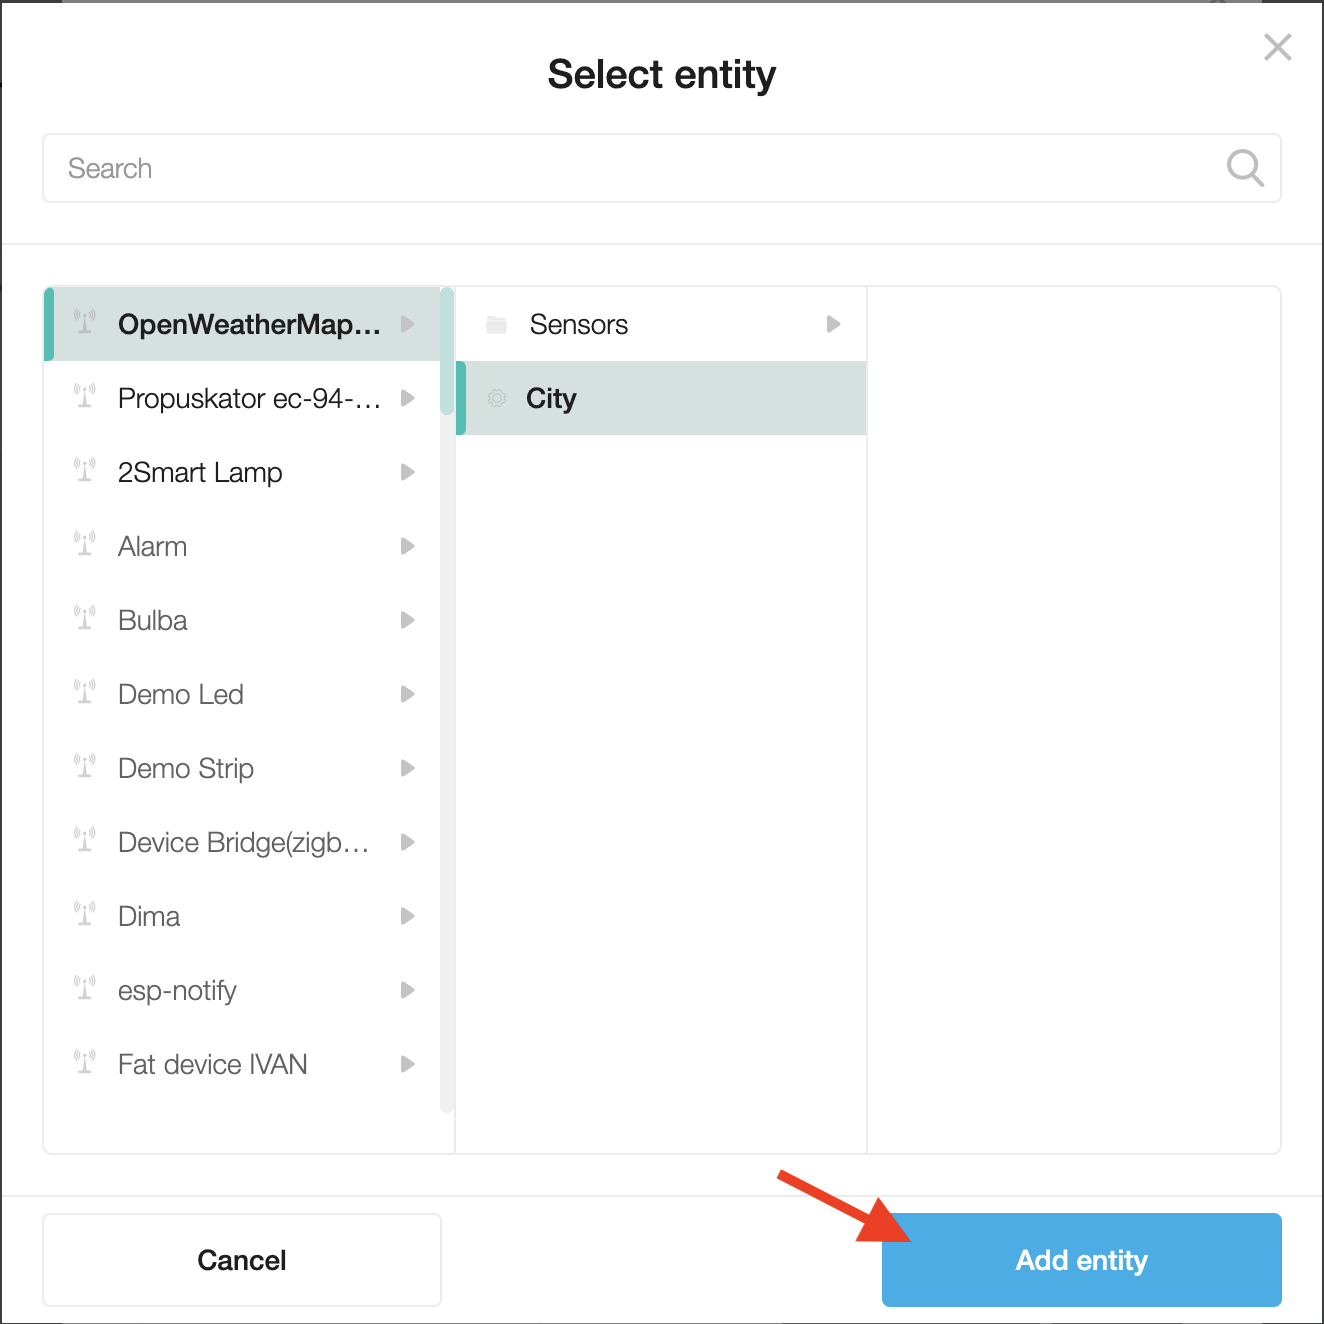
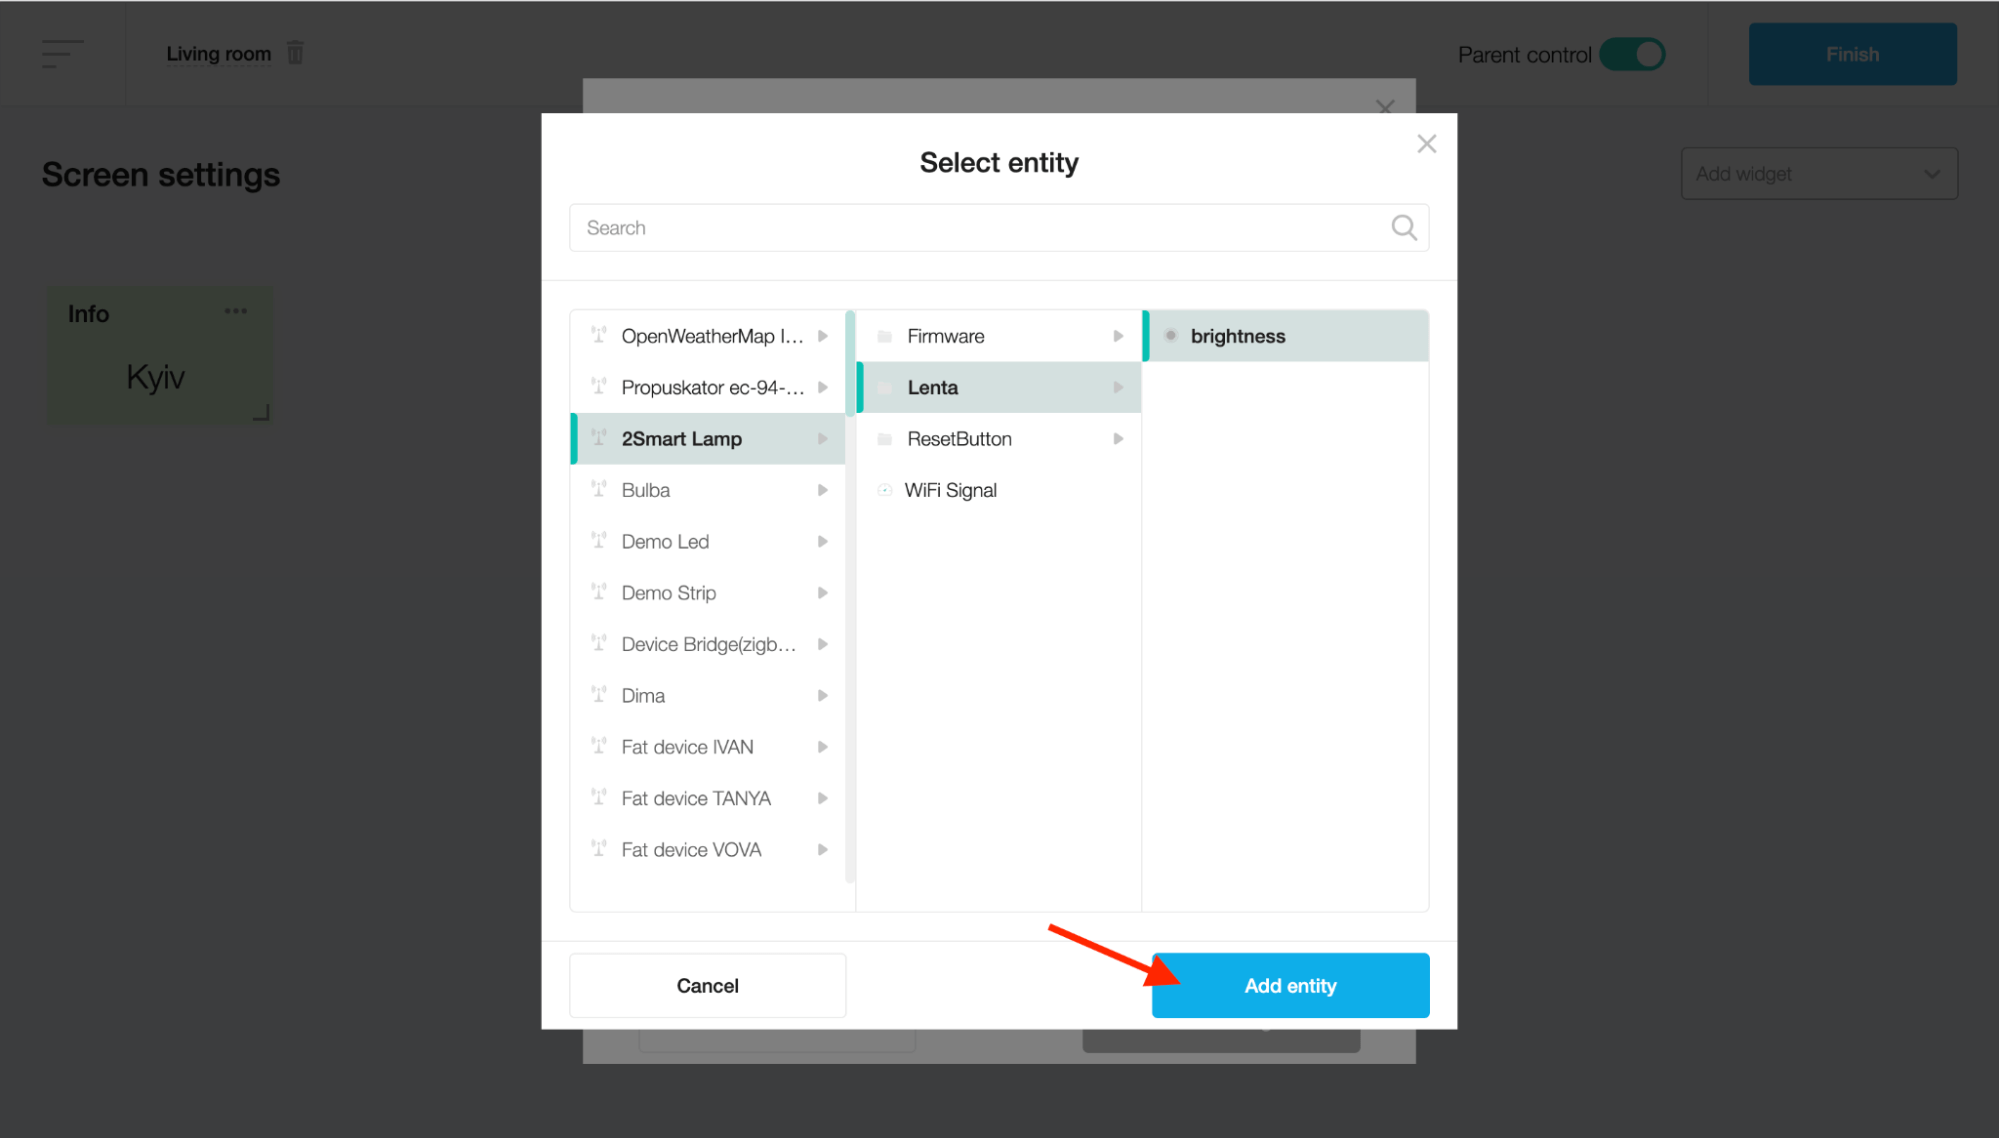
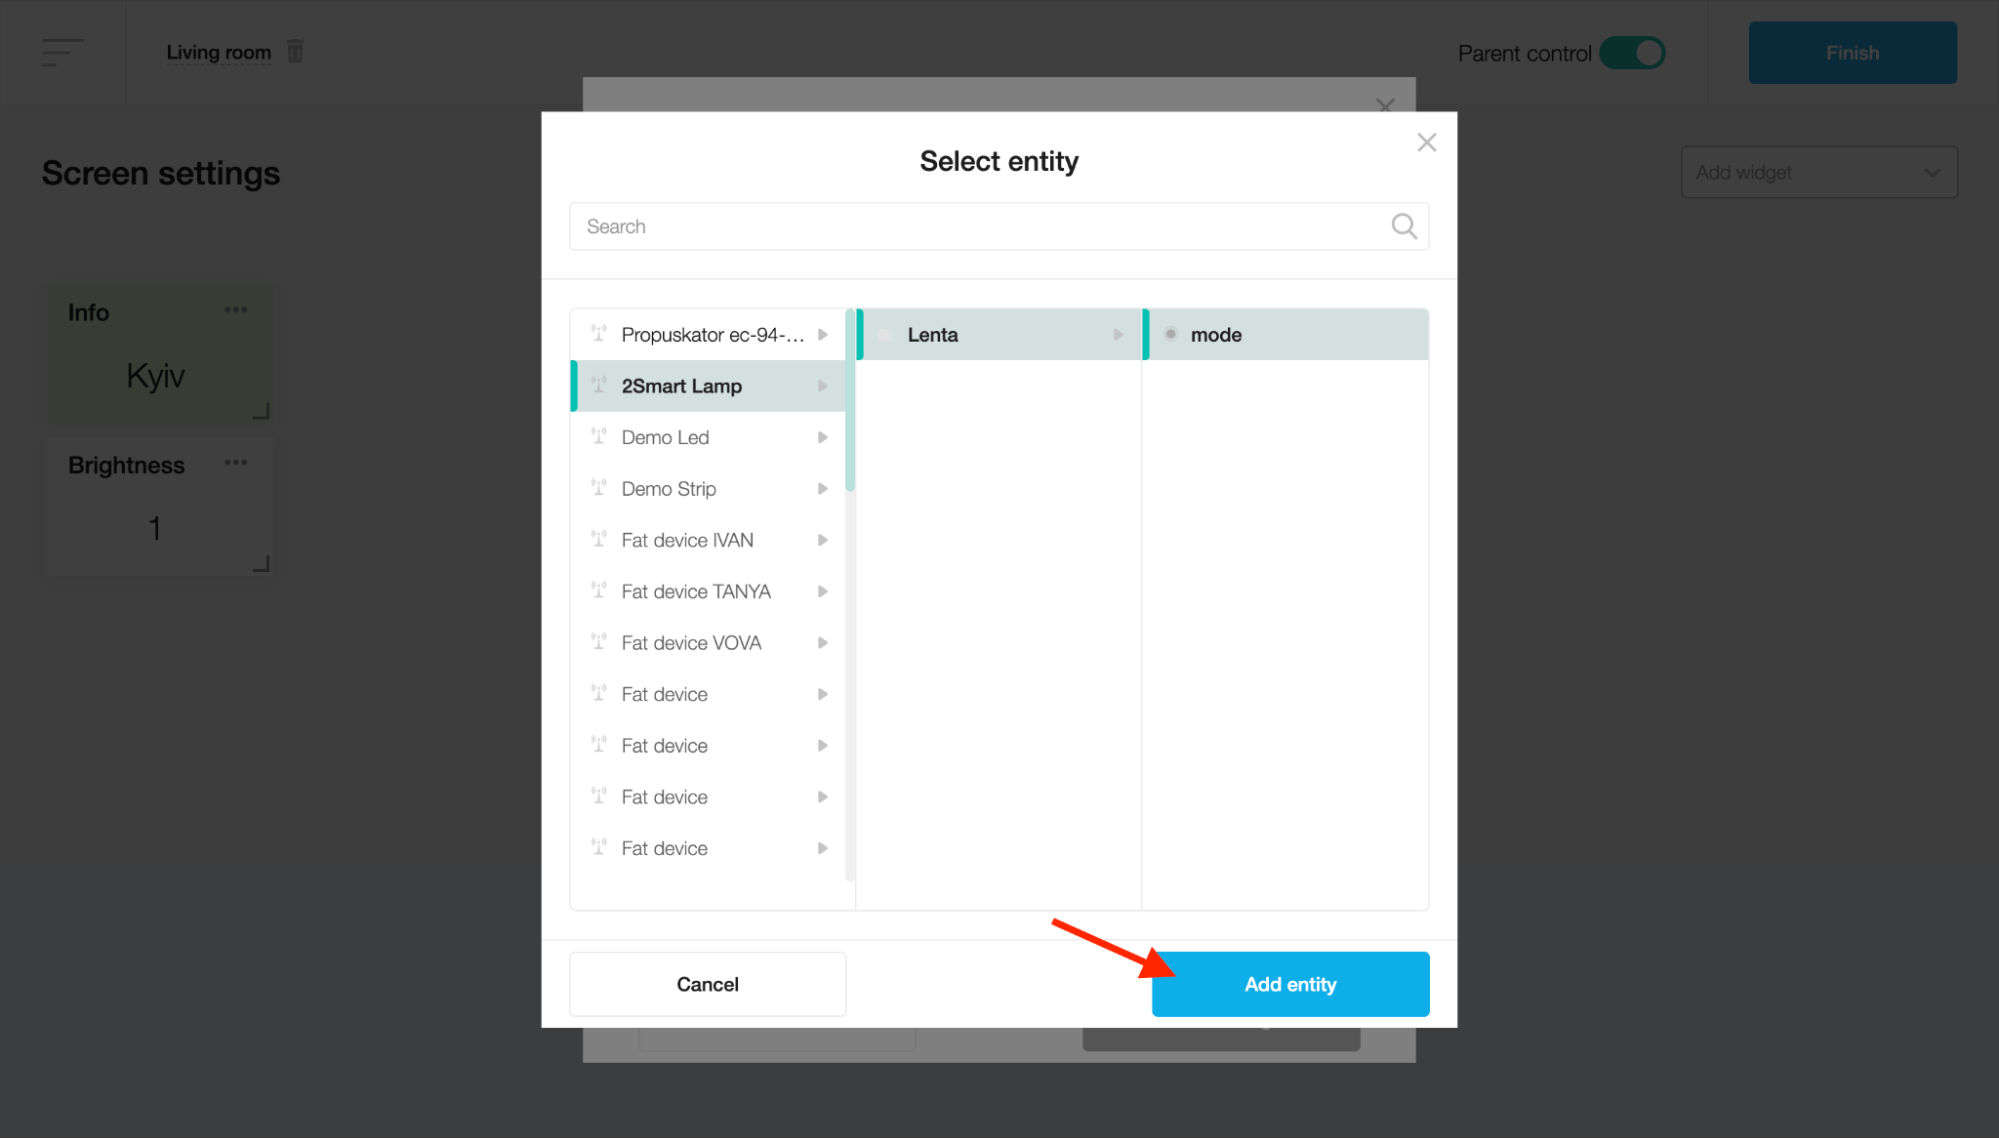
Click the plus button next to the Entity field and choose the device sensor on the “Select entity” modal window. Then click on the “Add entity” button.
If you want to change the widget’s background color, open the background list and choose another one.
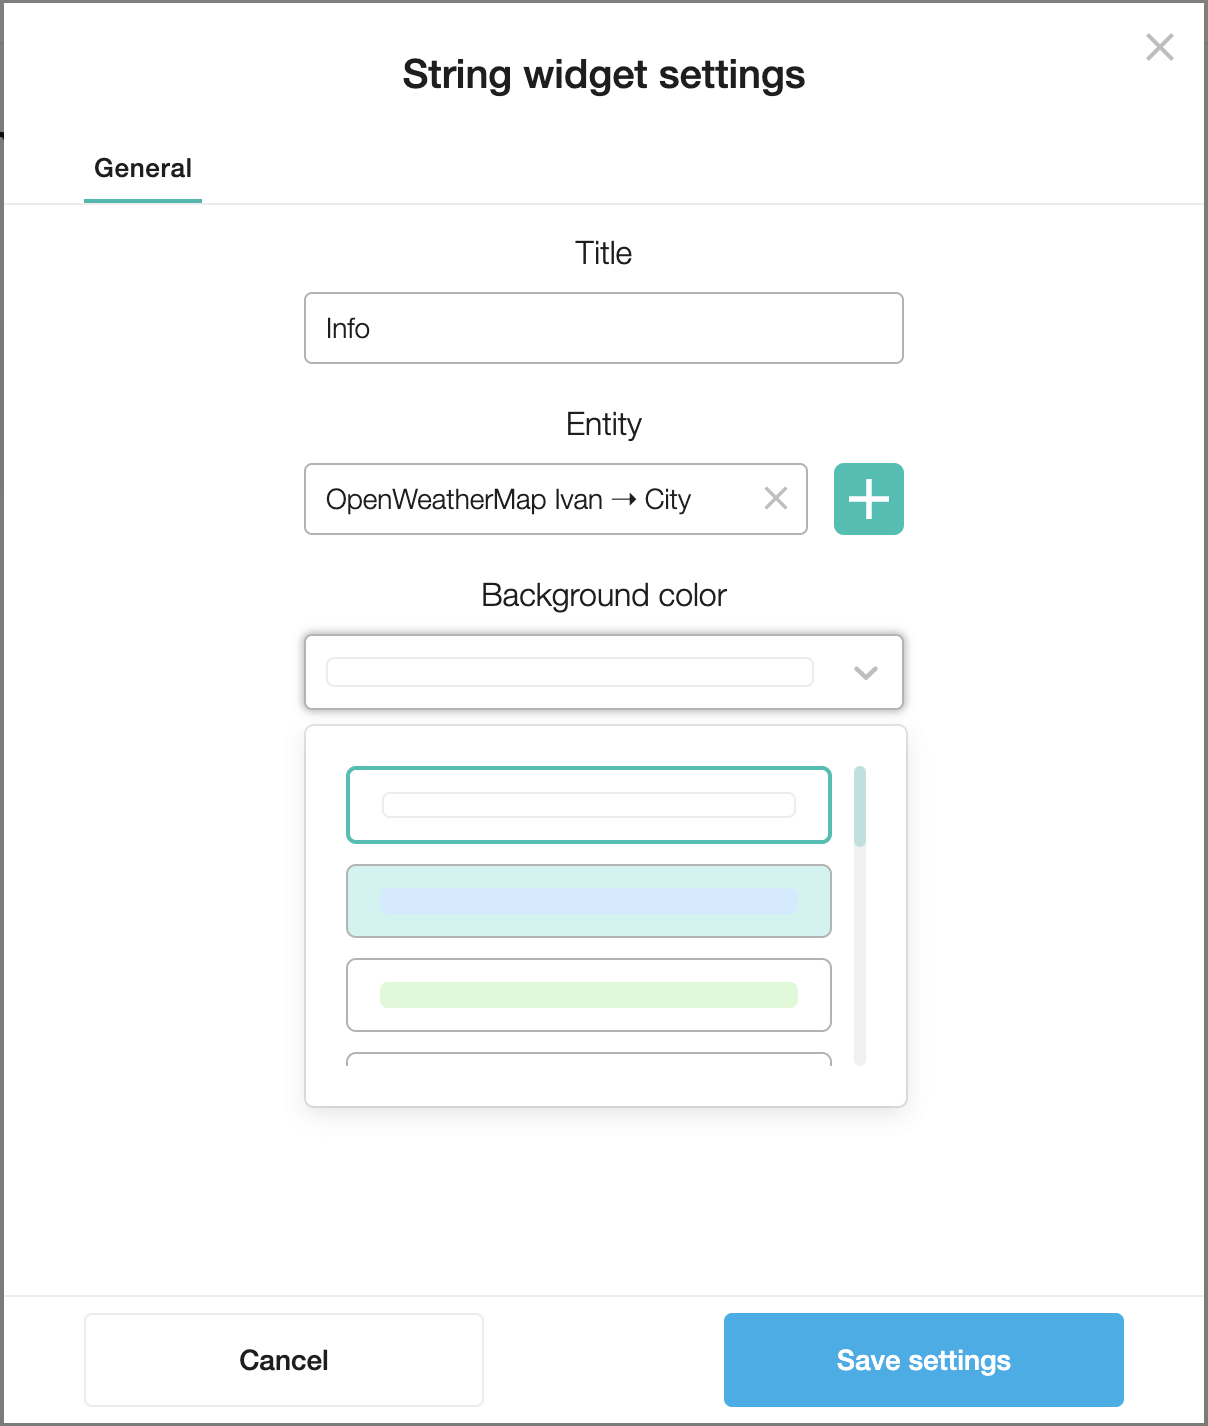
Click on the “Save settings” button.
Click the Finish button to add the String widget to the screen.
Number
This widget represents device numeric data.
To create a Number widget, fill in the Title field on the "Number widget settings" modal window.
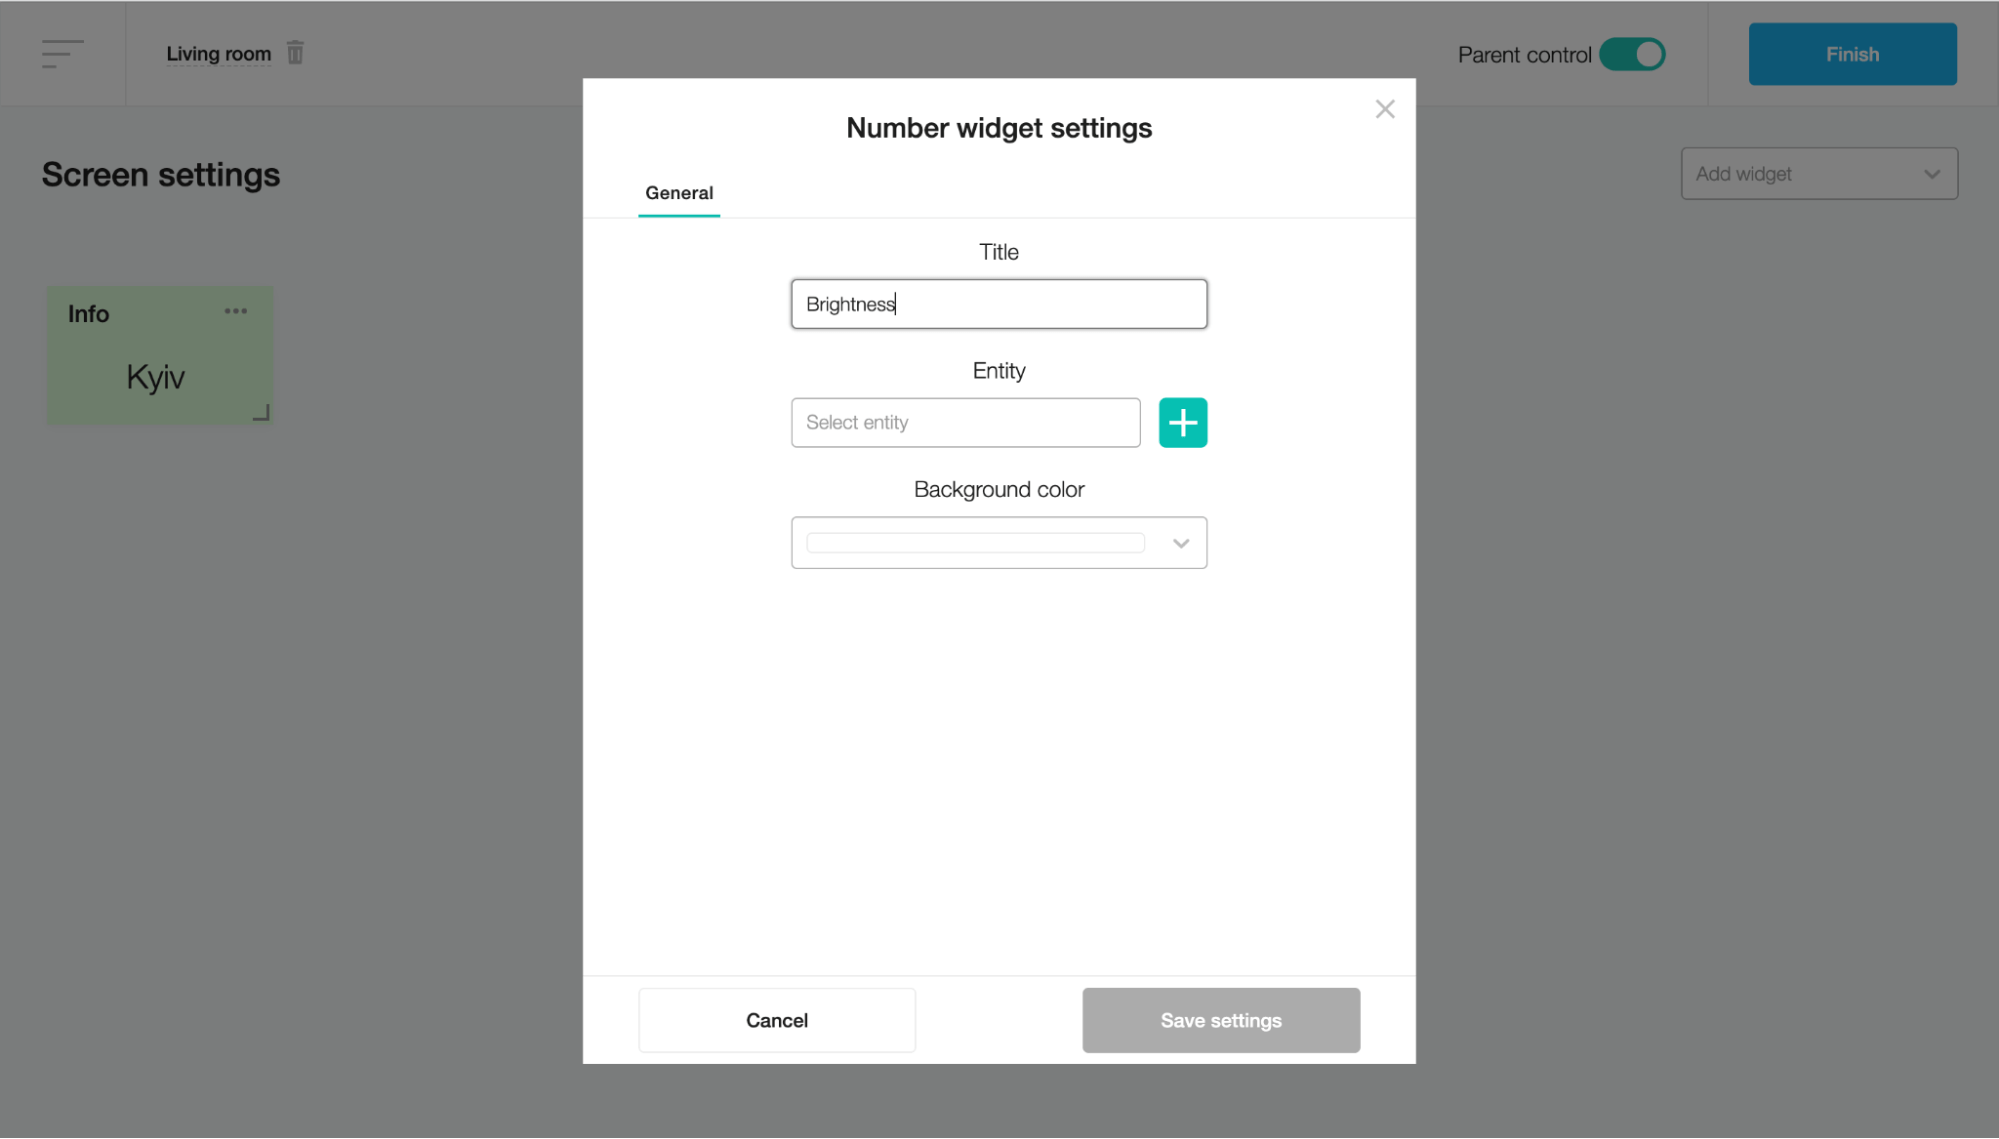
Click the plus button next to the Entity field and choose the device sensor on the “Select entity” modal window. Then click on the “Add entity” button.
Click on the “Save settings” button.
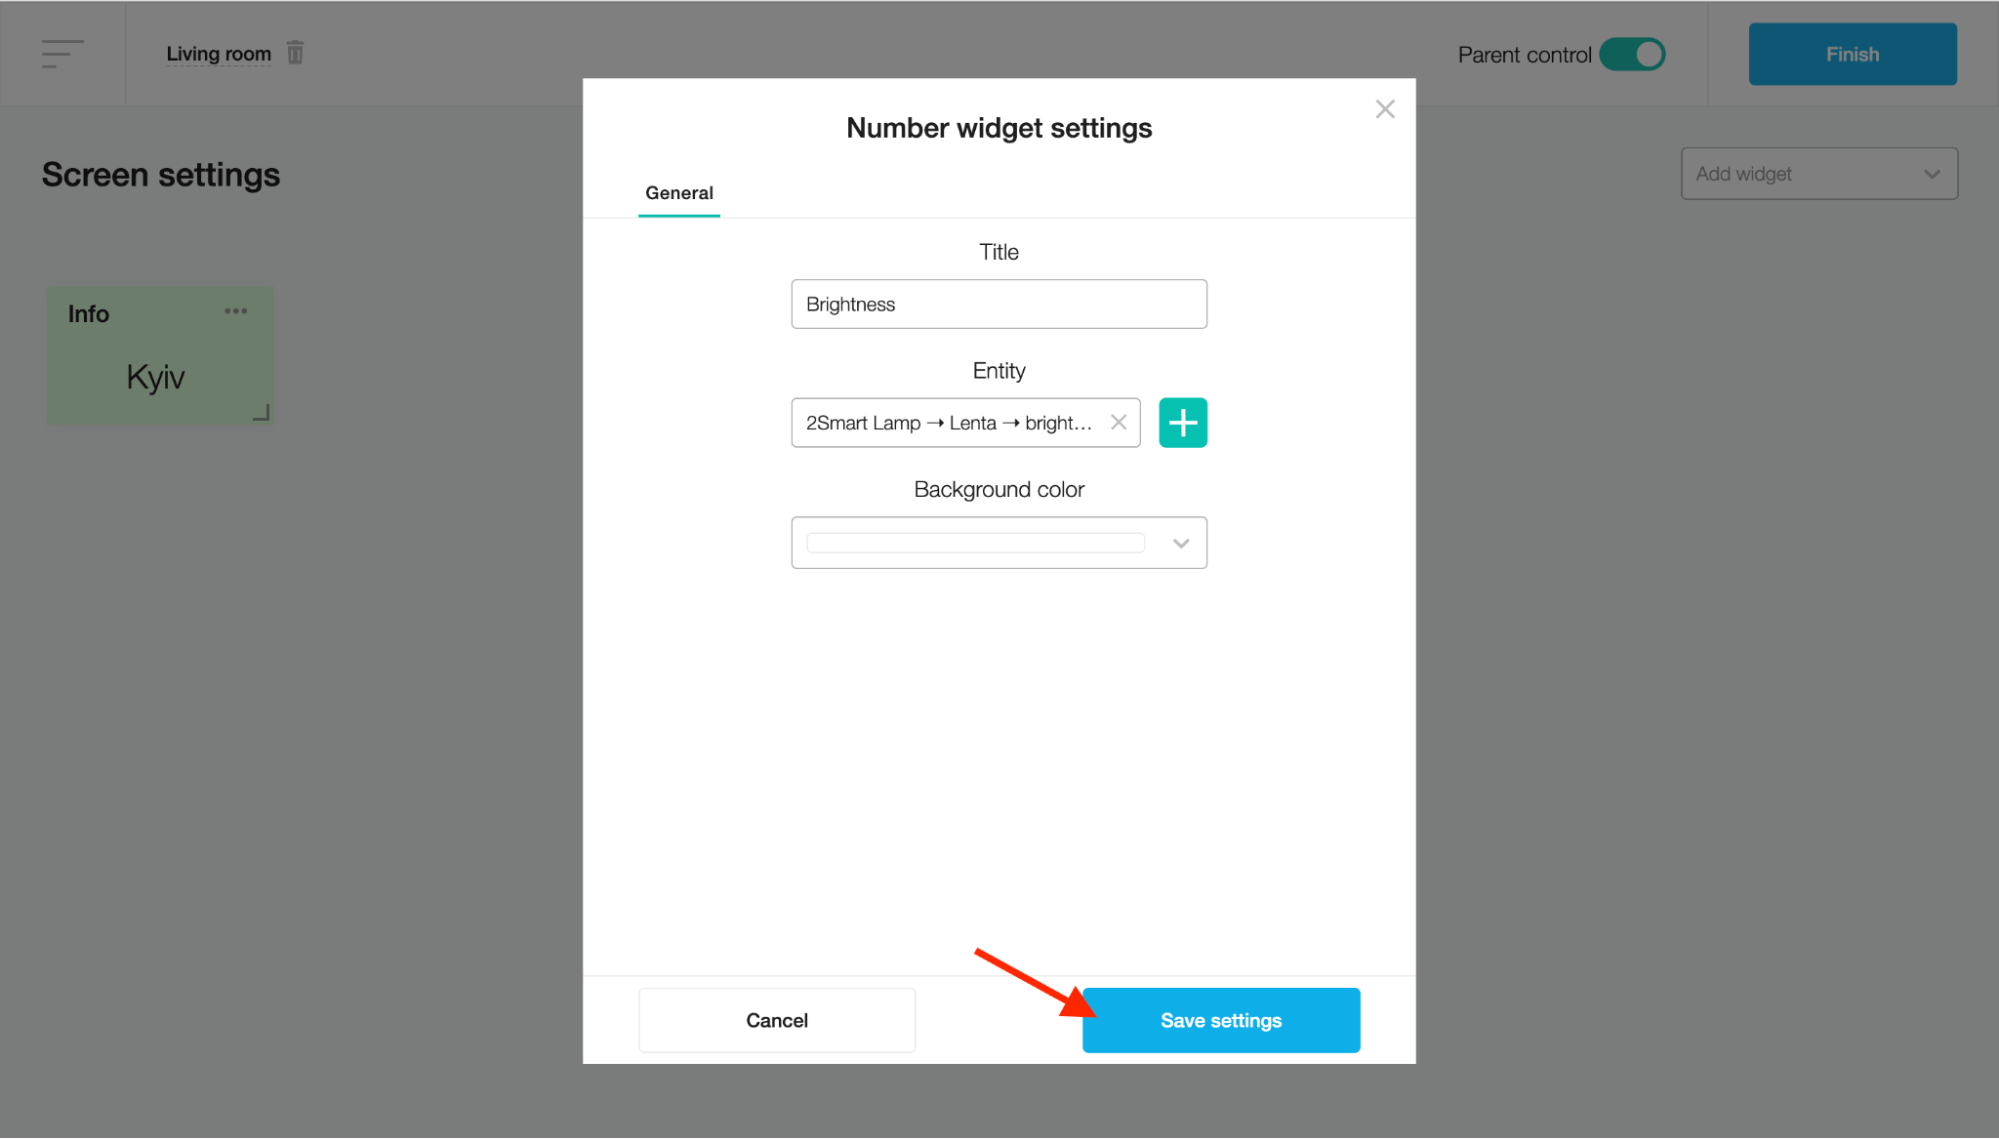
Click the Finish button to add the Number widget to the screen.
List
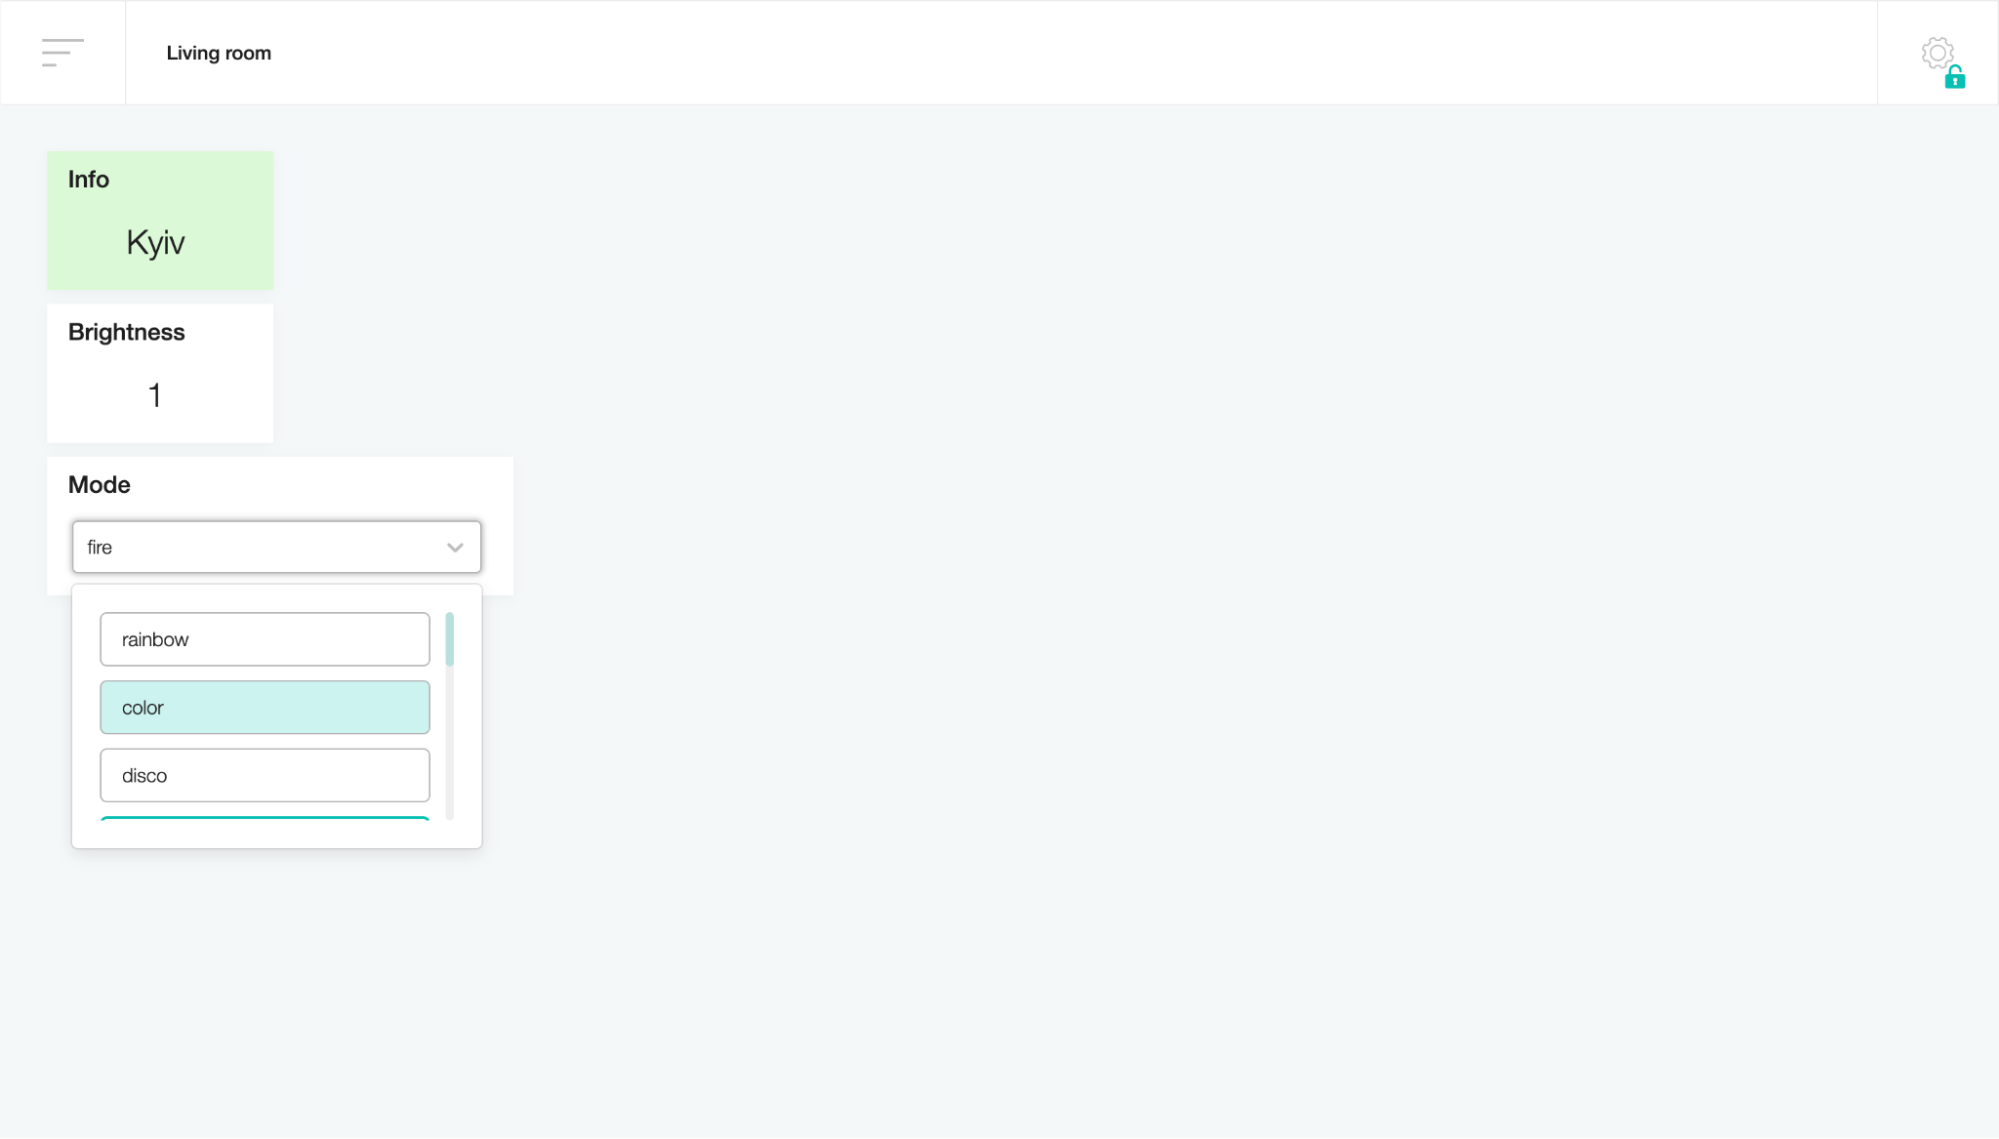
This widget creates a dropdown list for selecting sensor values. It is compatible with numeric, text, or logical (on/off) sensor values.
To create a List widget, fill in the Title field on the "List widget settings" modal window.

Click the plus button next to the Entity field and choose the device sensor on the “Select entity” modal window. Then click on the “Add entity” button.
Click on the “Save settings” button.

Click the Finish button to add the List widget to the screen.
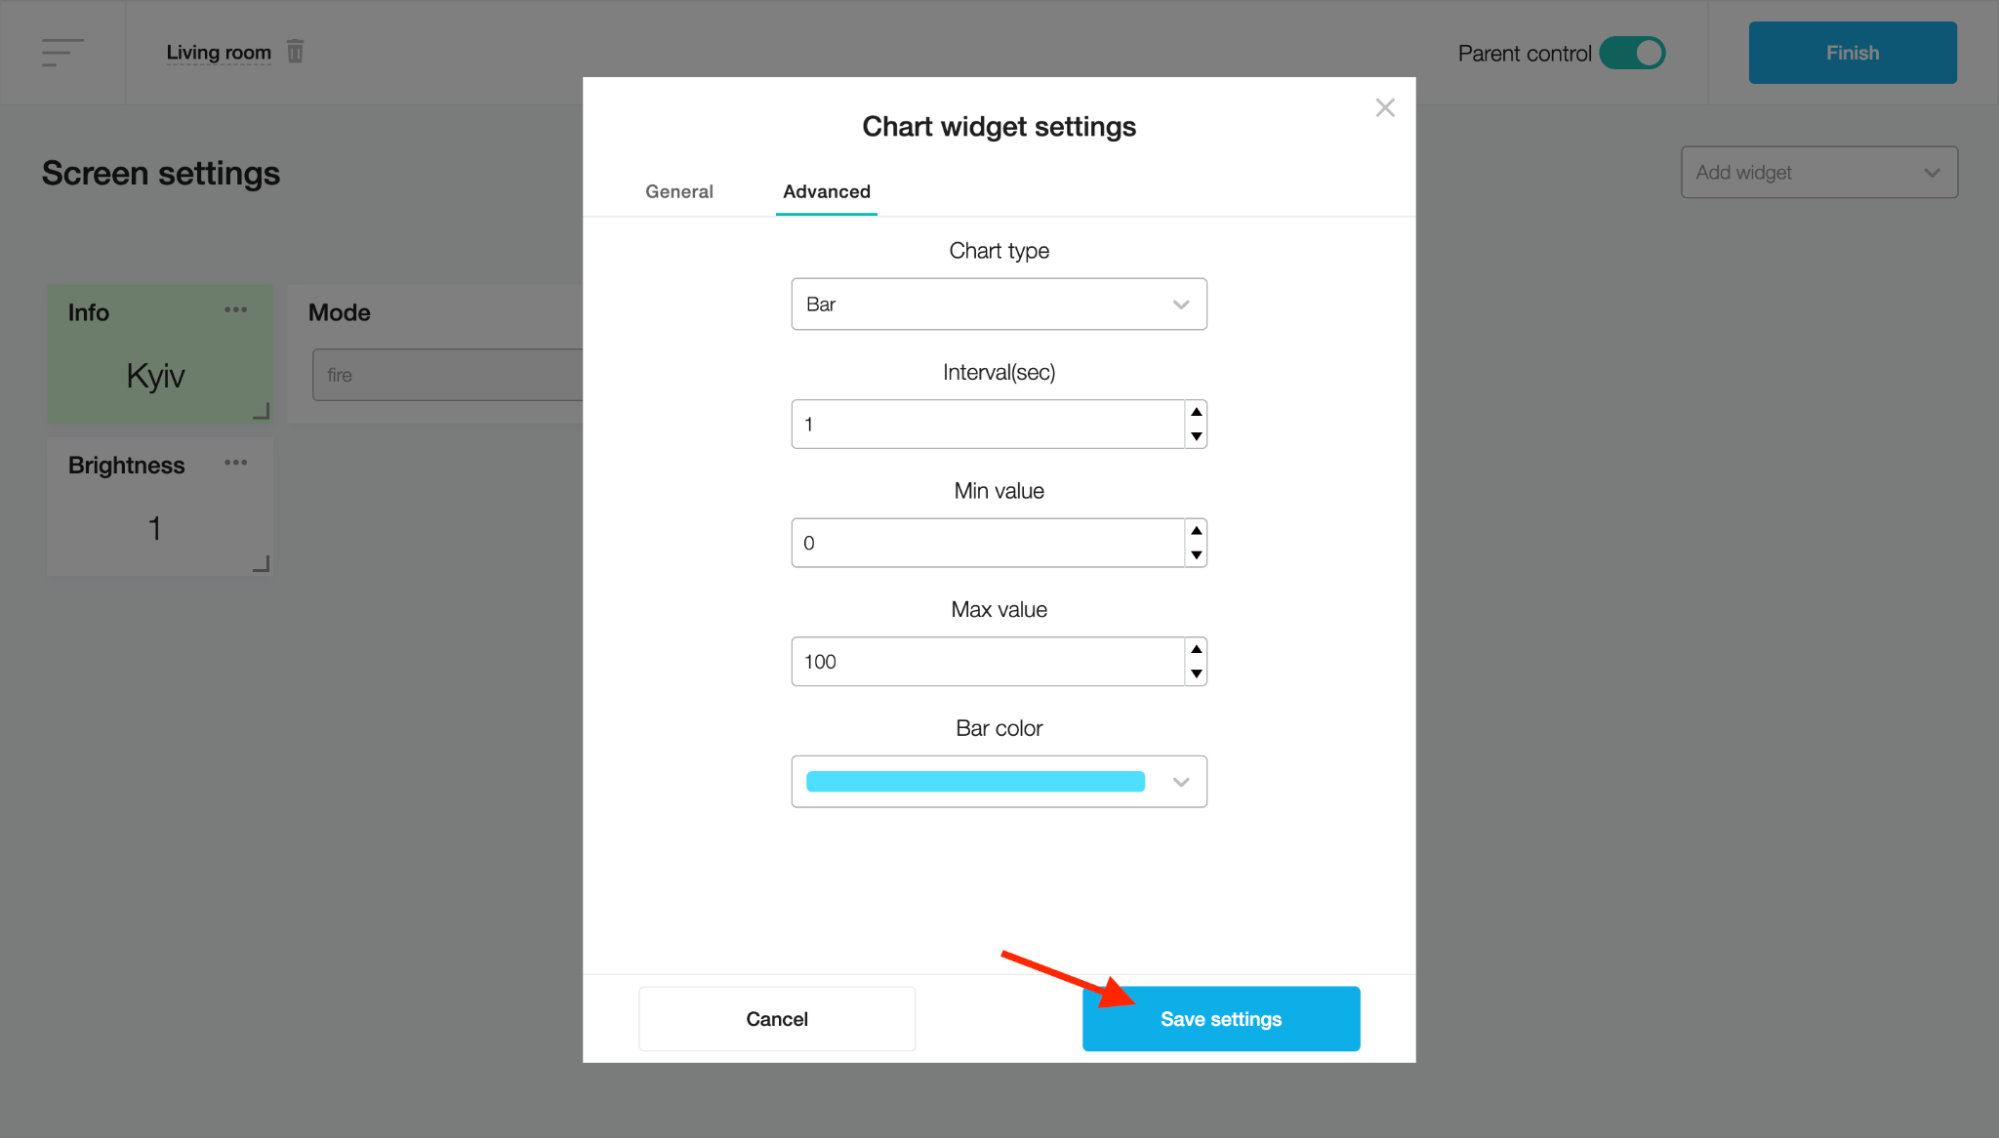
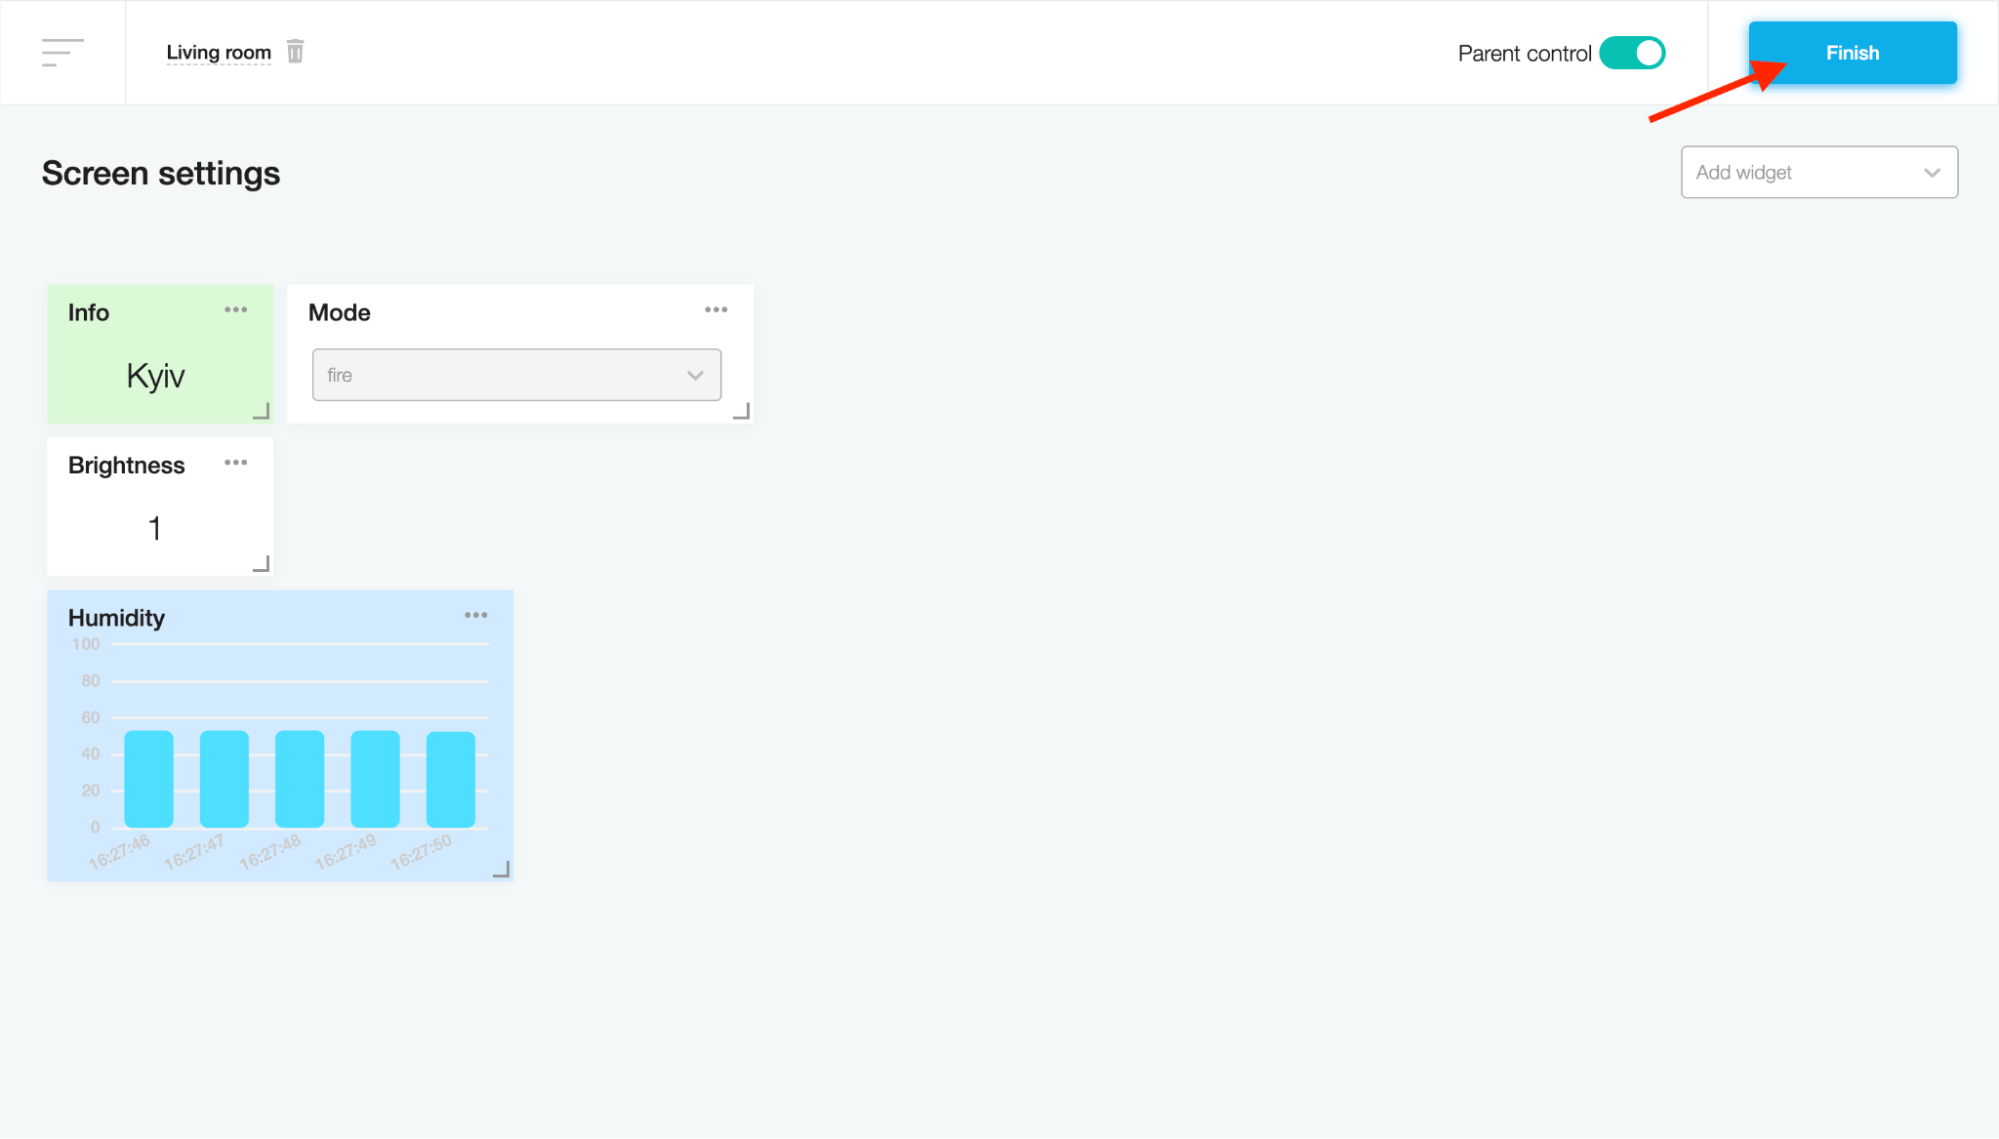
Chart
This widget presents the sensor’s numeric values on a historical graph.
To create a Chart widget, fill in the Title field and choose the device sensor in the Entity field on the "Chart widget settings" modal window.
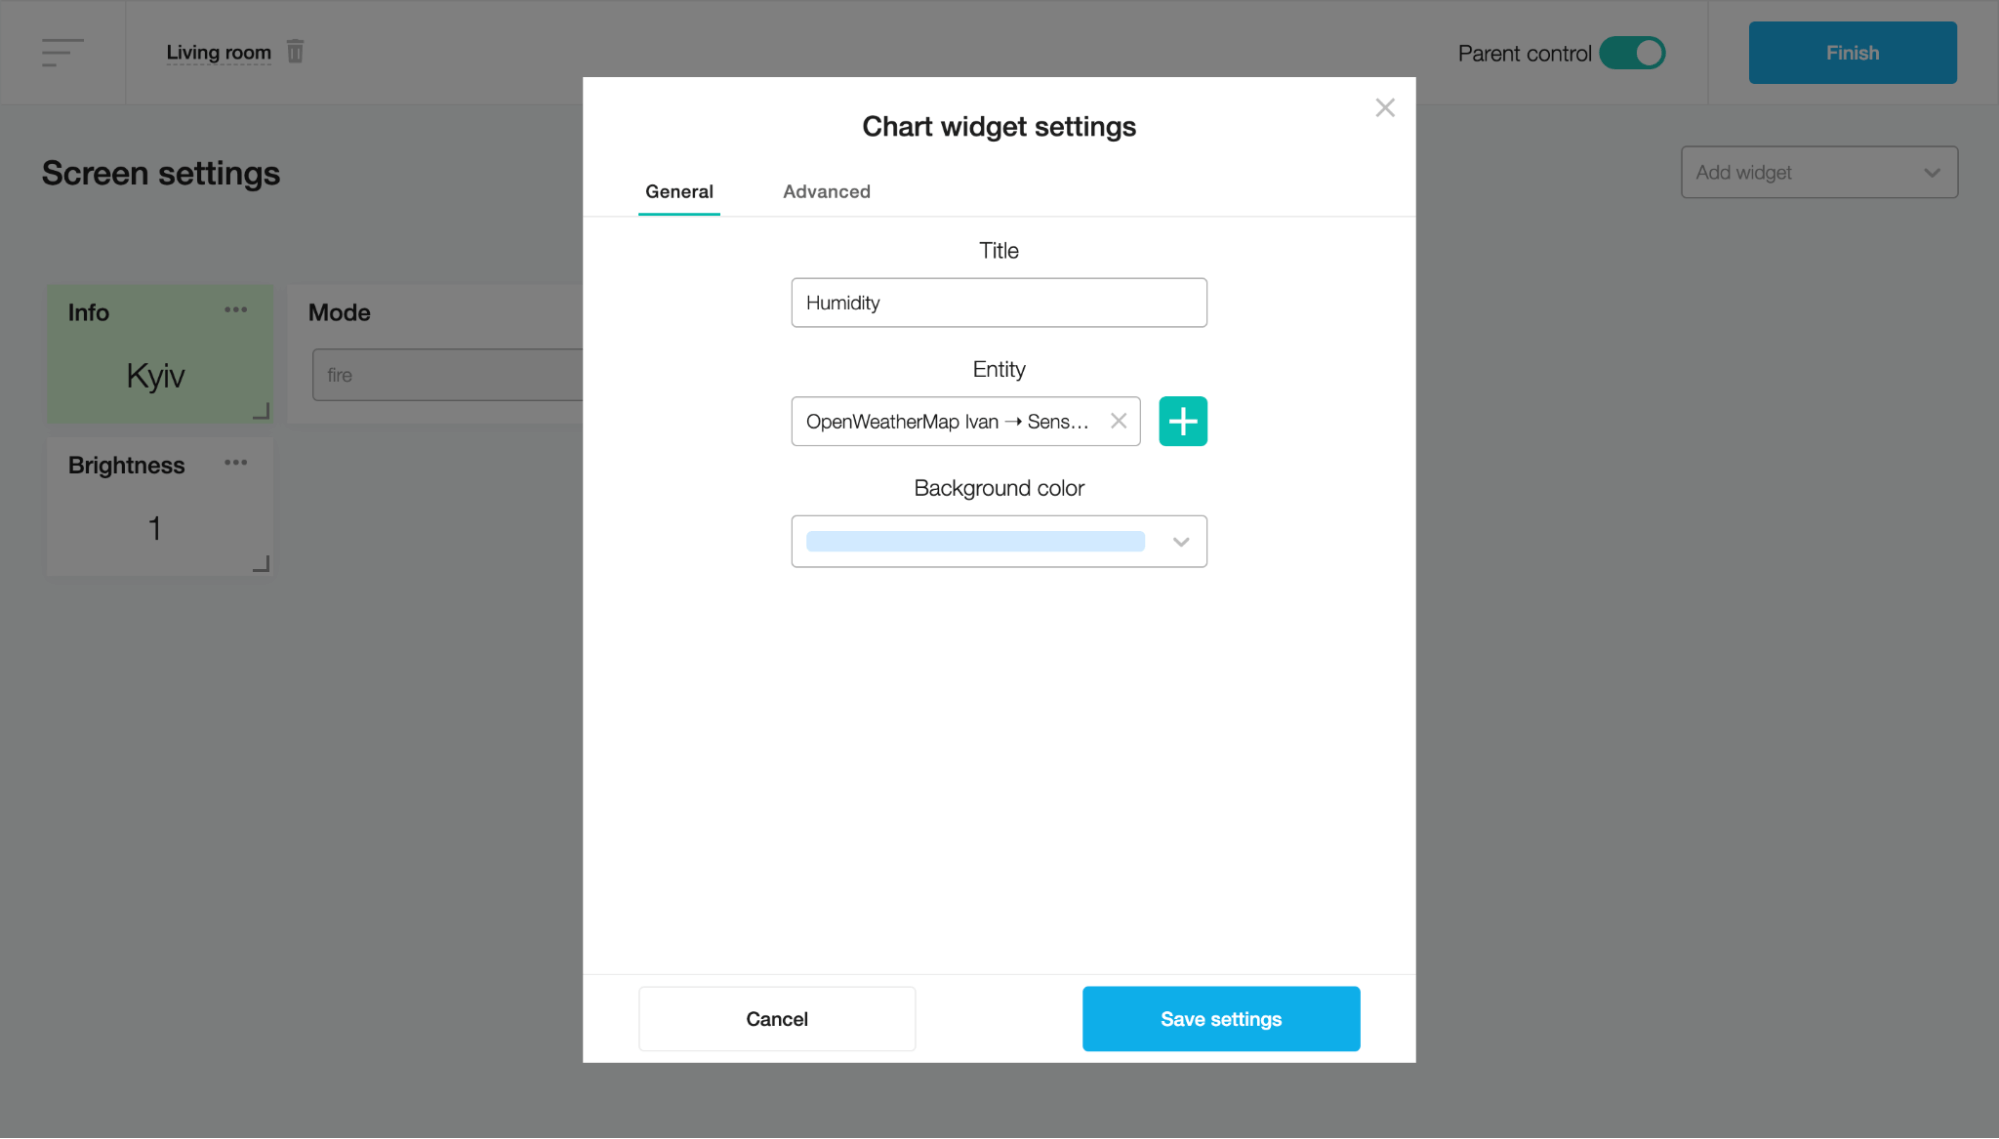
On the Advanced tab, you can edit the chart type, update the graph interval, set the minimum and maximum values and the bar color. When finished, click on the “Save Settings” button.
Click the Finish button to add the Chart widget to the screen.
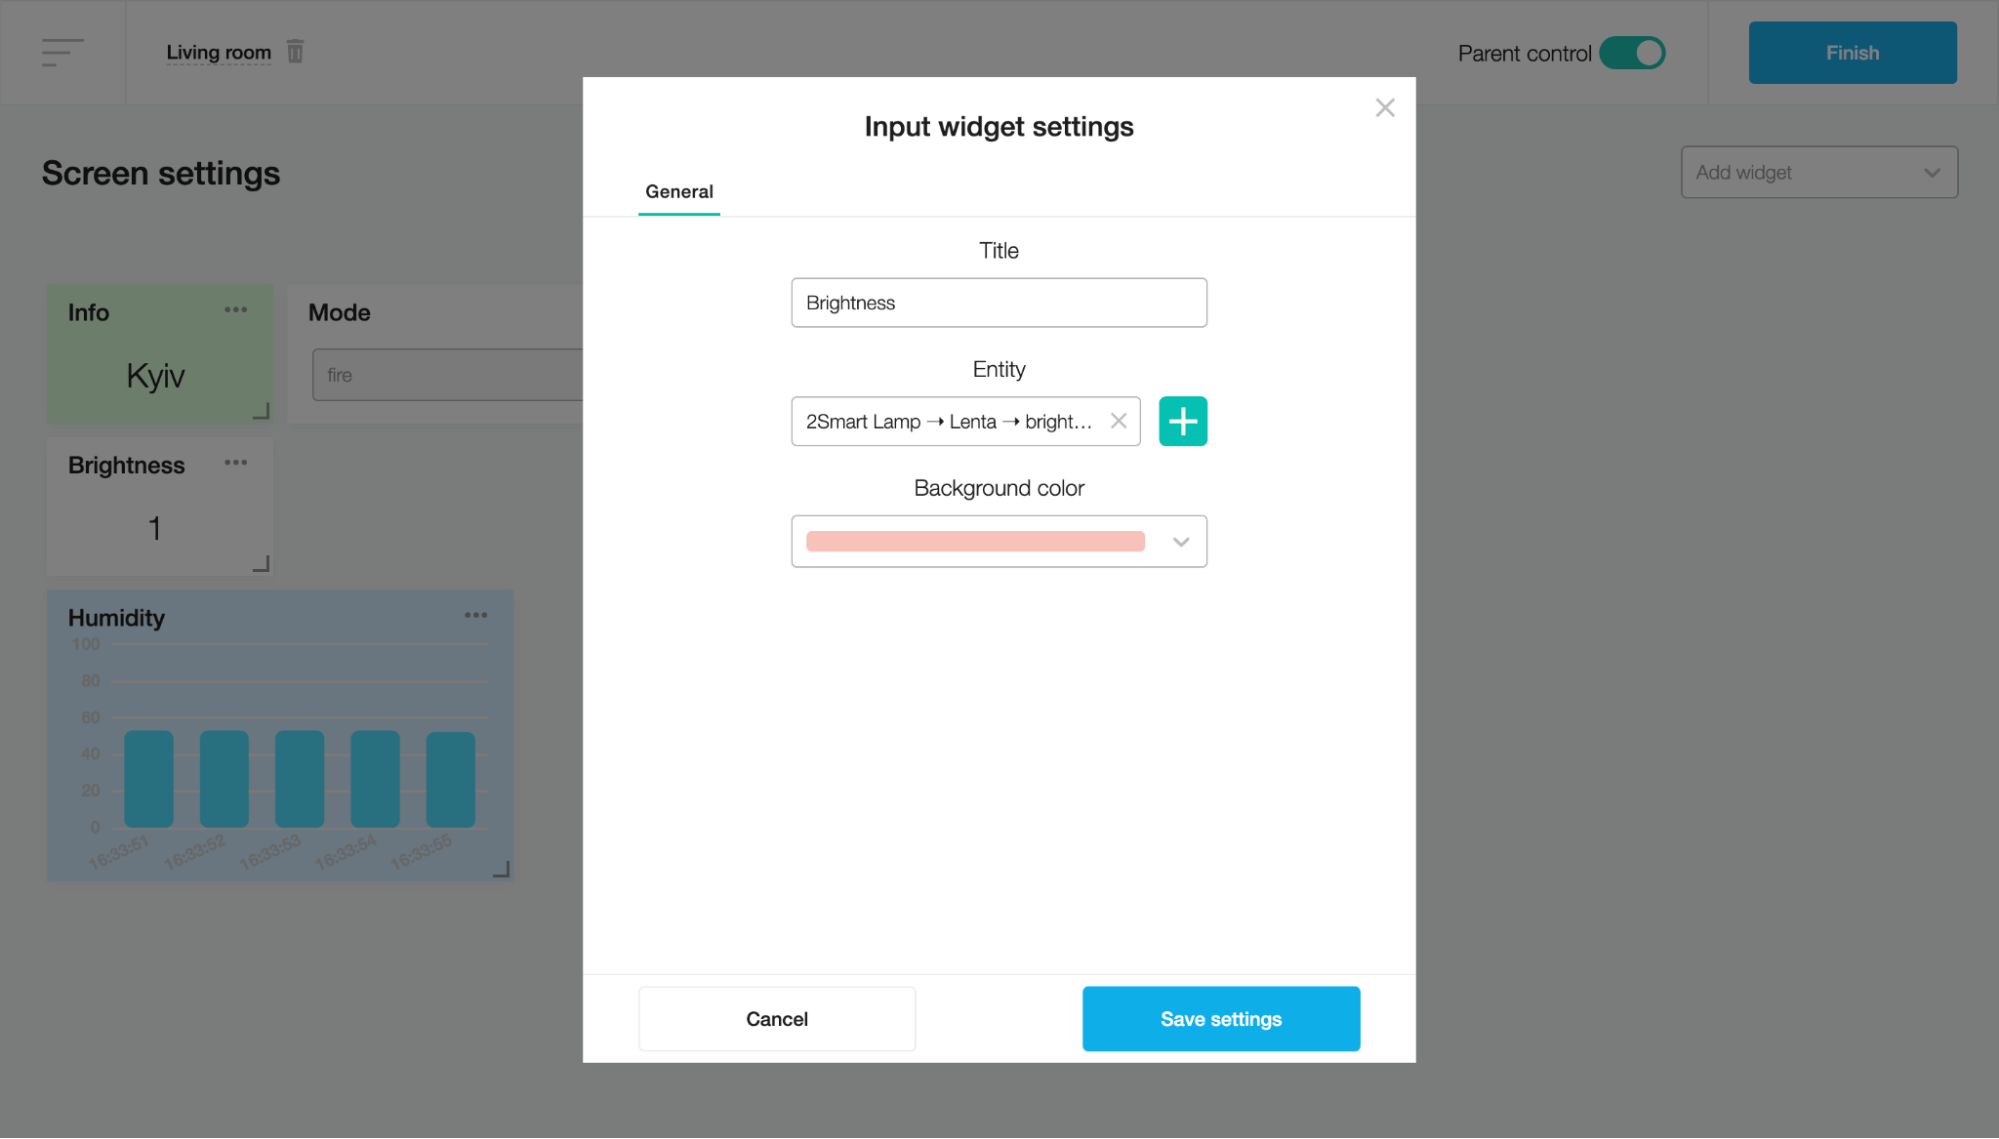
Input
This widget represents and allows you to edit the numeric or text values of the device's sensor. To edit, just enter a new value in the field.
To create an Input widget, fill in the Title field and choose the device sensor in the Entity field on the "Input widget settings" modal window.
Click on the “Save settings” button.
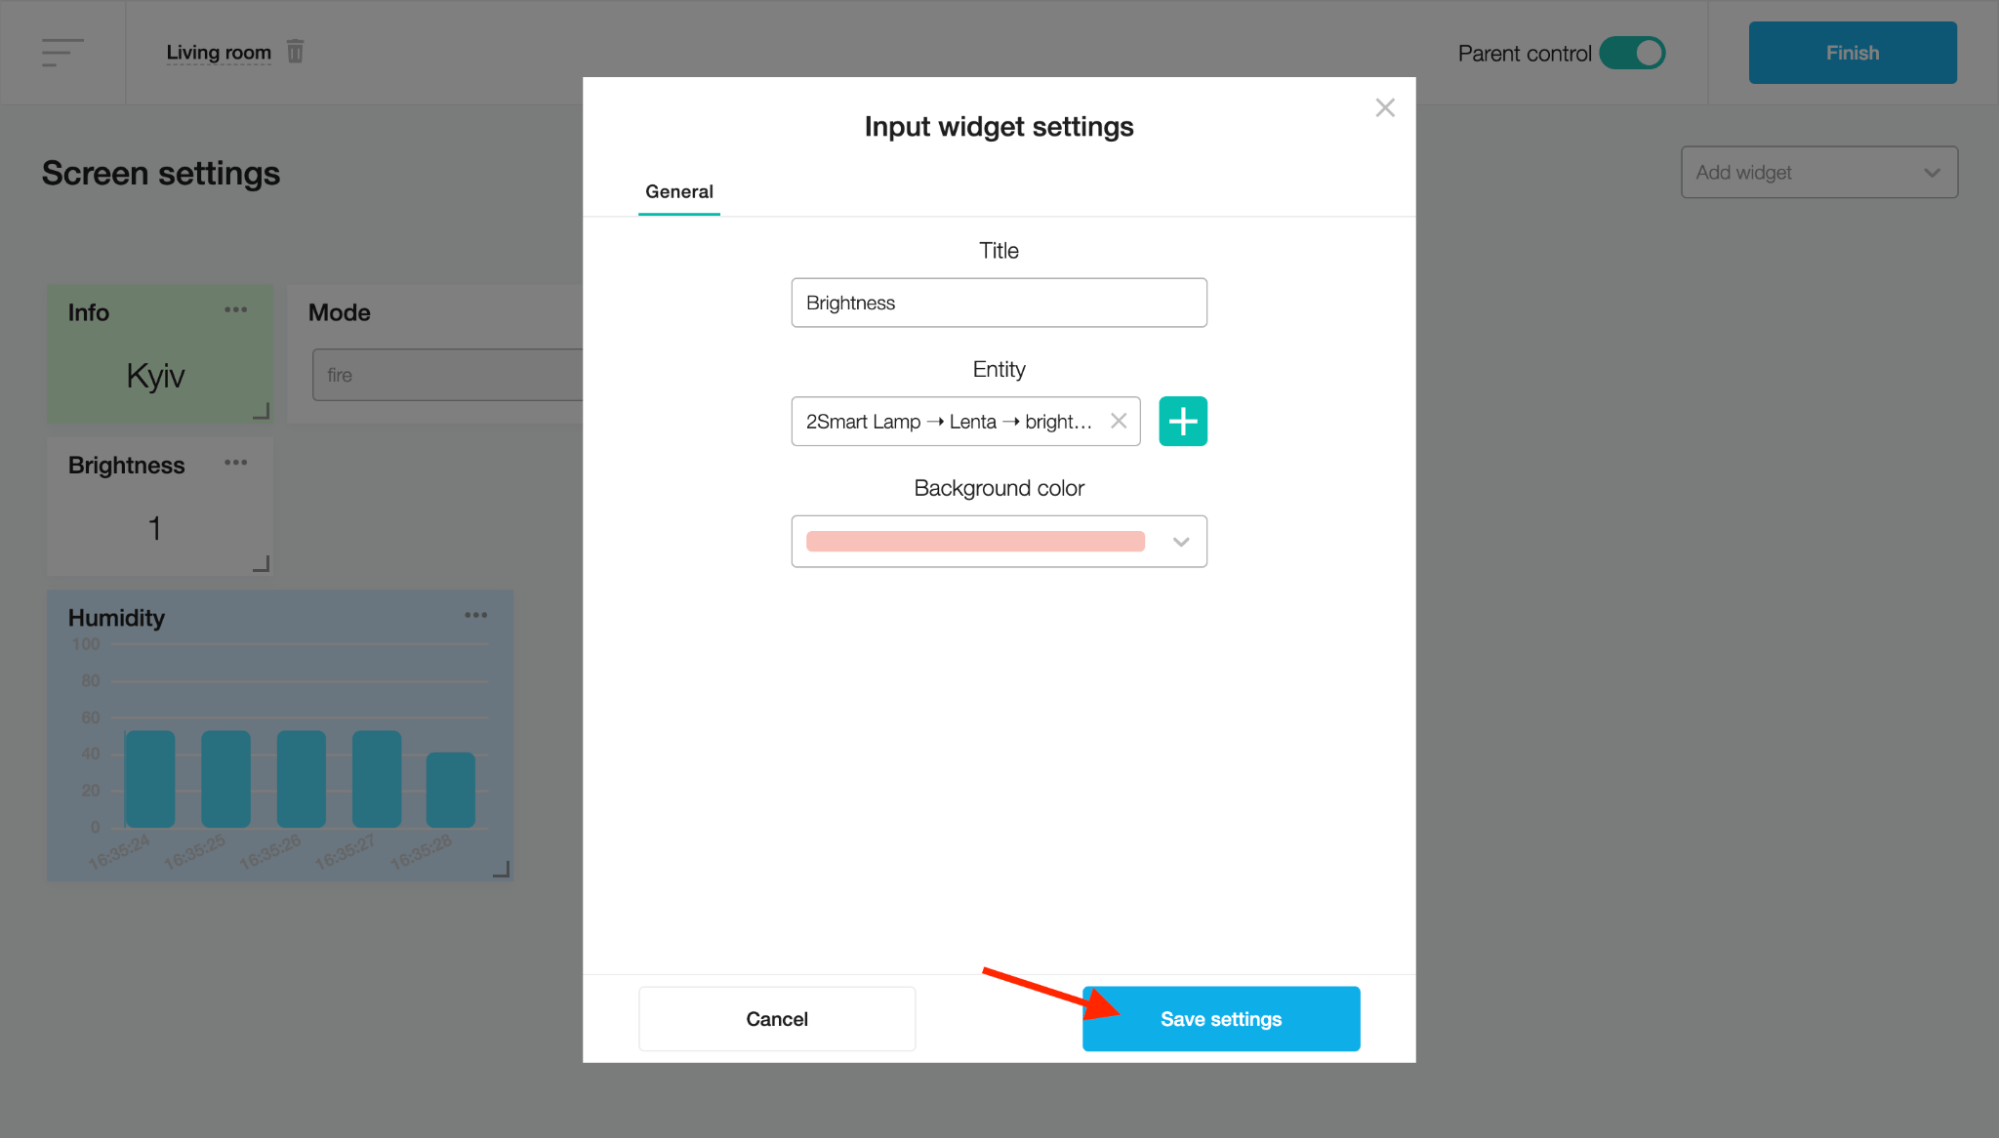
Click the Finish button to add the Input widget to the screen.
After that, you can click on the value of the Input widget and set a new one.

Toggle
This widget activates or deactivates the device's sensor. It is compatible with any sensors that have boolean values.
To create a Toggle widget, fill in the Title field and choose the device sensor in the Entity field on the "Toggle widget settings" modal window.

Click on the “Save settings” button.
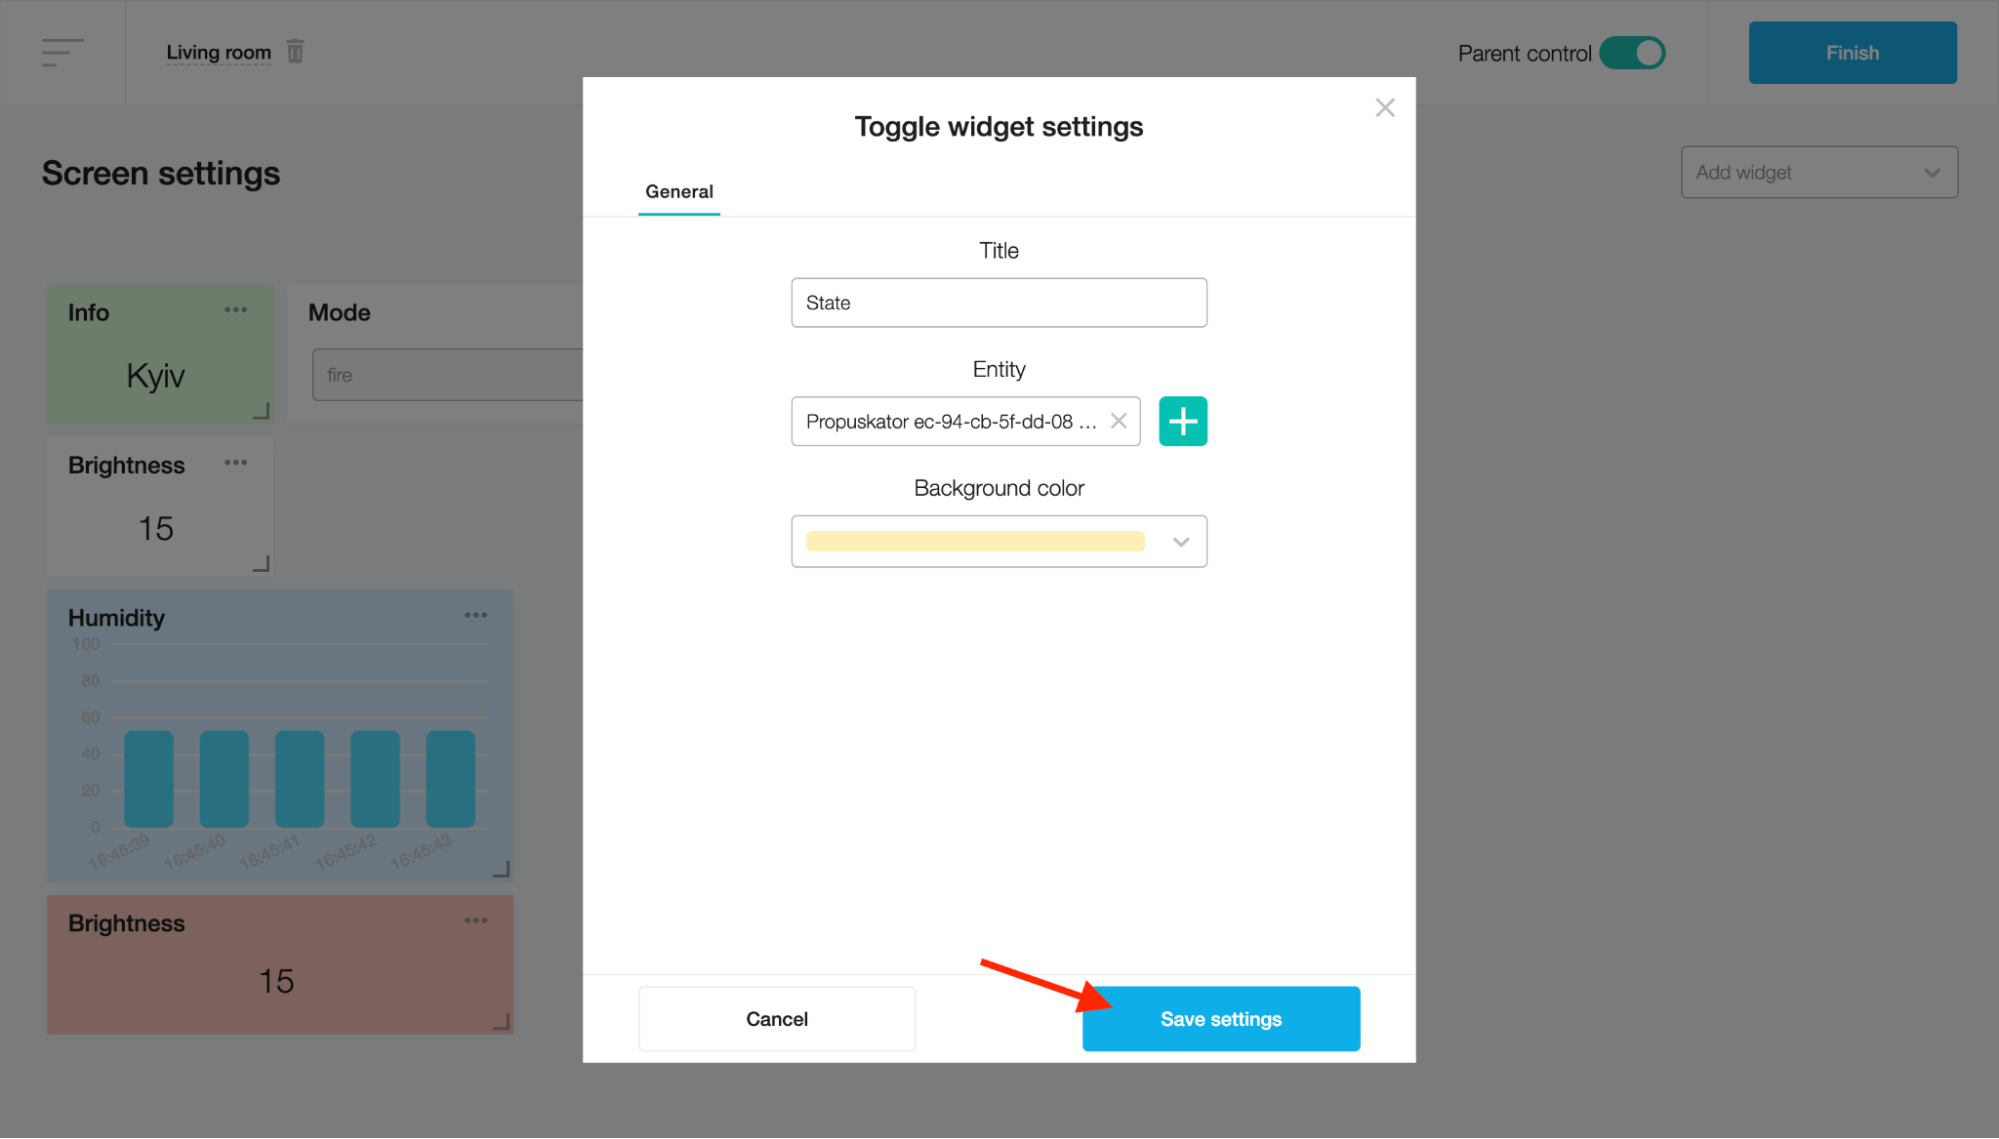
Click the Finish button to add the Toggle widget to the screen.
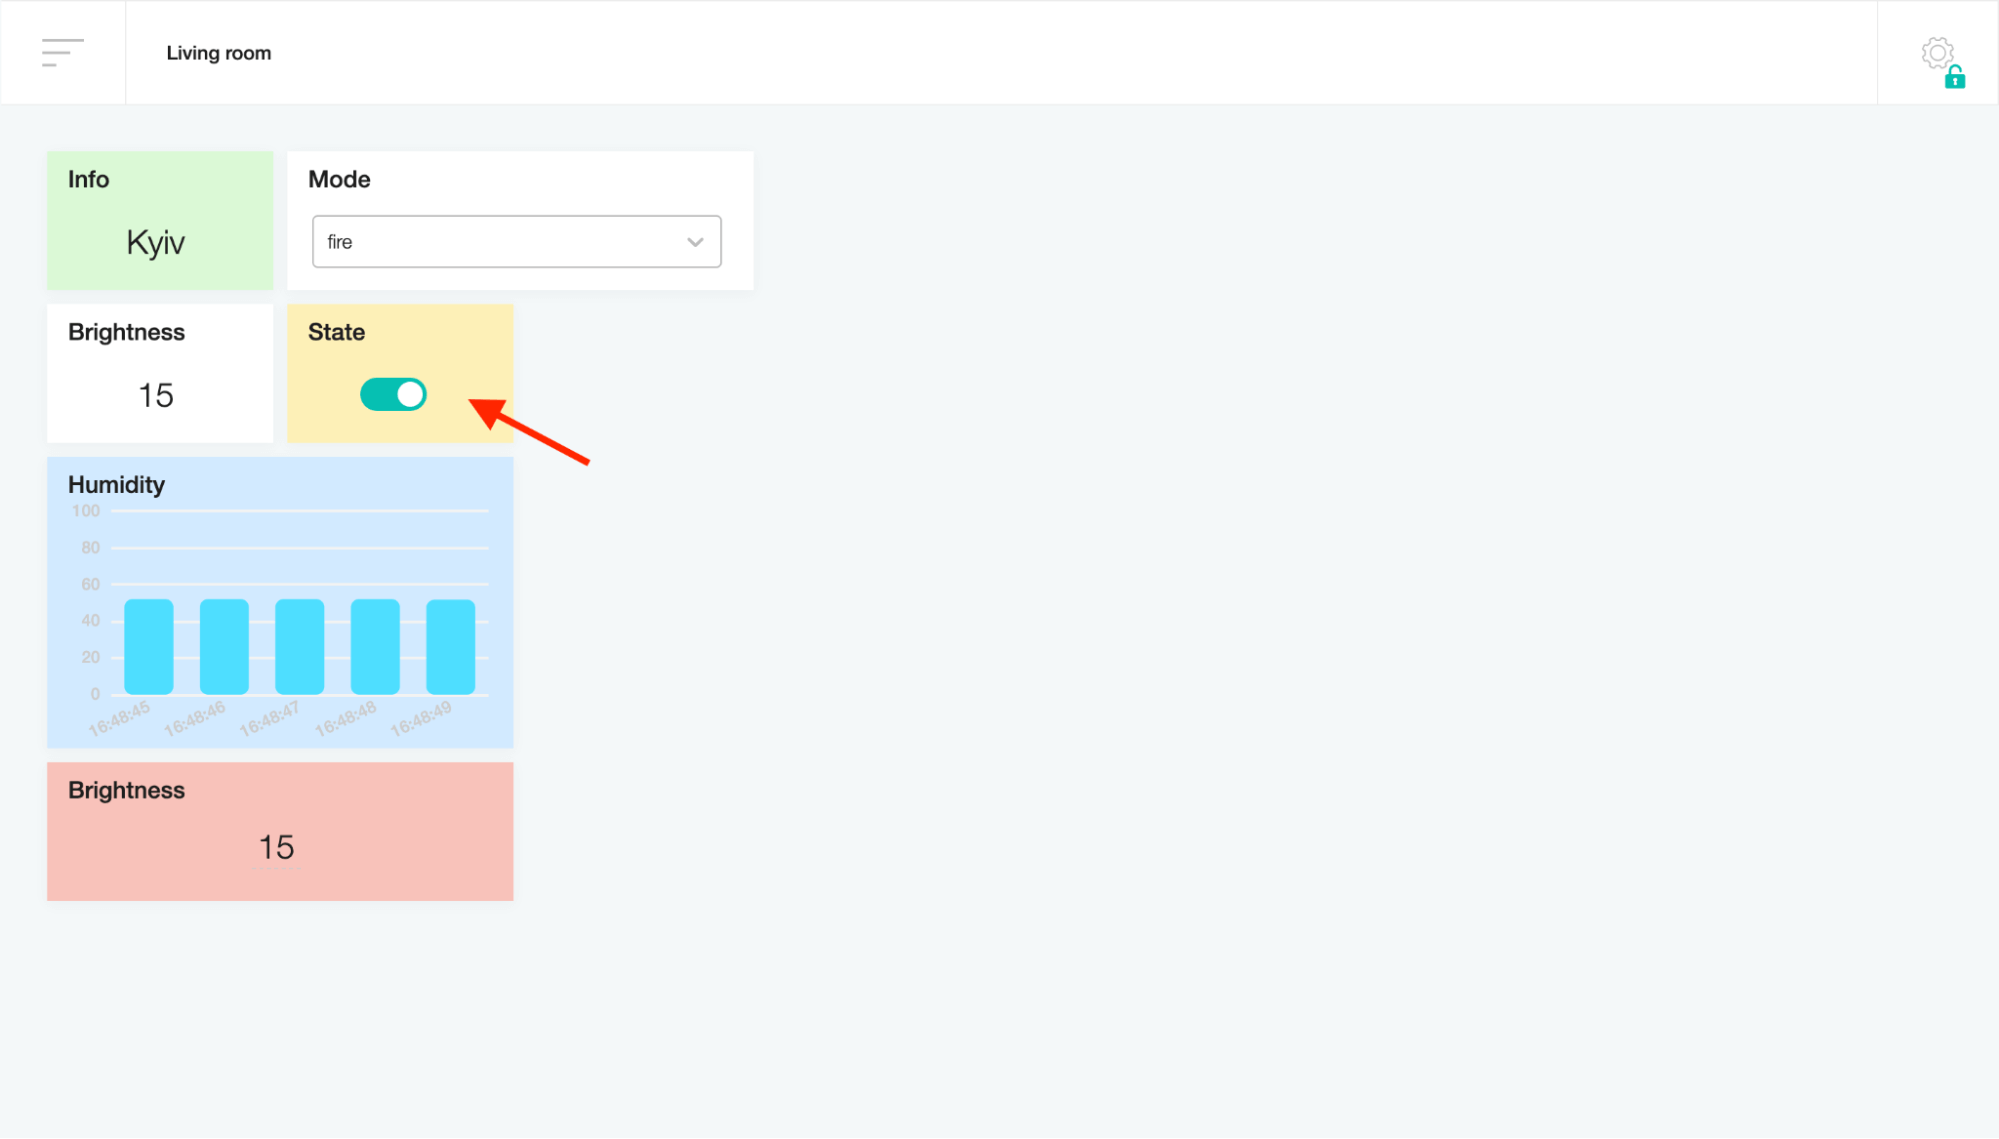
After that, you can click on the toggle and change the state of the device sensor.
Gauge
This widget represents numeric data via a semicircular scale with an arrow.
To create a Gauge widget, fill in the Title field and choose the device sensor in the Entity field on the "Gauge widget settings" modal window.

On the Advanced tab, you can set the minimum and maximum values. When finished, click on the “Save settings” button.

Click the Finish button to add the Gauge widget to the screen.
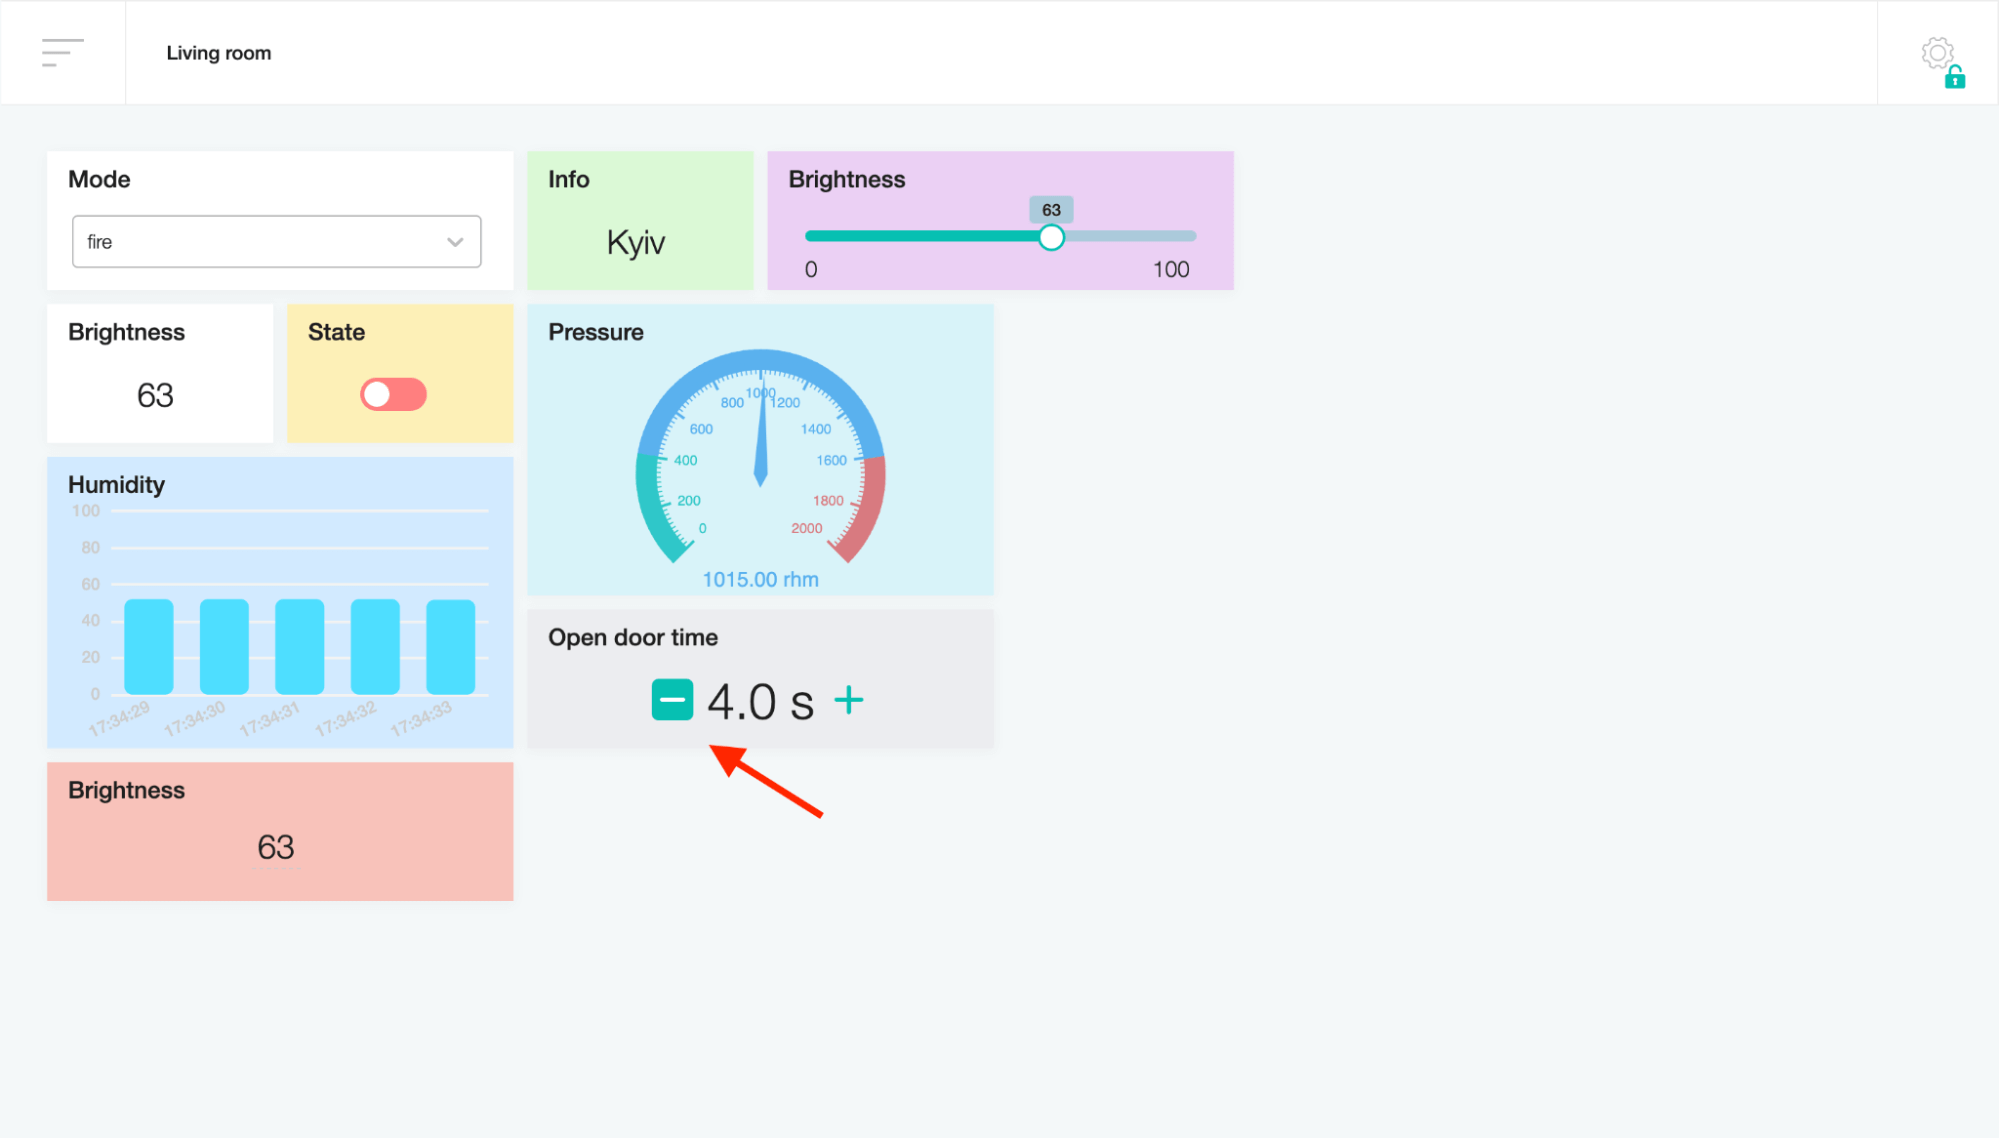
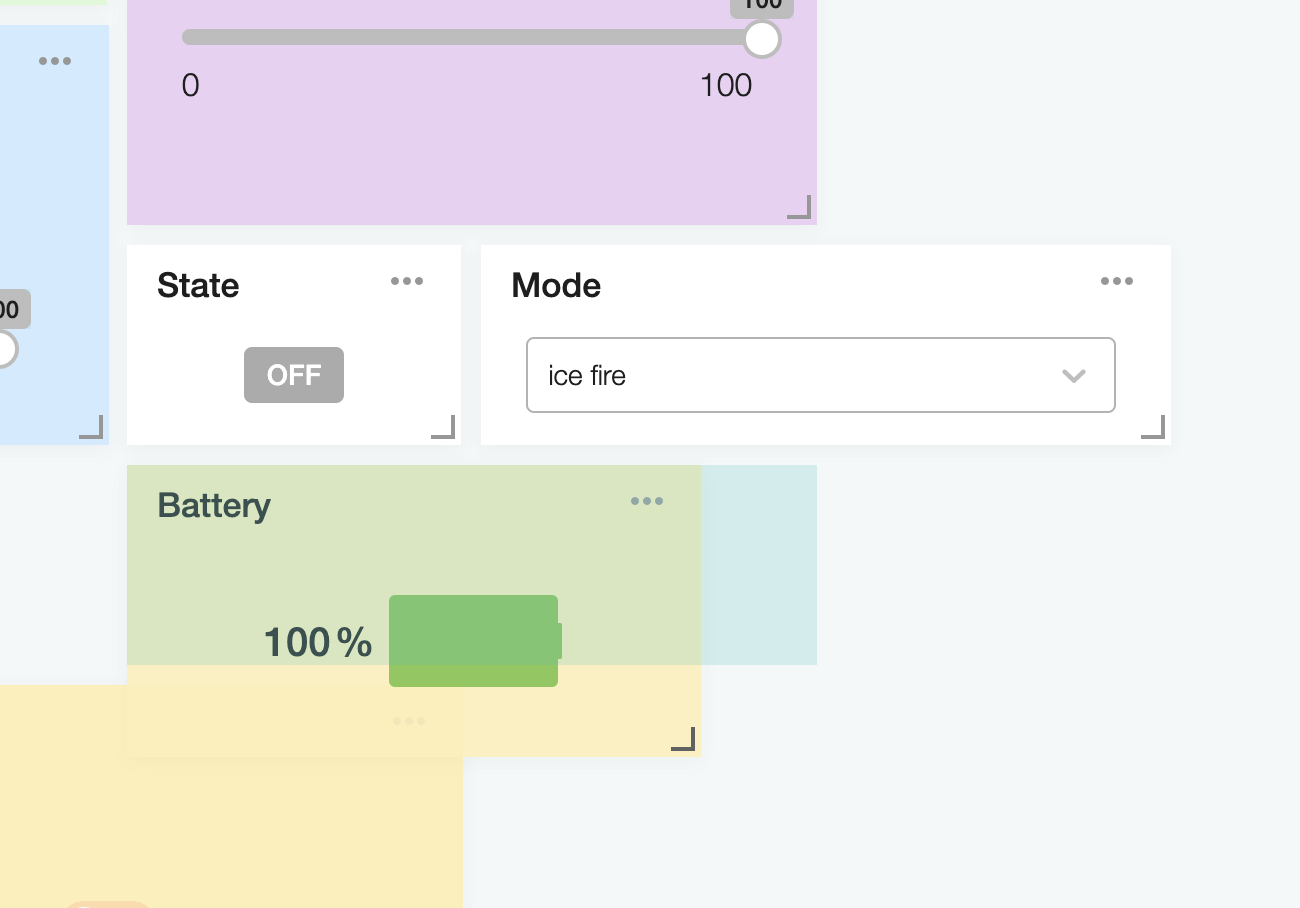
Slider
This widget changes the numeric value of the sensor.
To create a Slider widget, fill in the Title field and choose the device sensor in the Entity field on the "Slider widget settings" modal window.
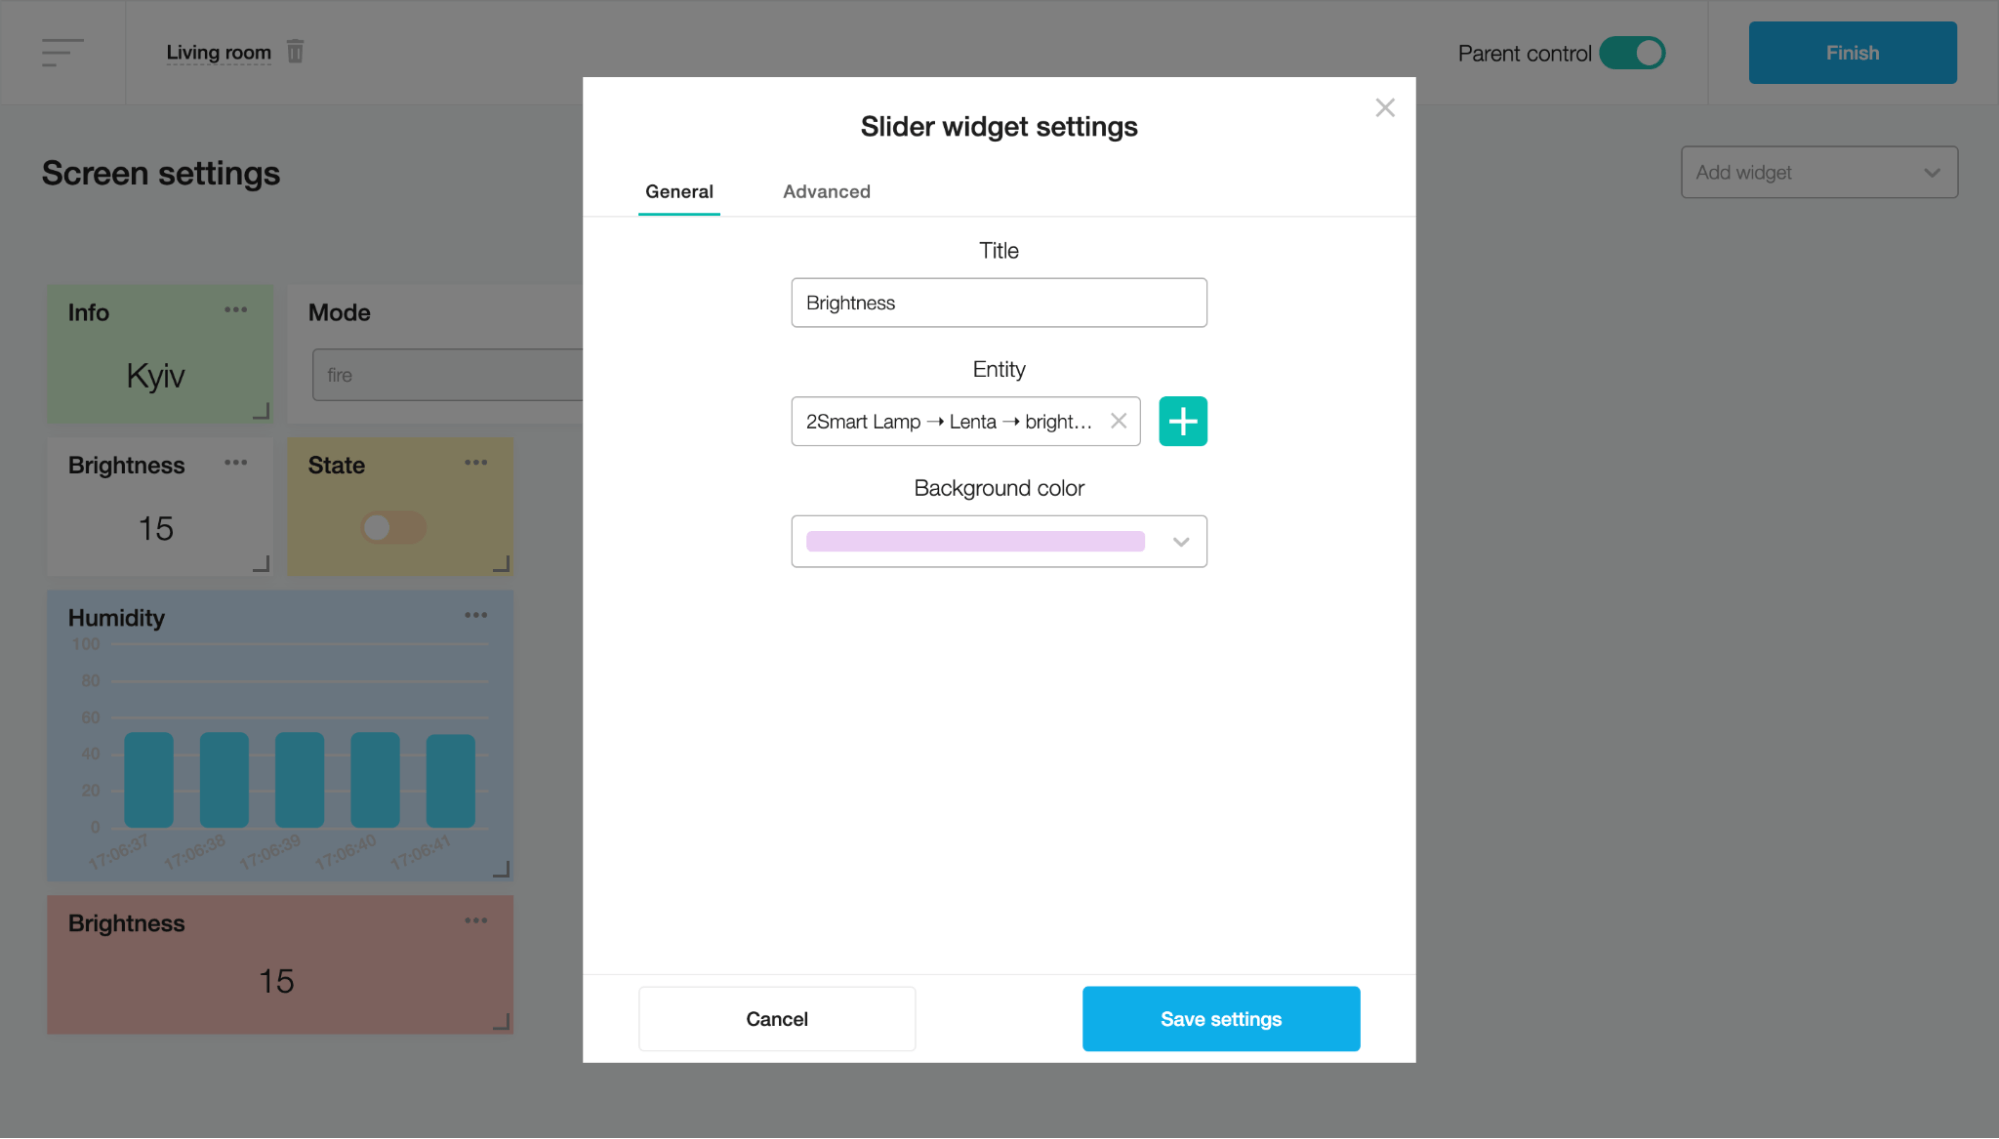
On the Advanced tab, you can edit the step and set the minimum and maximum values. When finished, click on the “Save settings” button.

Click the Finish button to add the Slider widget to the screen.
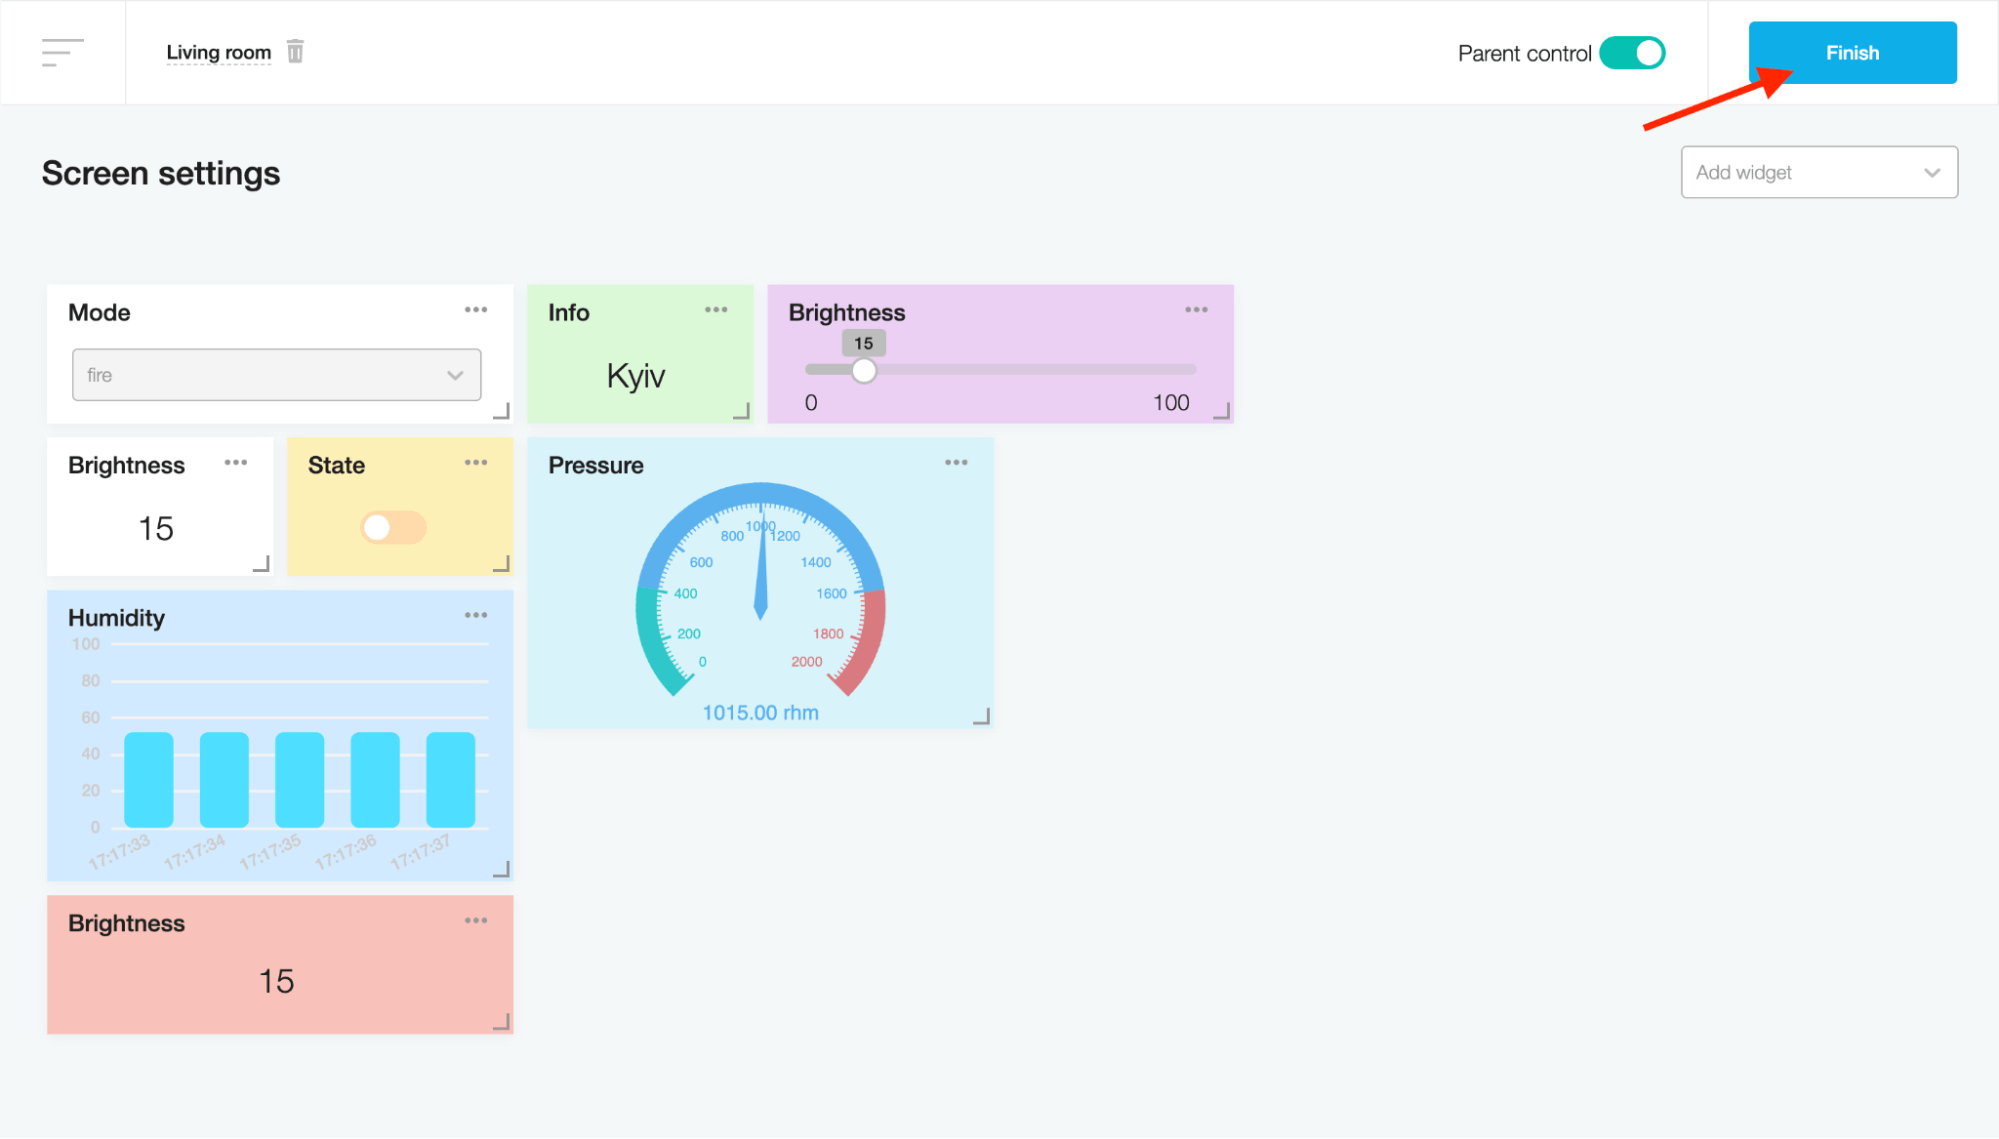
After that, you can change the value of the sensor by dragging the slider to the right or left.

Thermostat
This widget changes the numerical value of the sensor using the “+” and “-” buttons within the configured range.
To create a Thermostat widget, fill in the Title field and choose the device sensor in the Entity field on the "Thermostat widget settings" modal window.

On the Advanced tab, you can edit the step. When finished, click on the “Save settings” button.
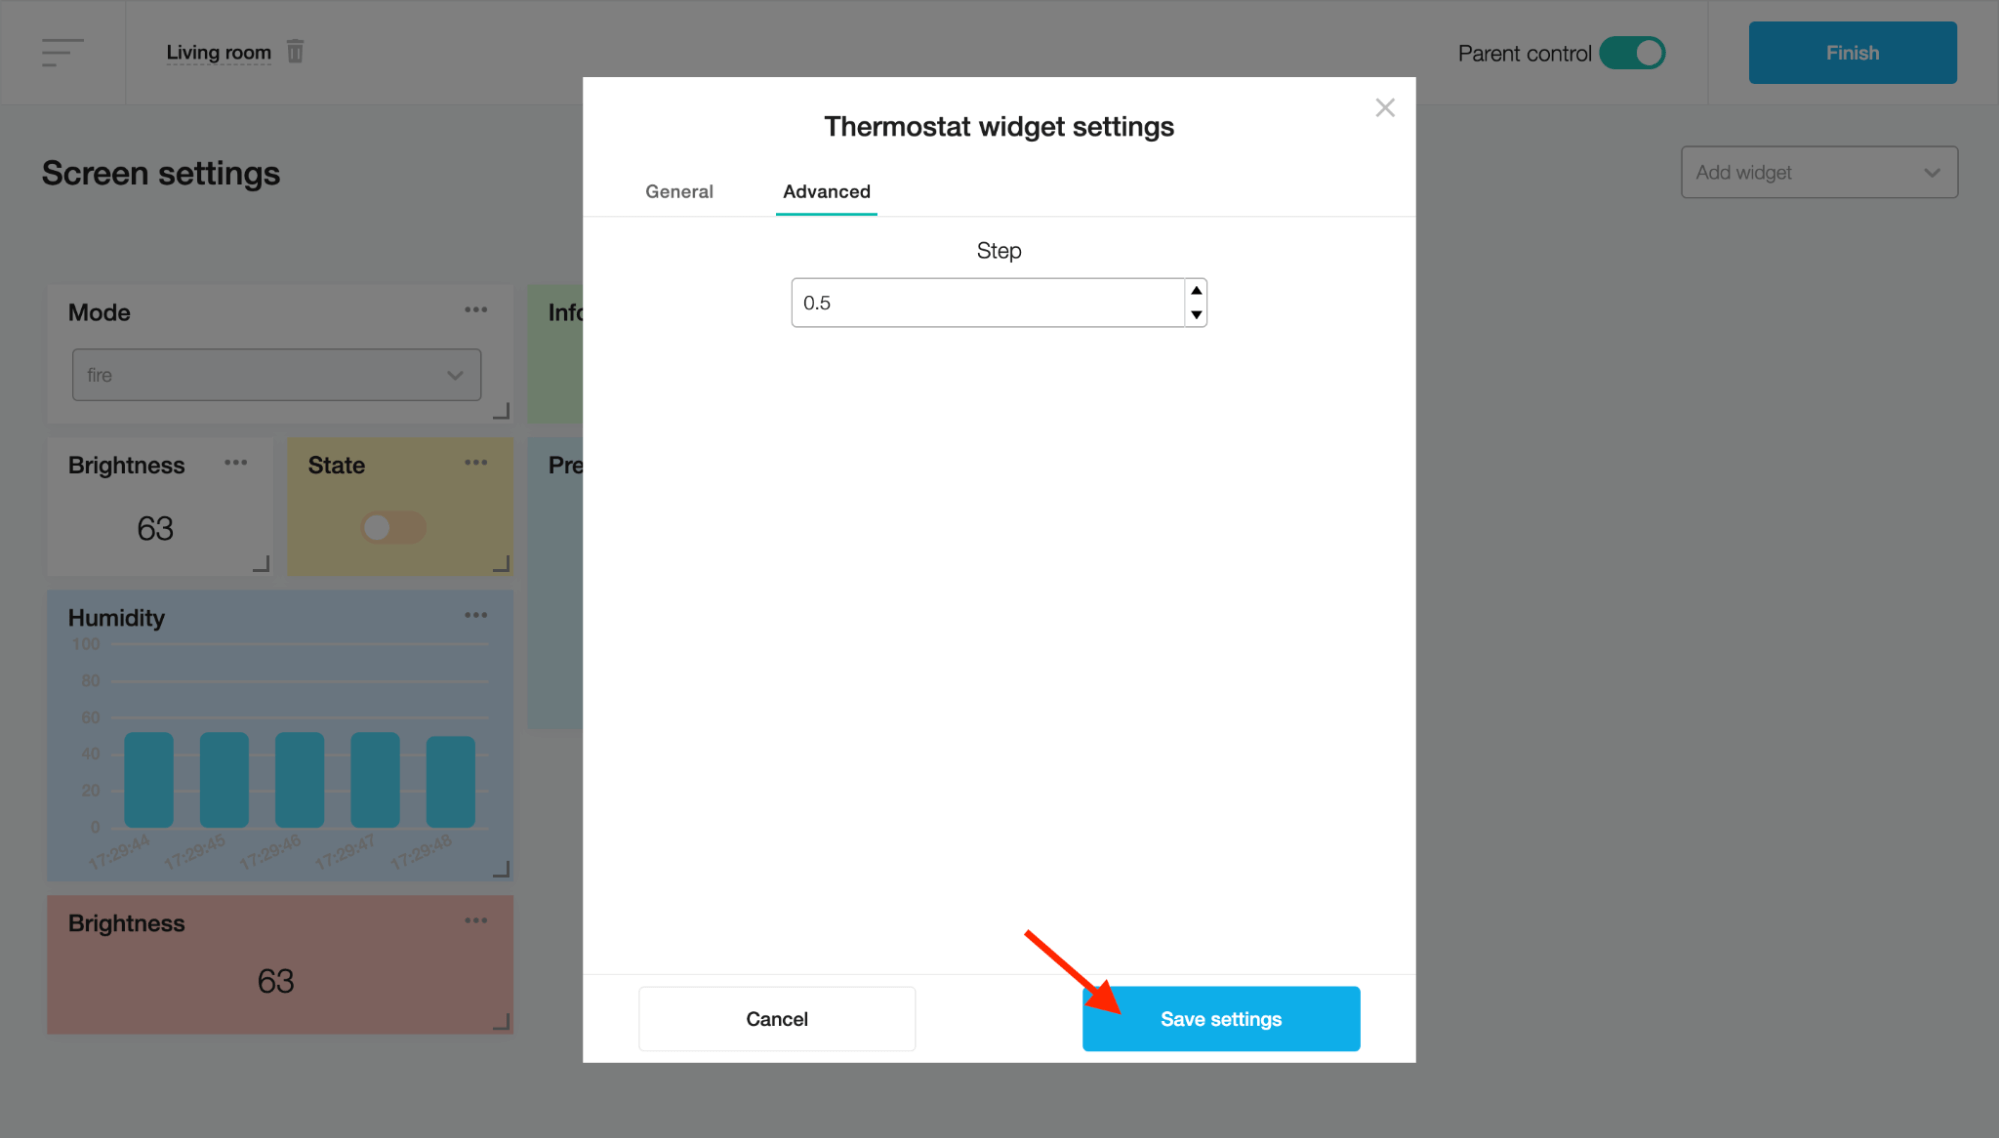
Click the Finish button to add the Thermostat widget to the screen.
After that, you can change the value of the sensor by clicking on the “+” or “-” button.
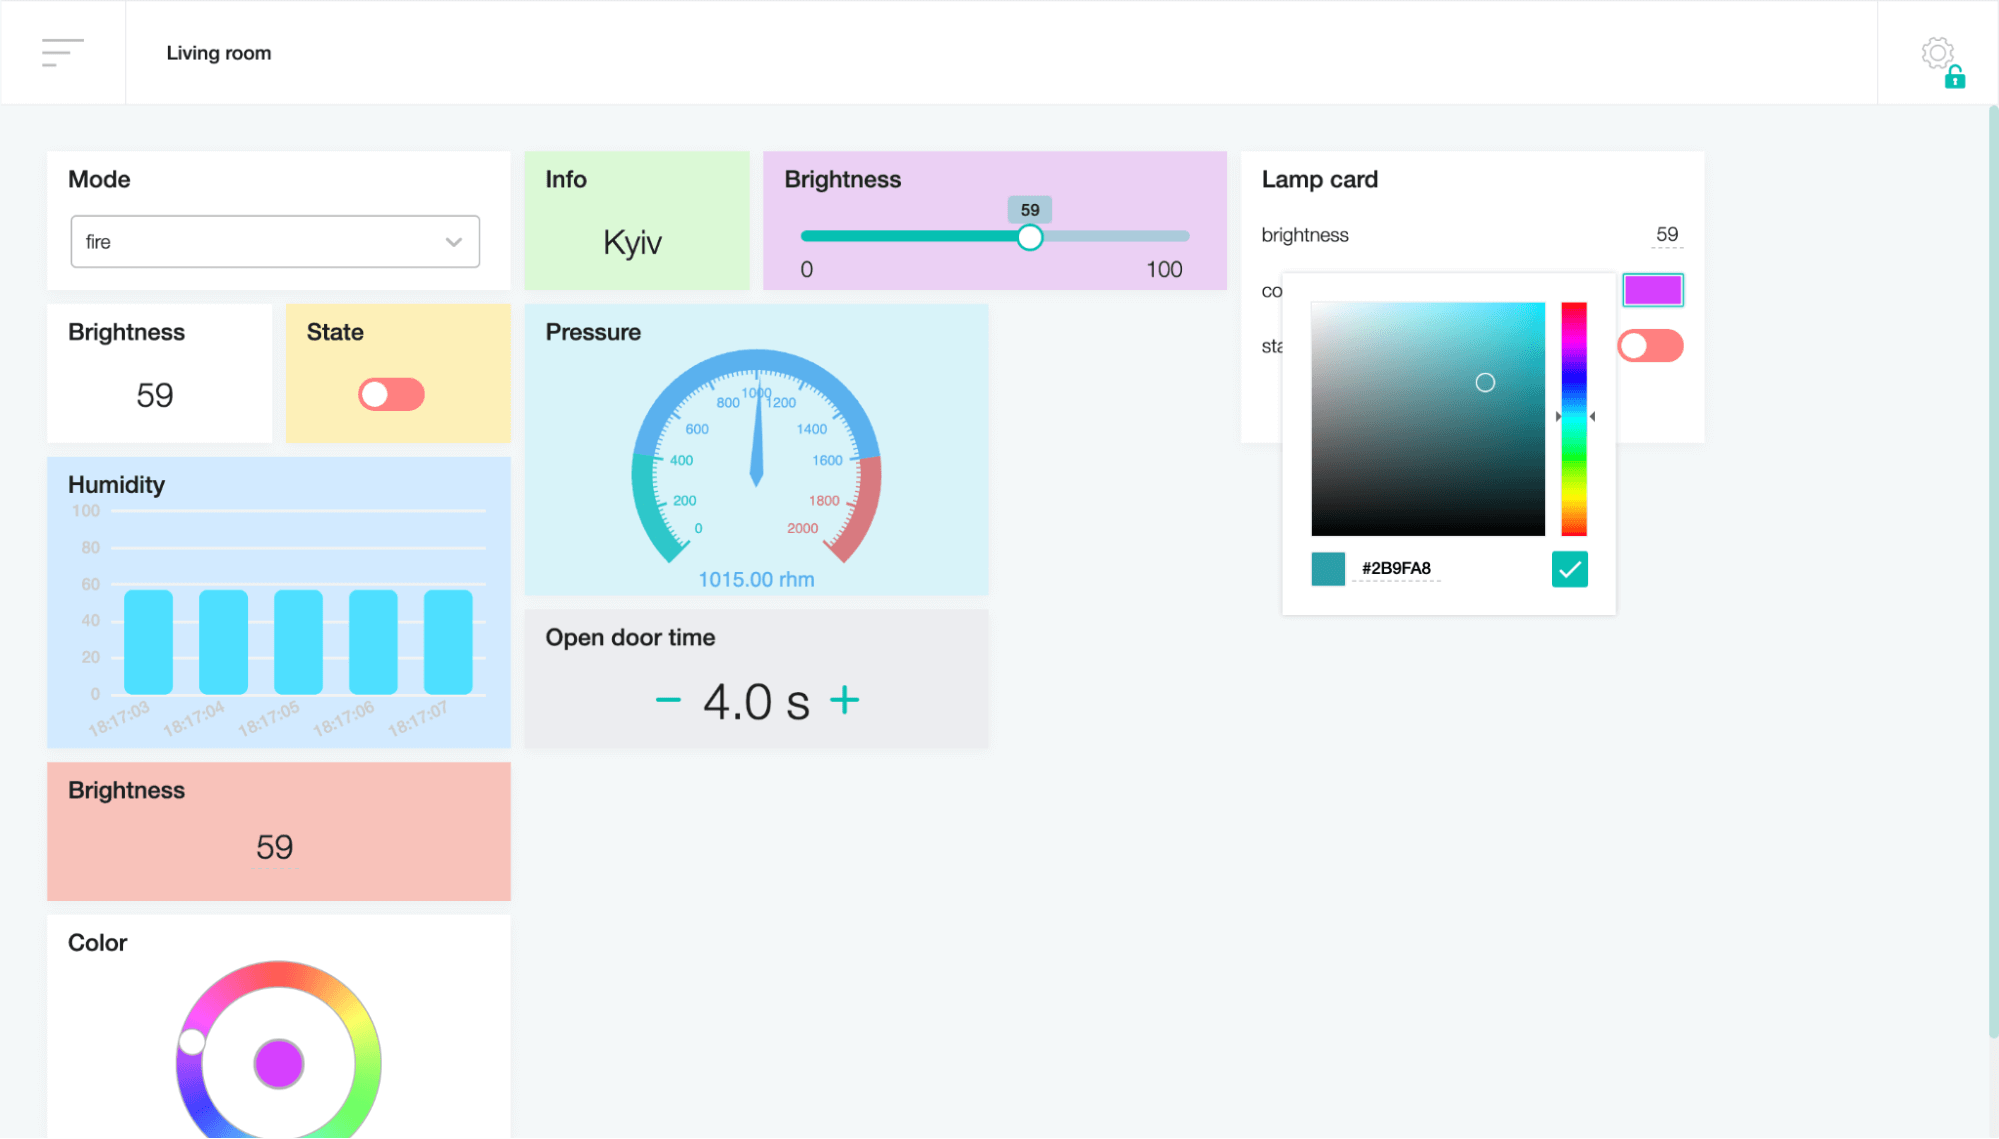
Color
This widget changes the color value of the sensor via a circle palette.
To create a Color widget, fill in the Title field and choose the device sensor in the Entity field on the "Color widget settings" modal window.
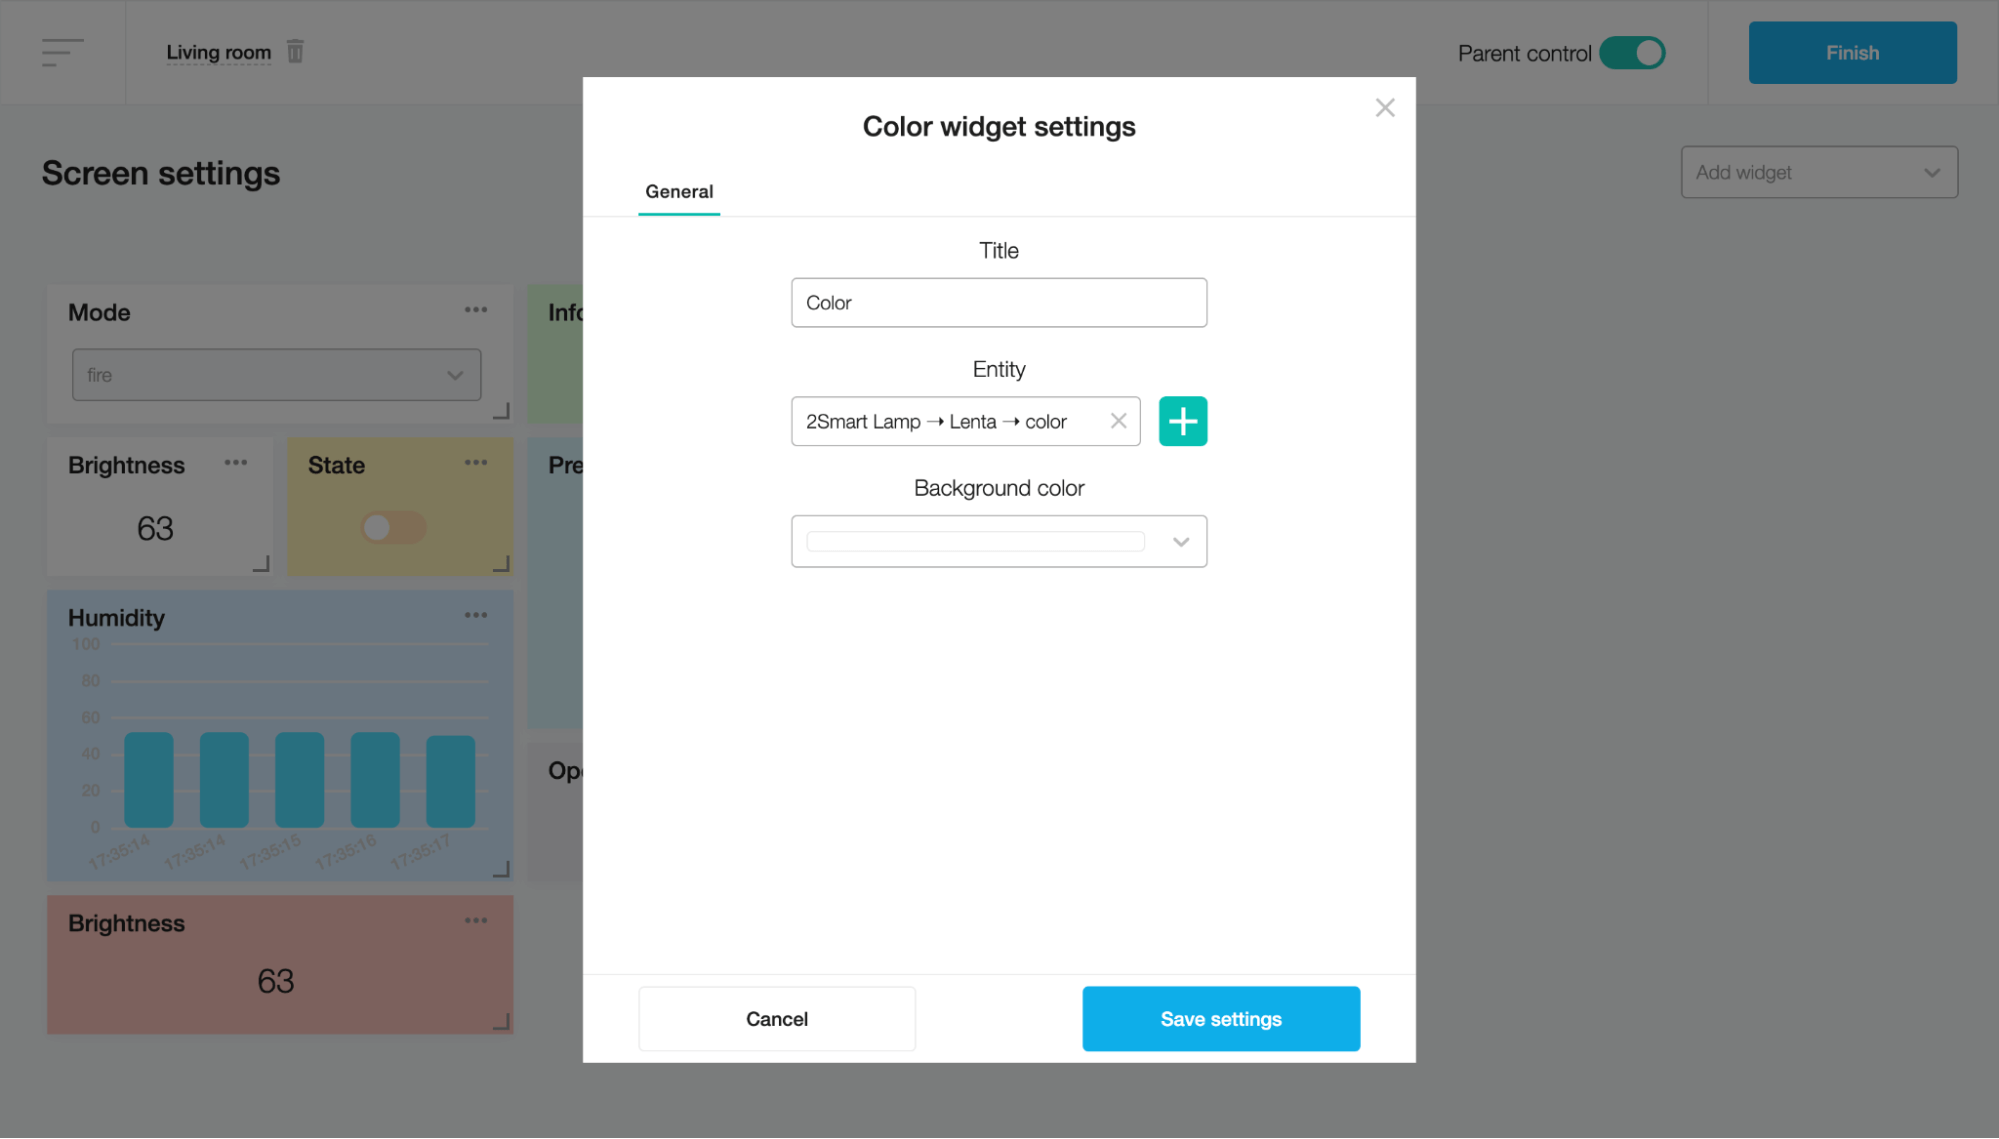
Click on the “Save settings” button.

Click the Finish button to add the Color widget to the screen.
After that, you can change the sensor value by clicking on the selected sector of the color palette.
Card
This widget organizes several sensors into one widget represented as a card.
To create a Card widget, fill in the Title field on the "Card widget settings" modal window.
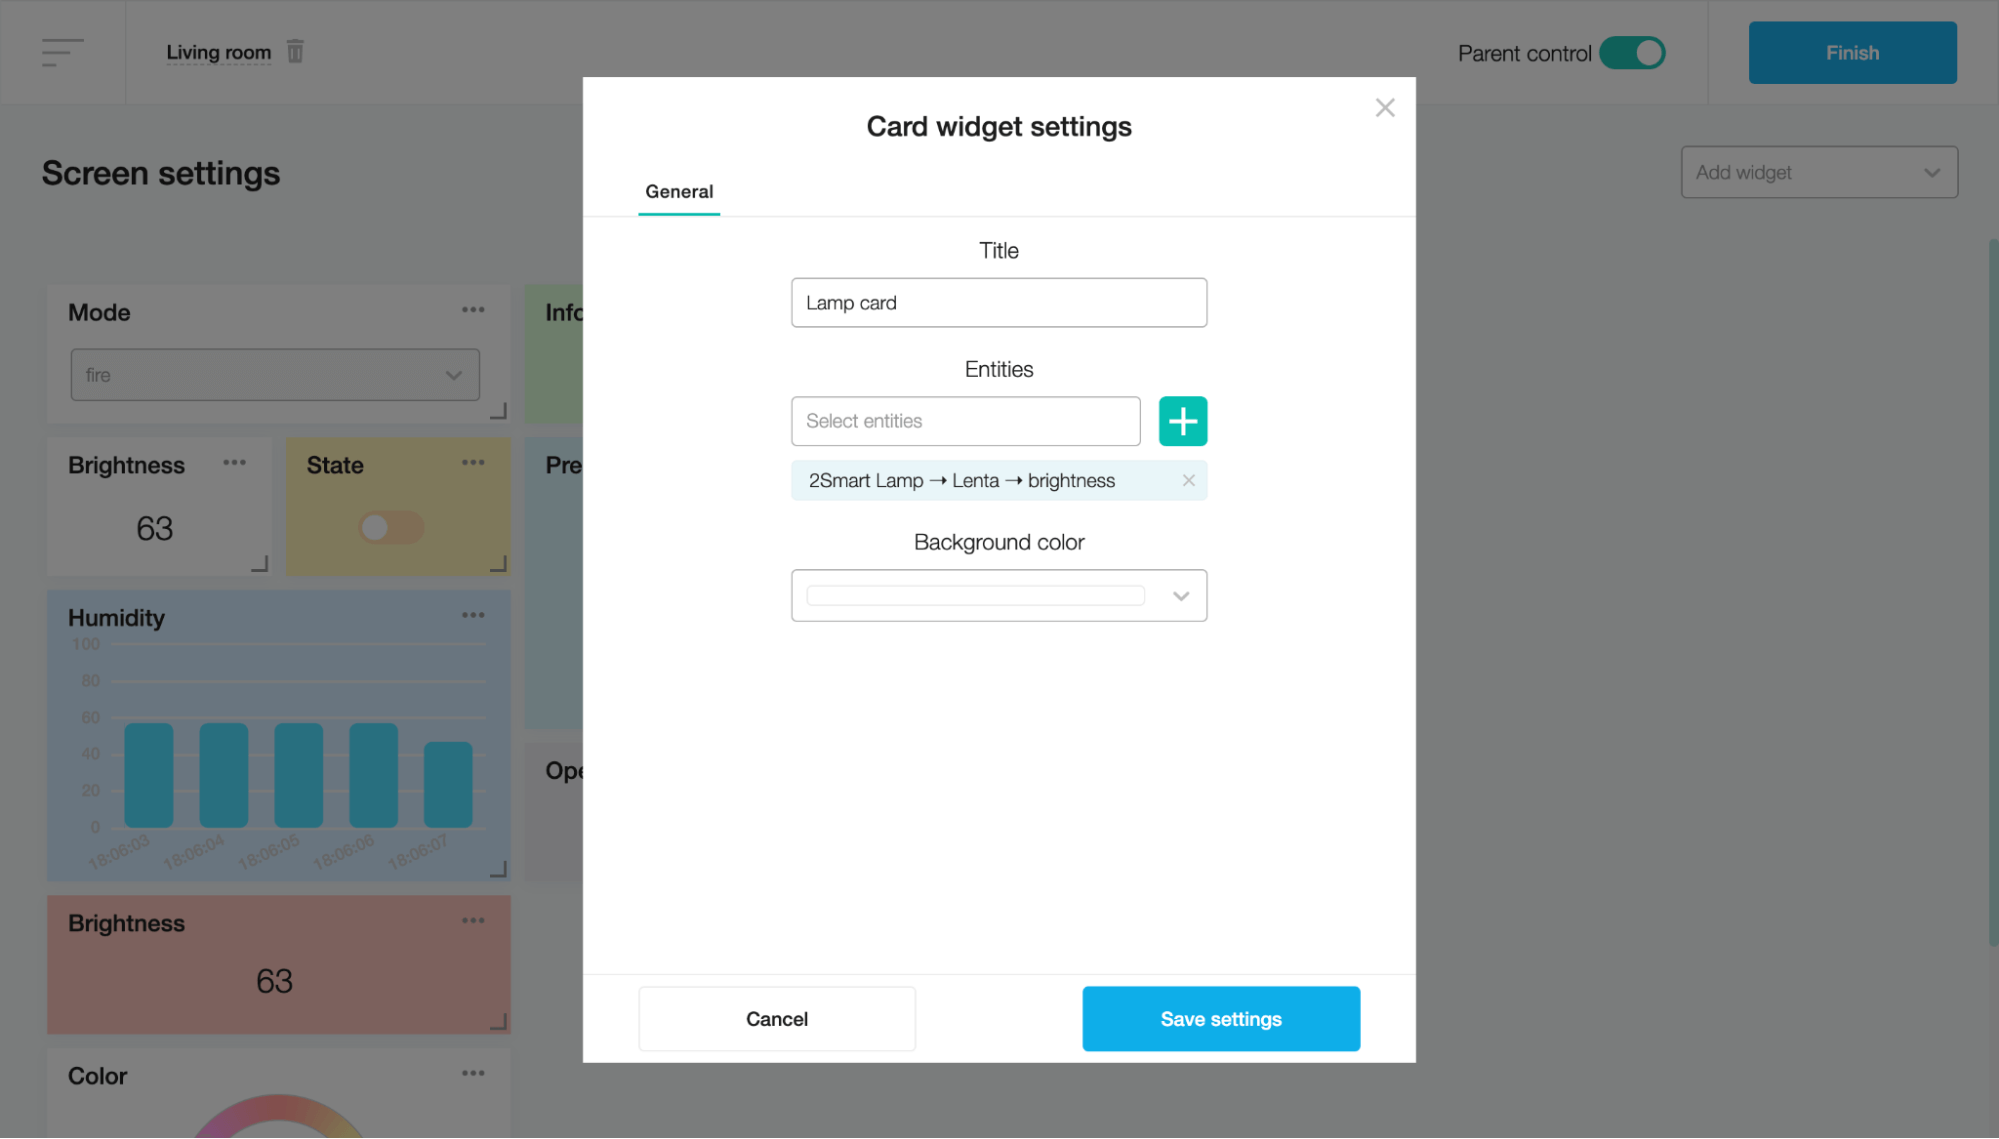
Click the plus button next to the Entities field and select the sensors whose values will be presented on the card. When finished, click on the “Save settings” button.
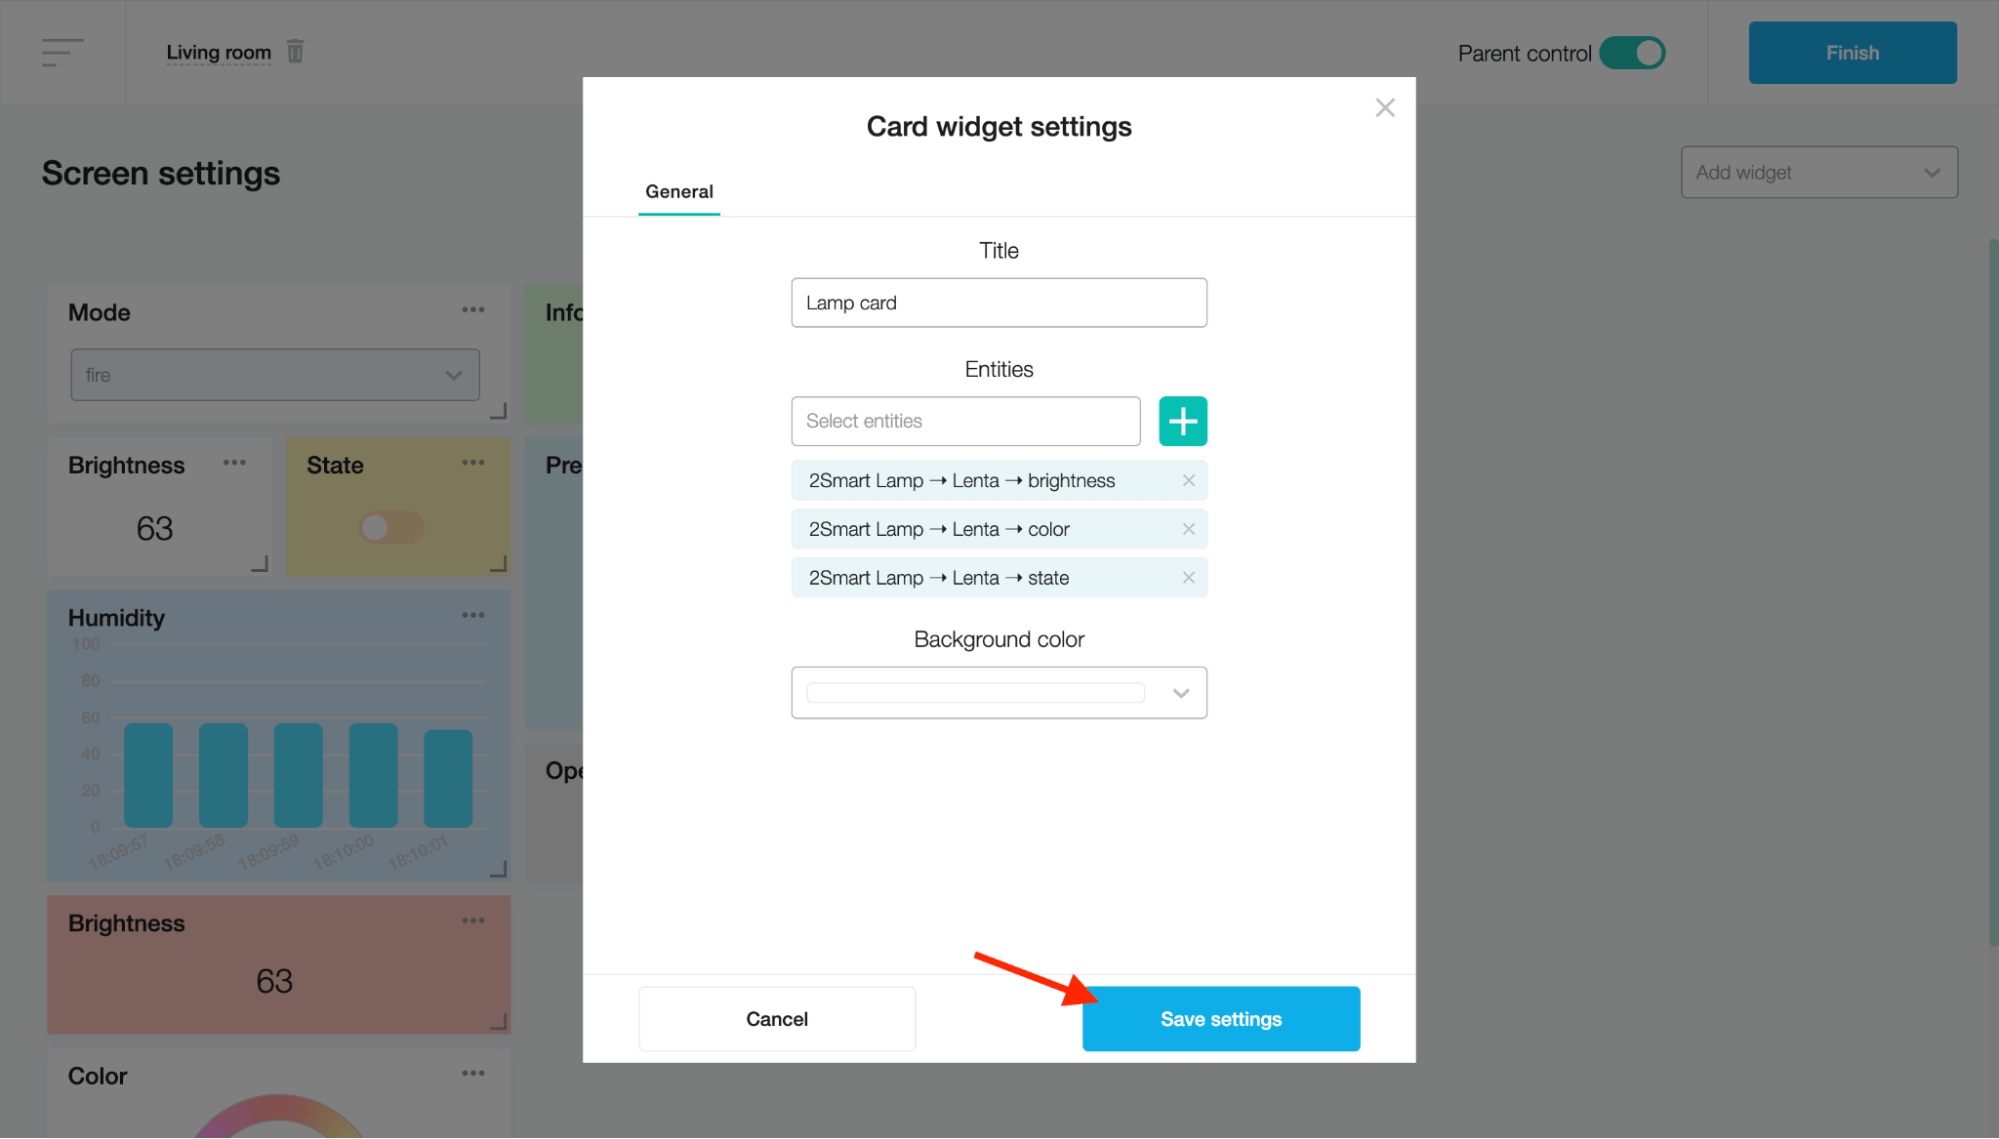
Adjust the card size and click the Finish button to add the Card widget to the screen.
After that, you can control the values of several sensors using one card.
Push button
This widget activates the device sensor.
To create a Push button widget, fill in the Title field and choose the device sensor in the Entity field on the "Push button widget settings" modal window.

Click on the “Save settings” button.
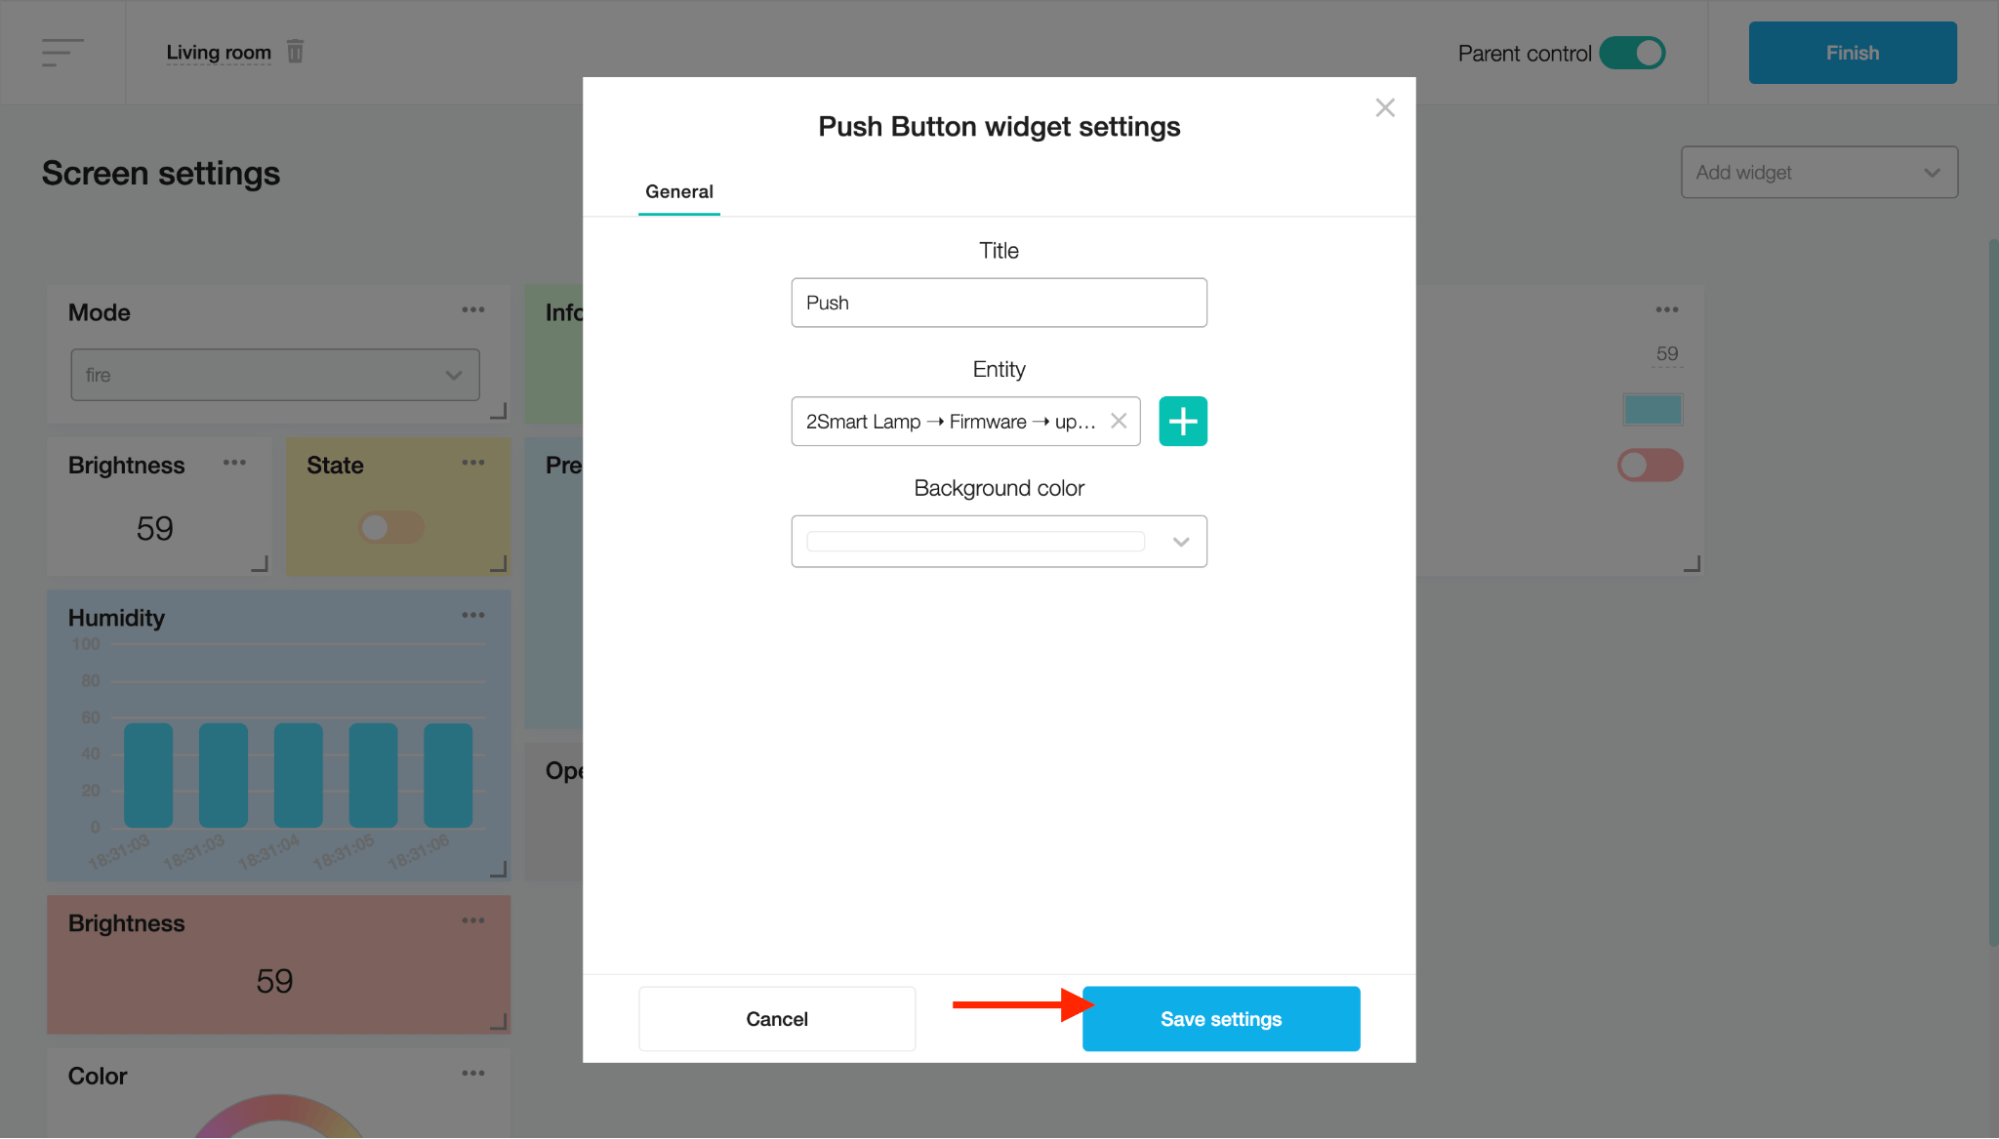
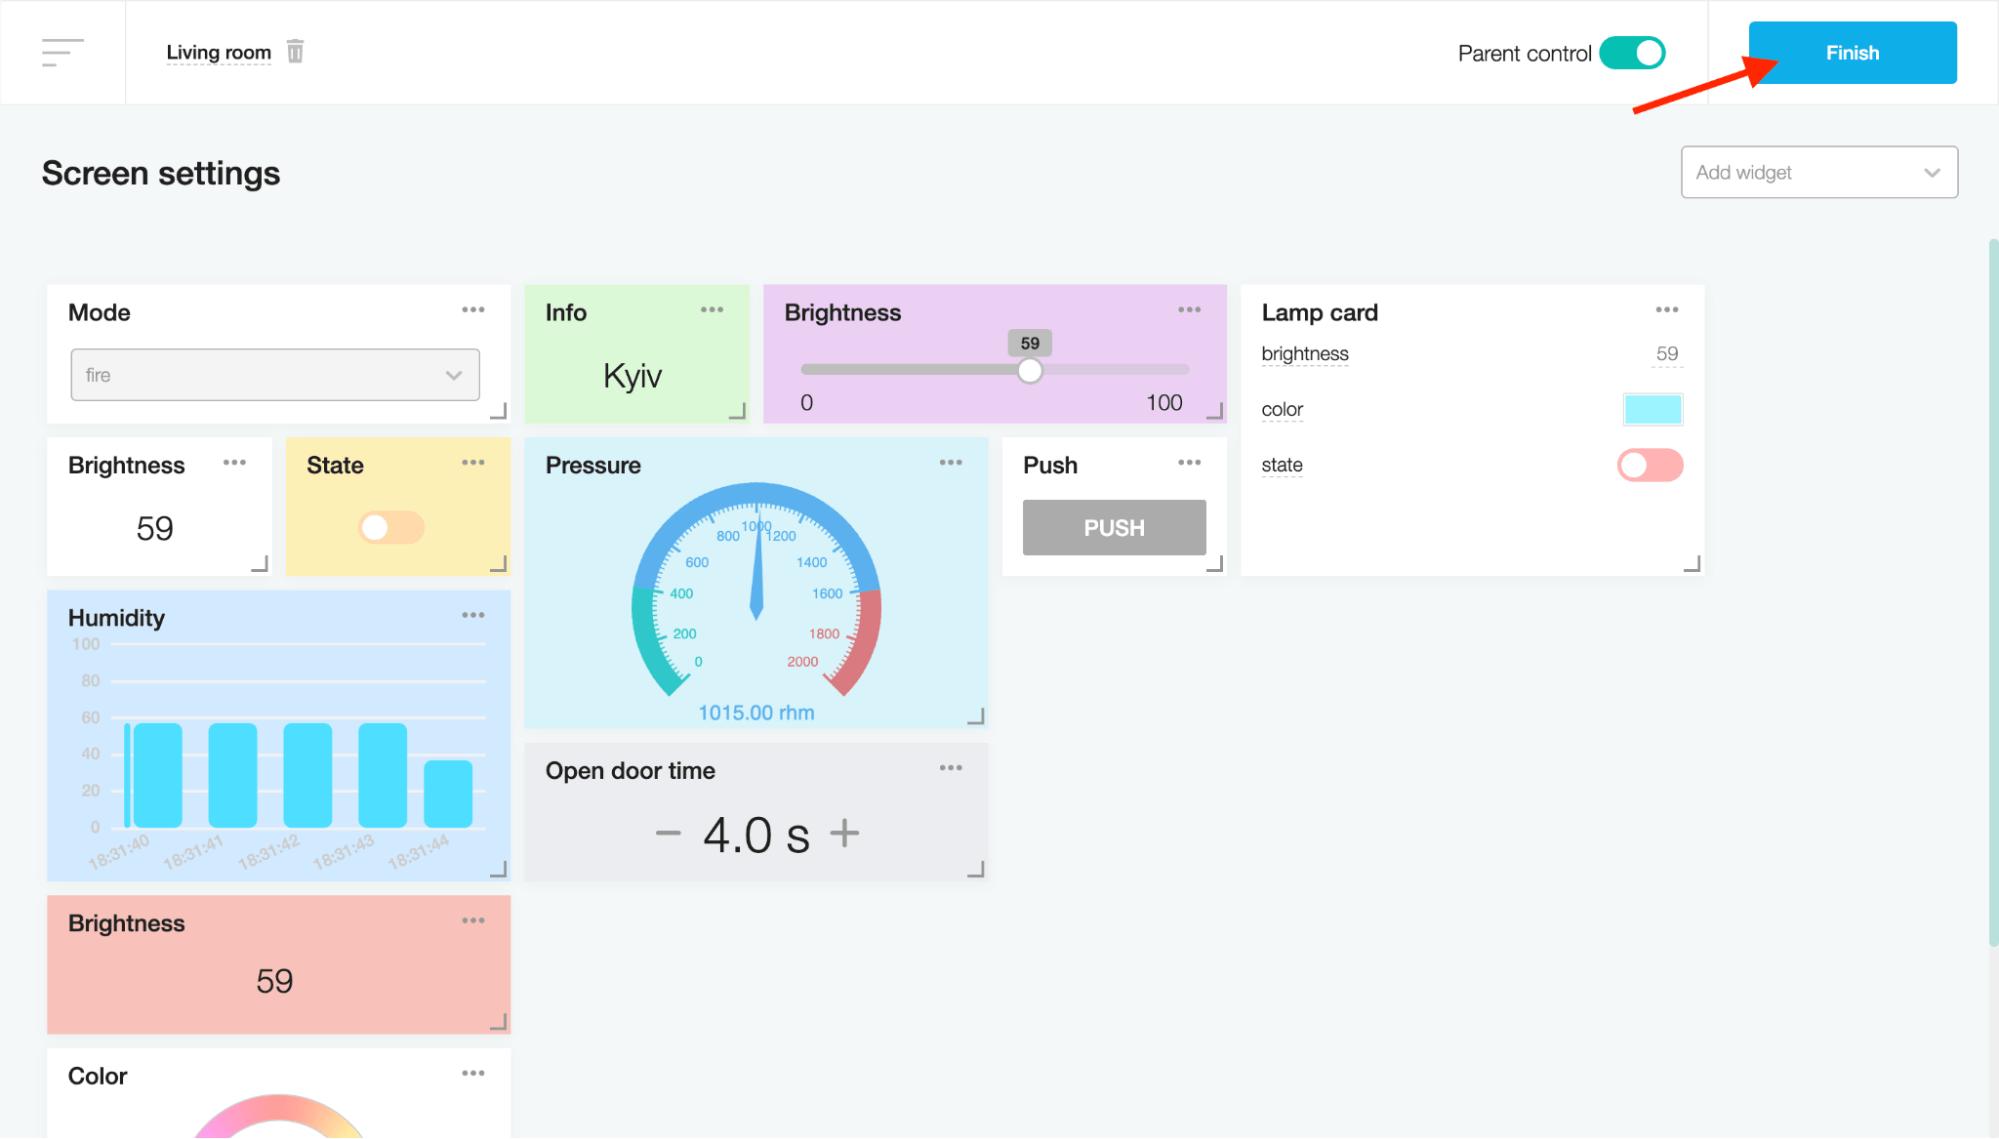
Click the Finish button to add the Push button widget to the screen.
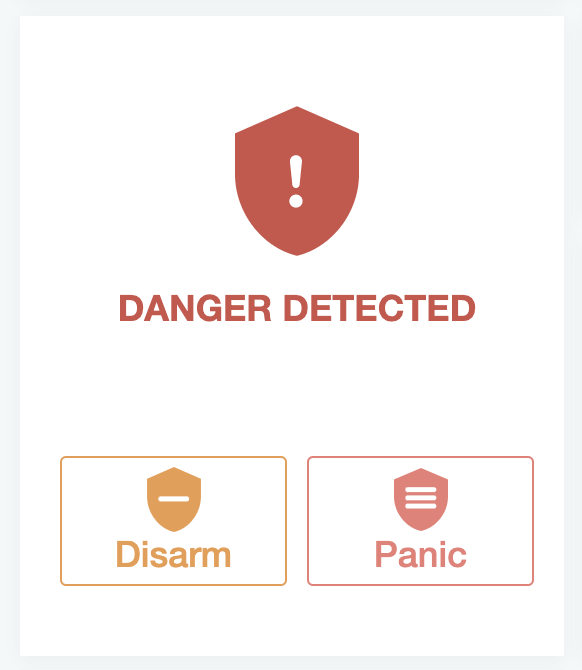
Alarm
This widget activates the emergency sensor according to the security status.
To create an Alarm widget, fill in the Title field and choose the device sensors for alarm state, emergency state, and a sensor for the alarm button. An alarm state is responsible for the armed or disarmed condition of the system. If the emergency state is true and the system is armed, the system condition will change to danger.
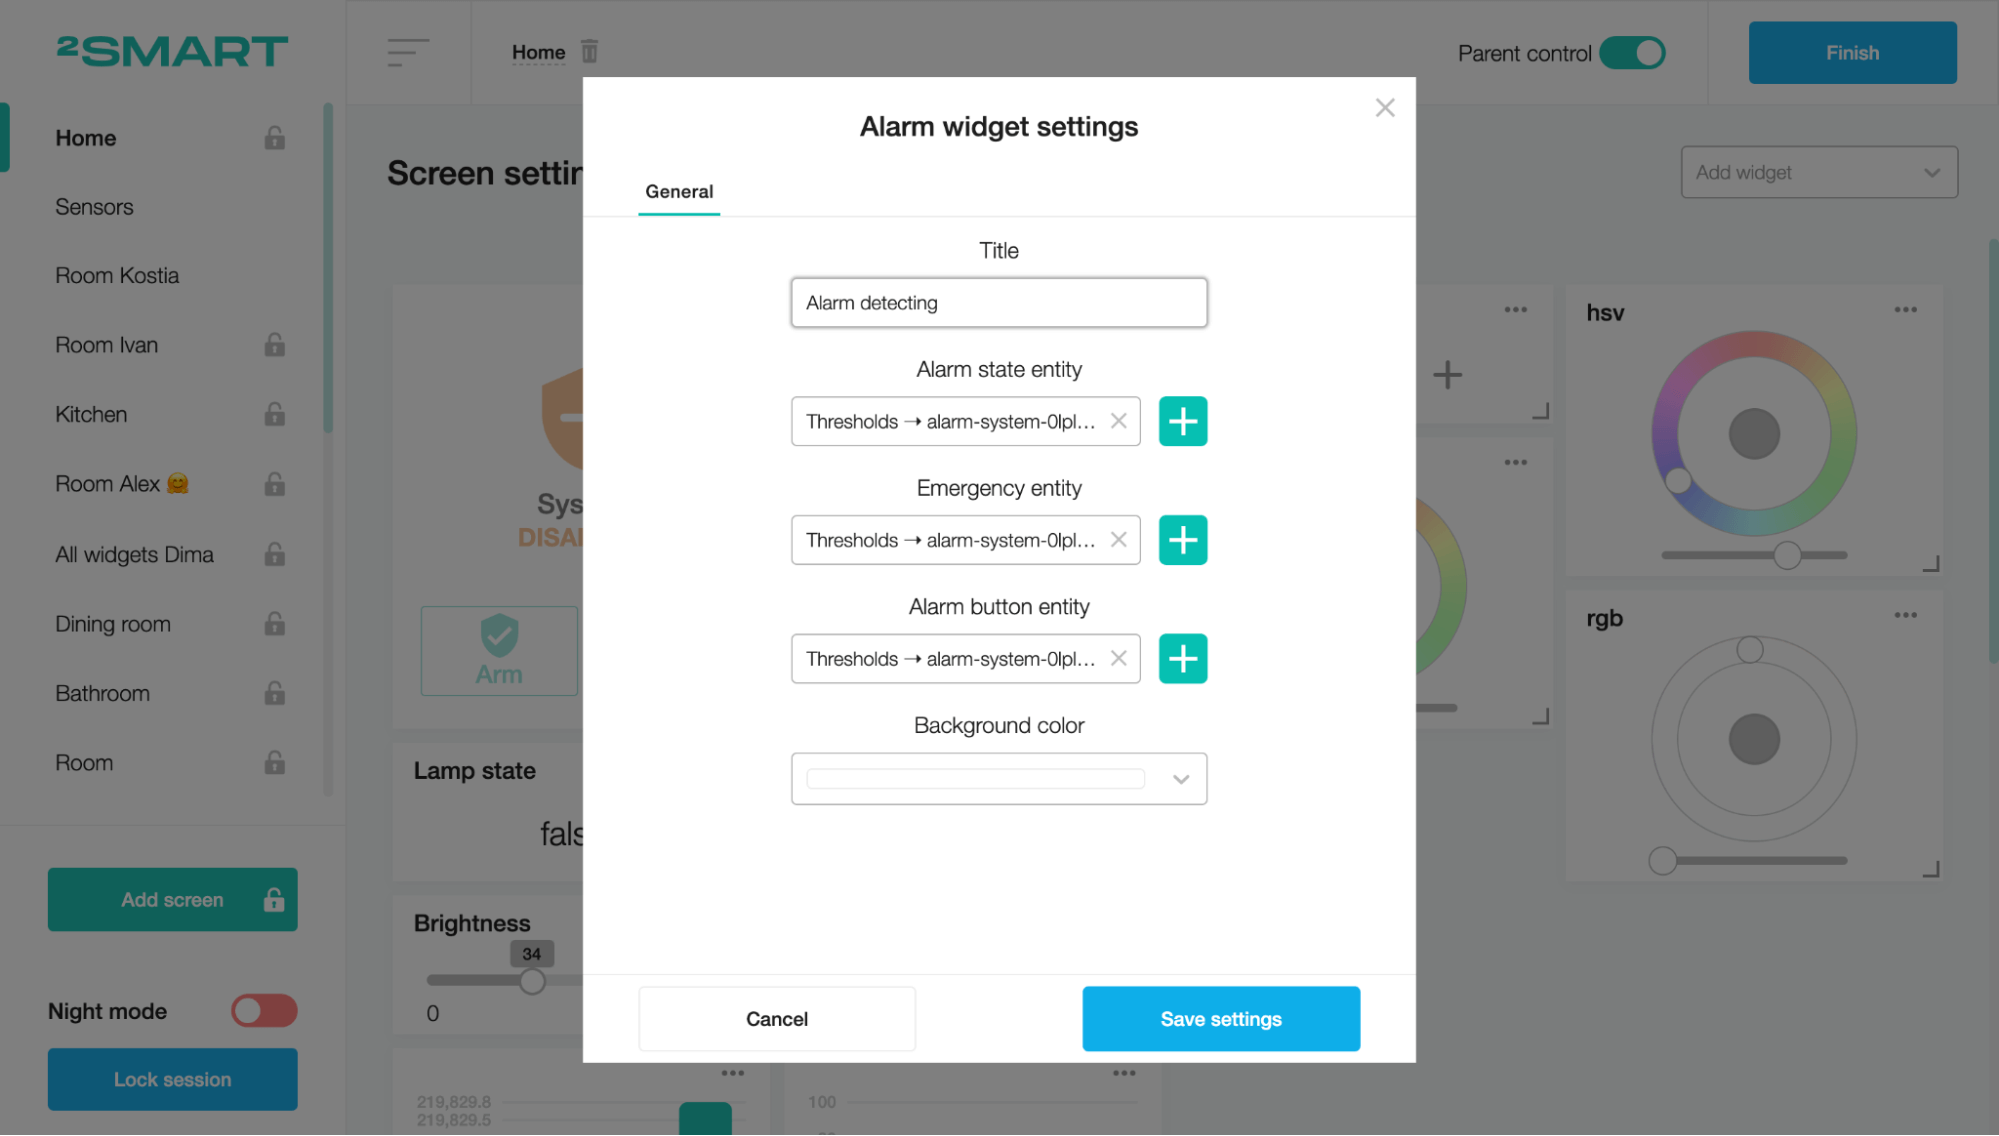
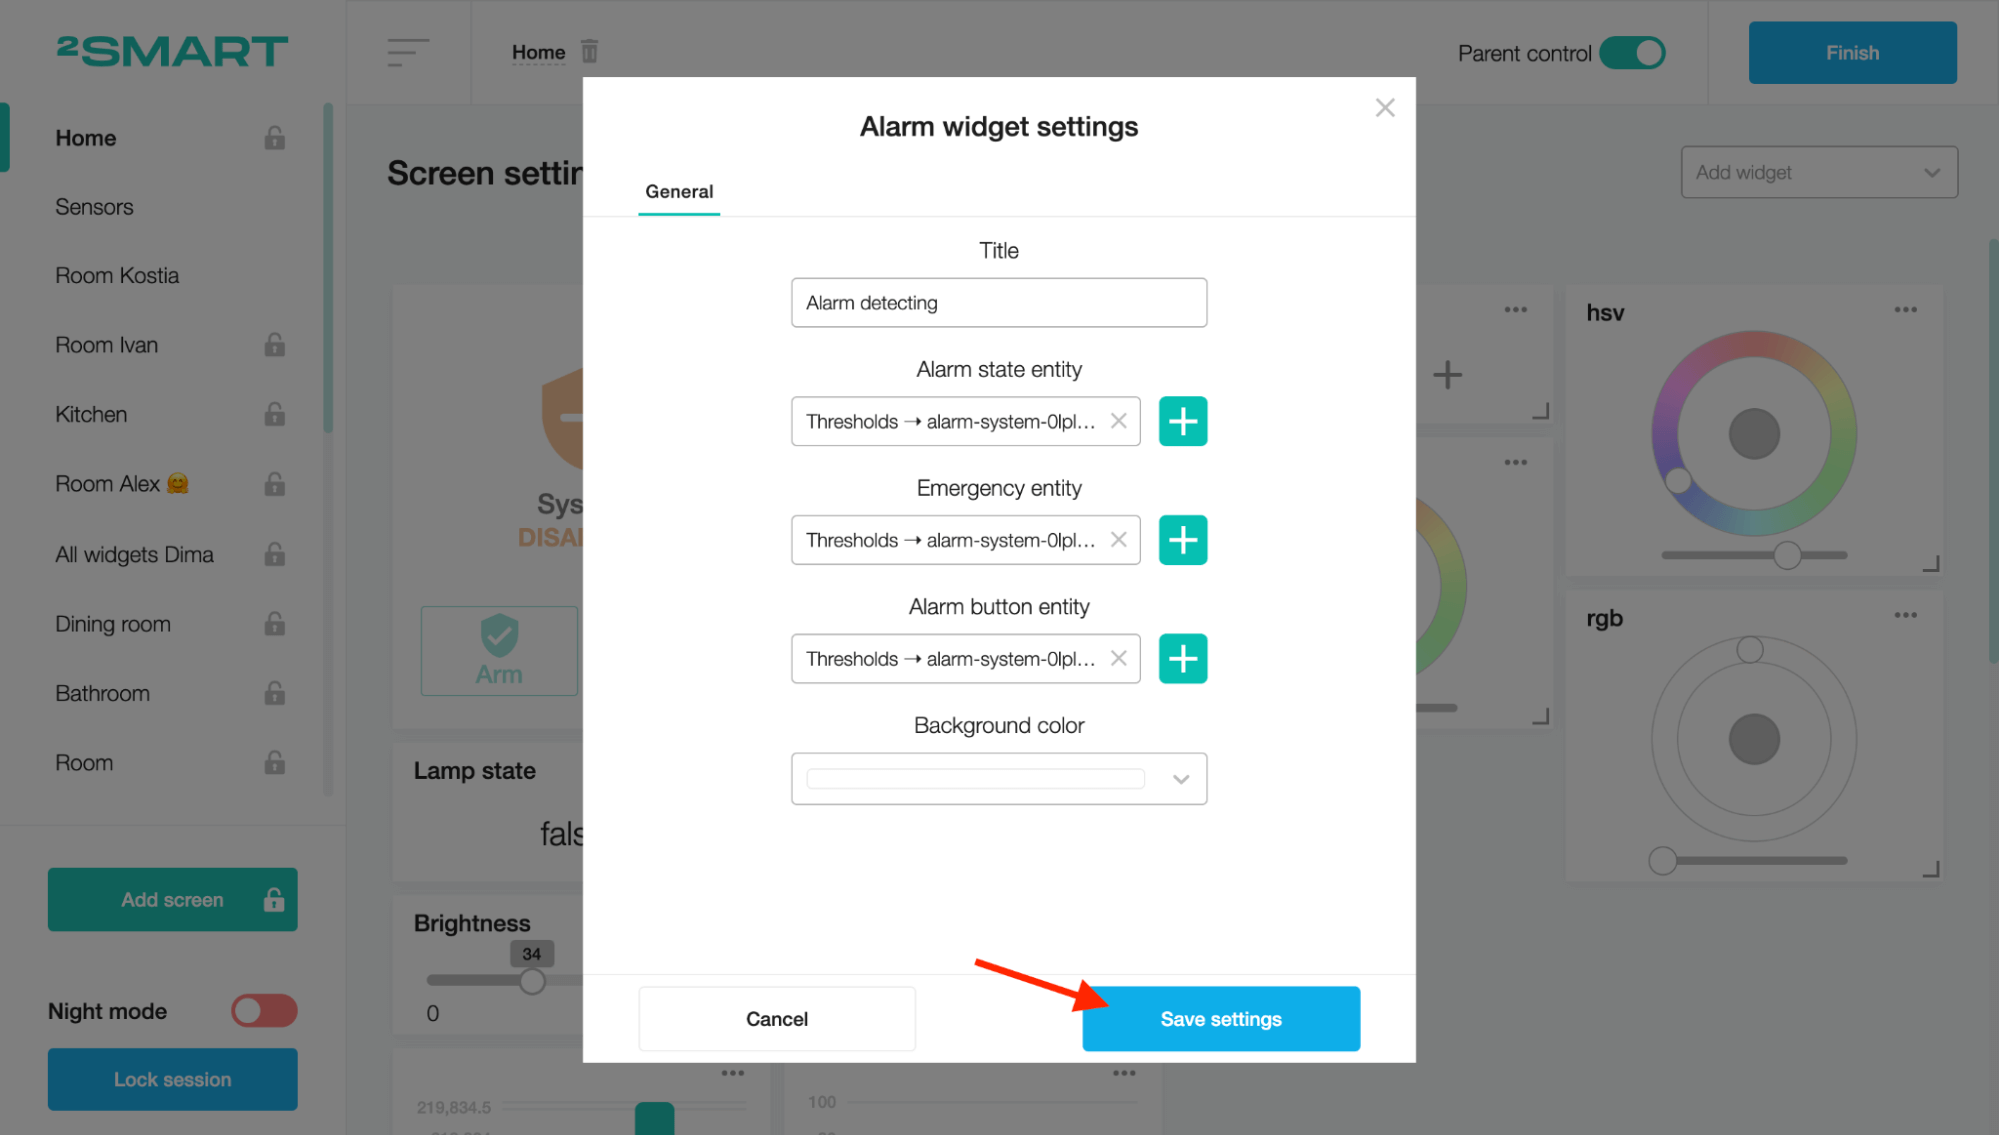
Click on the “Save settings” button.
Click the Finish button to add the Alarm widget to the screen.
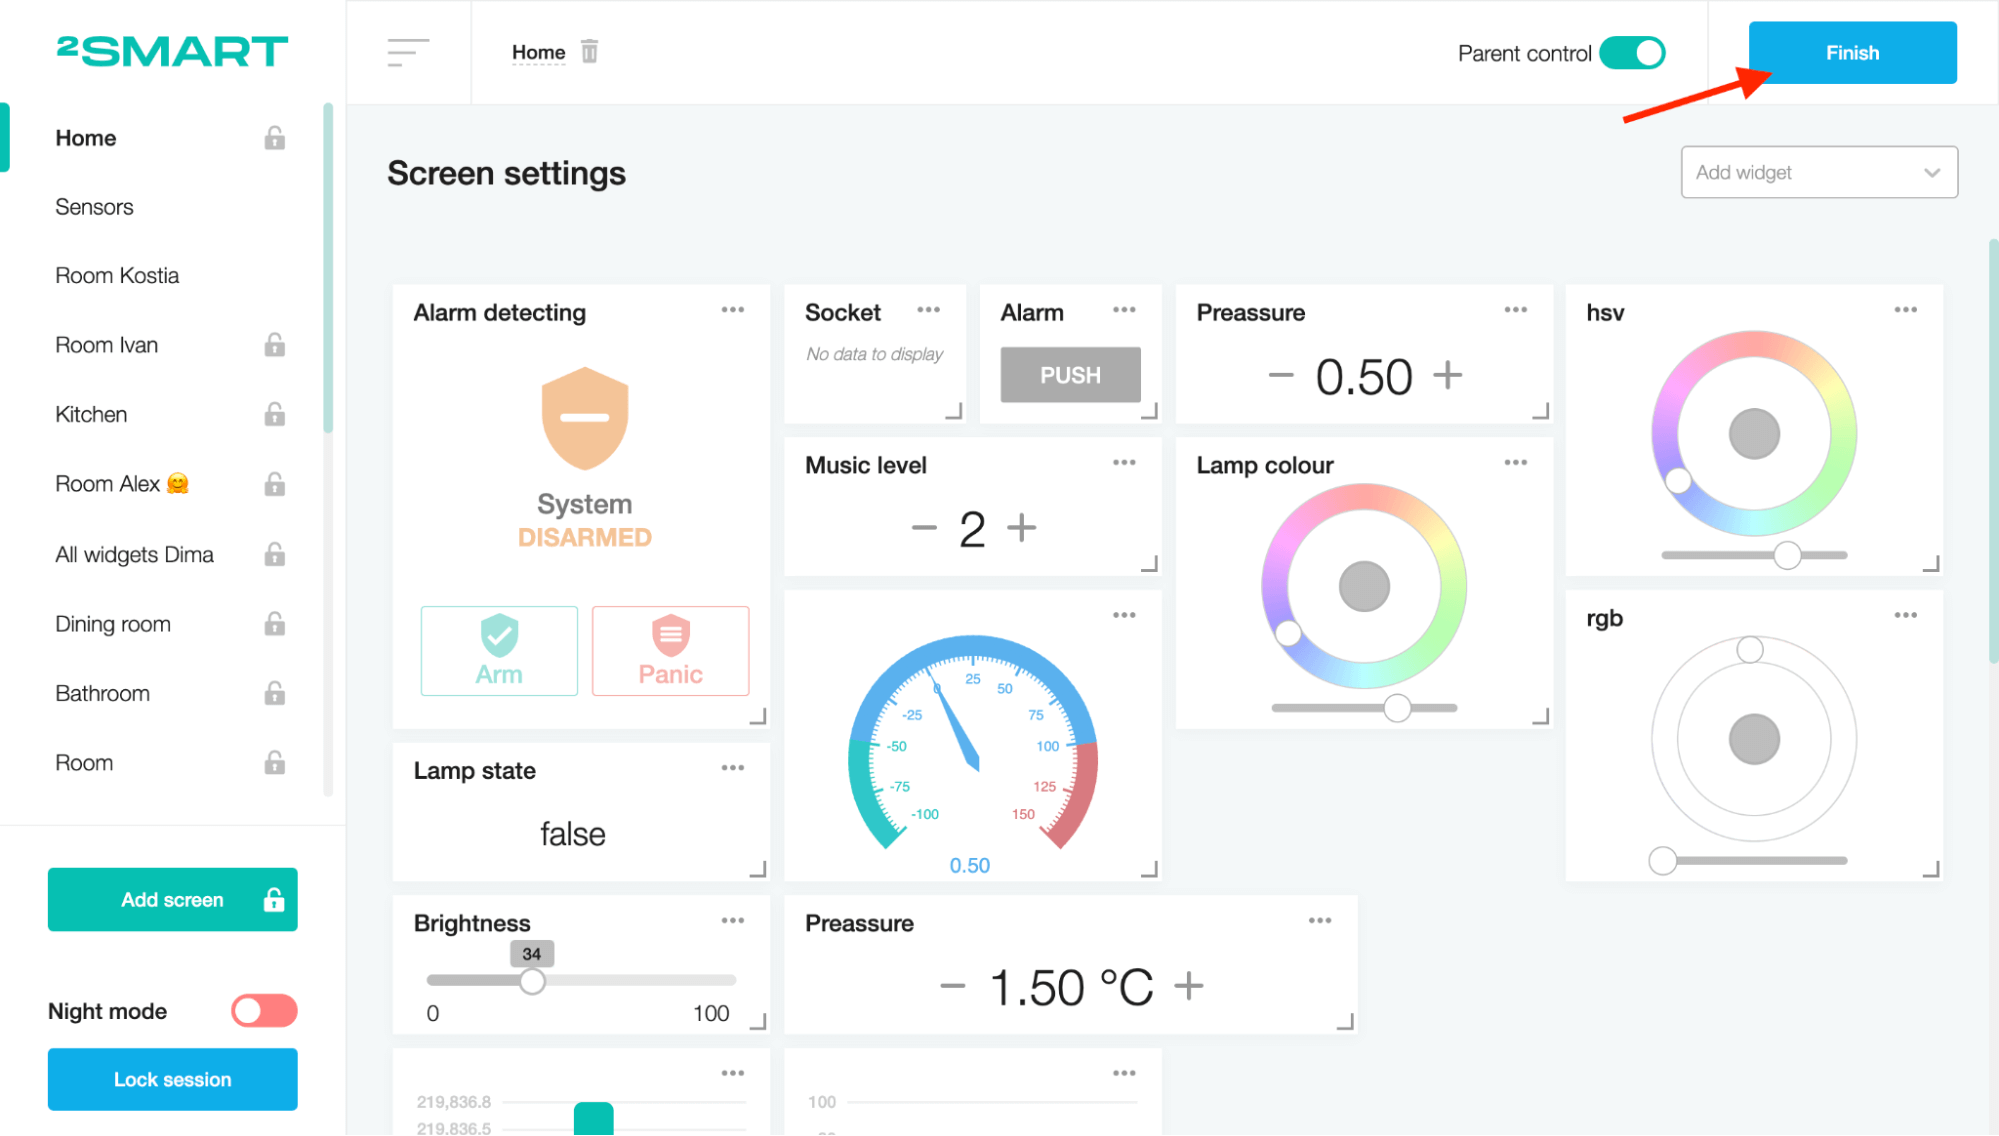
After that, you can manage the security system of the device. The system will show a danger state when the emergency sensor detects changes in the armed state.
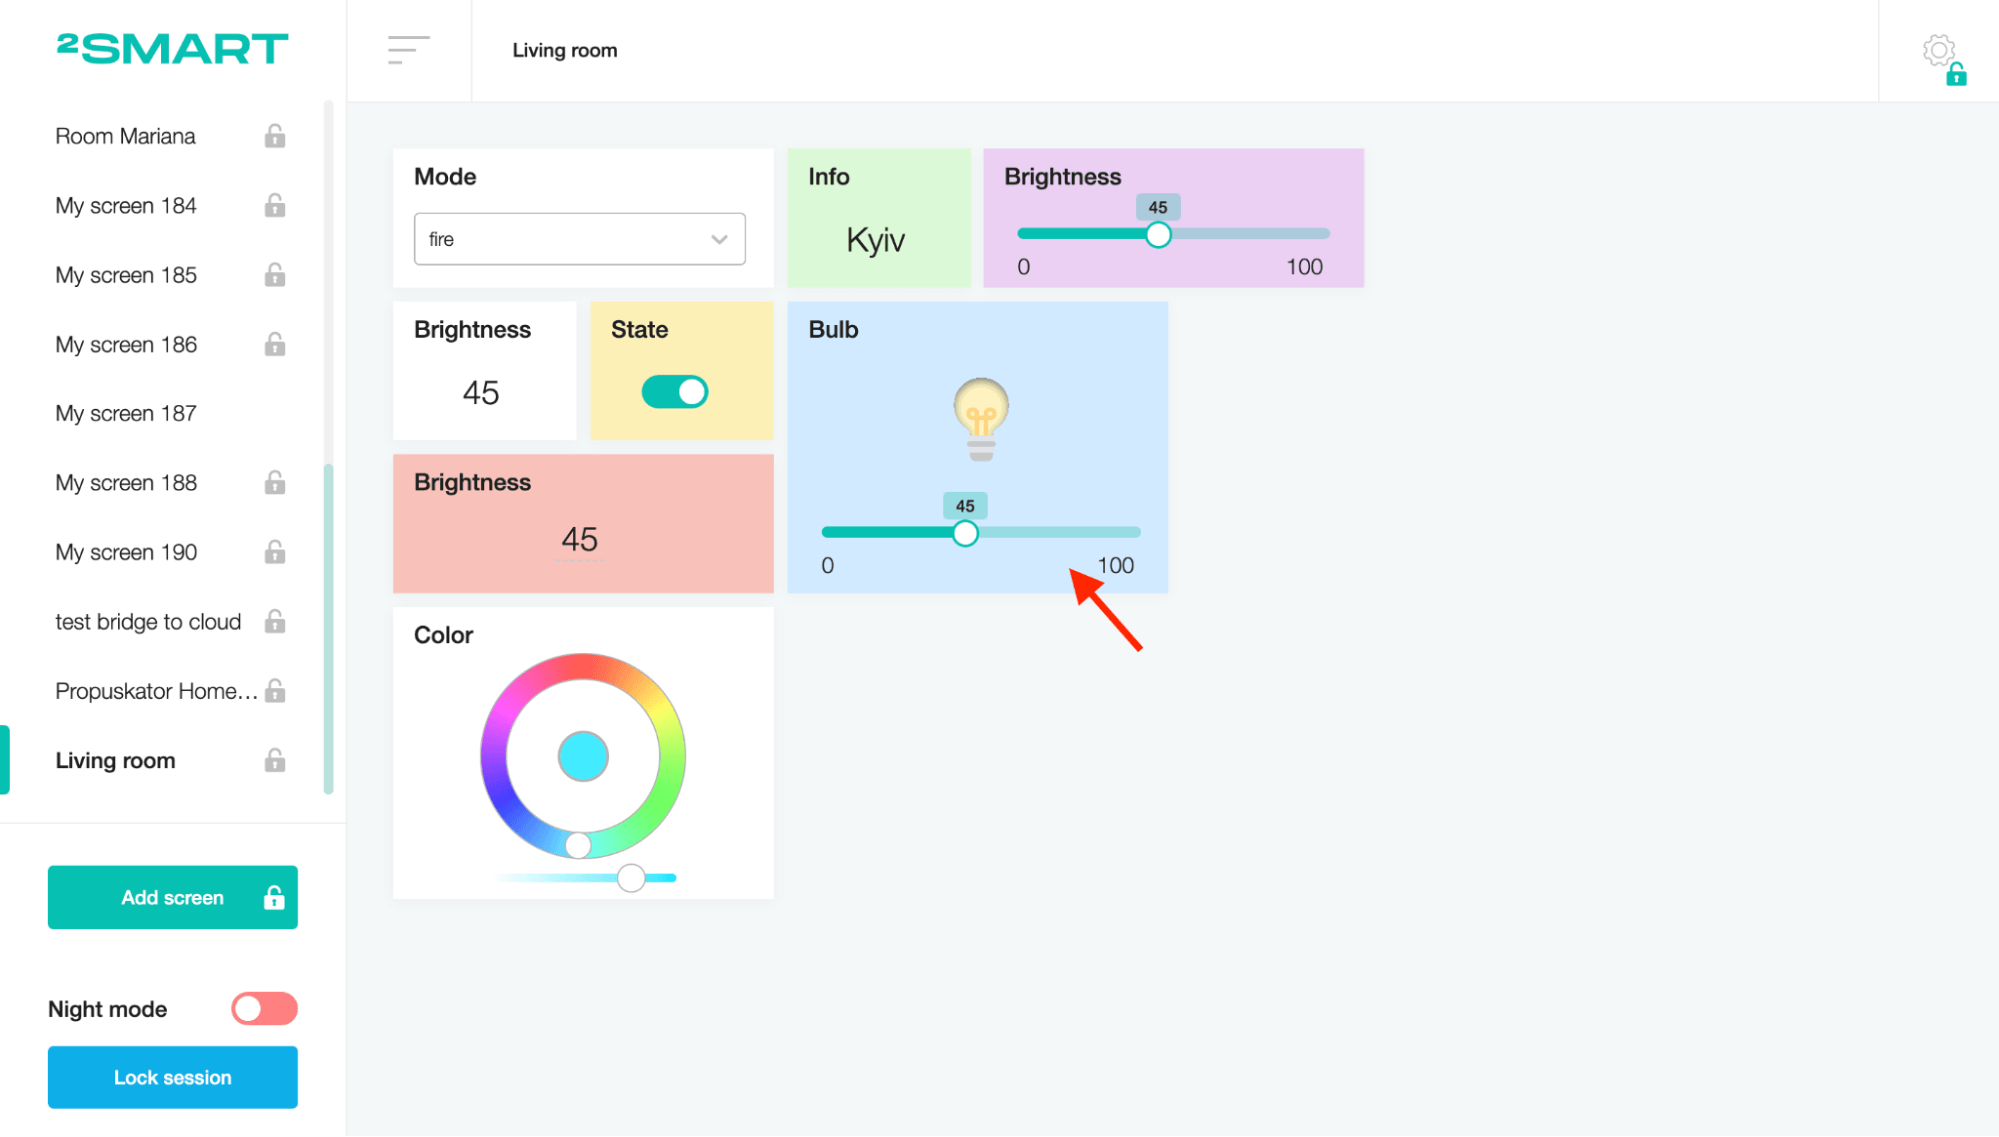
Bulb
This widget turns the lamp on and off and adjusts its brightness (if there is a brightness sensor).
To create a Bulb widget, fill in the Title field and choose the device sensors for the “Bulb state entity” and the “Brightness level entity” fields.
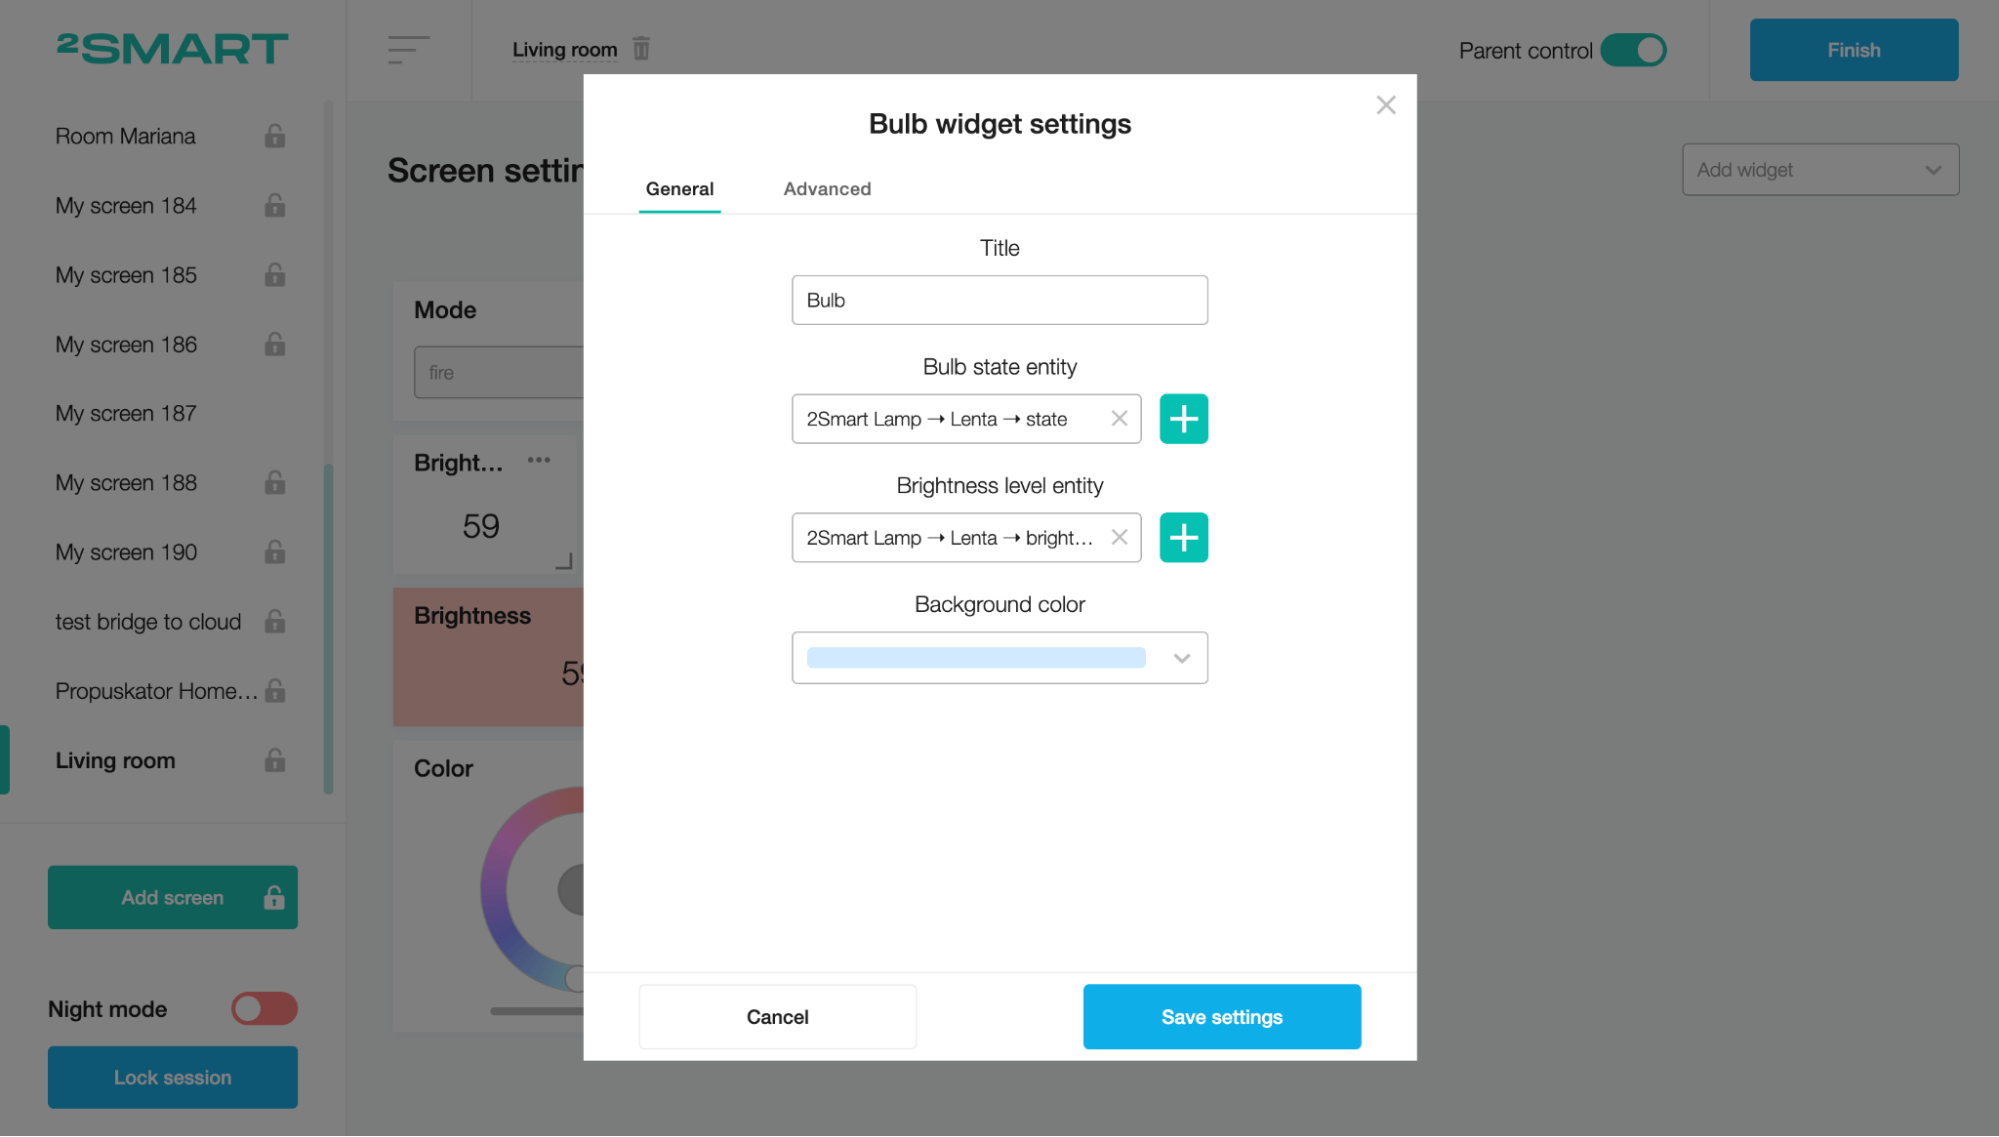
On the Advanced tab, you can edit the step and set the minimum and maximum values. When finished, click on the “Save settings” button.

Click the Finish button to add the Bulb widget to the screen.

After that, you can turn the device on and off by clicking on the bulb icon. You can also control the brightness of the device using the slider.
Two-way button
This widget is a standard-looking button for turning the sensor on and off.
To create a Two-way button widget, fill in the Title field and choose the device sensor in the Entity field on the "Two-way button widget settings" modal window.
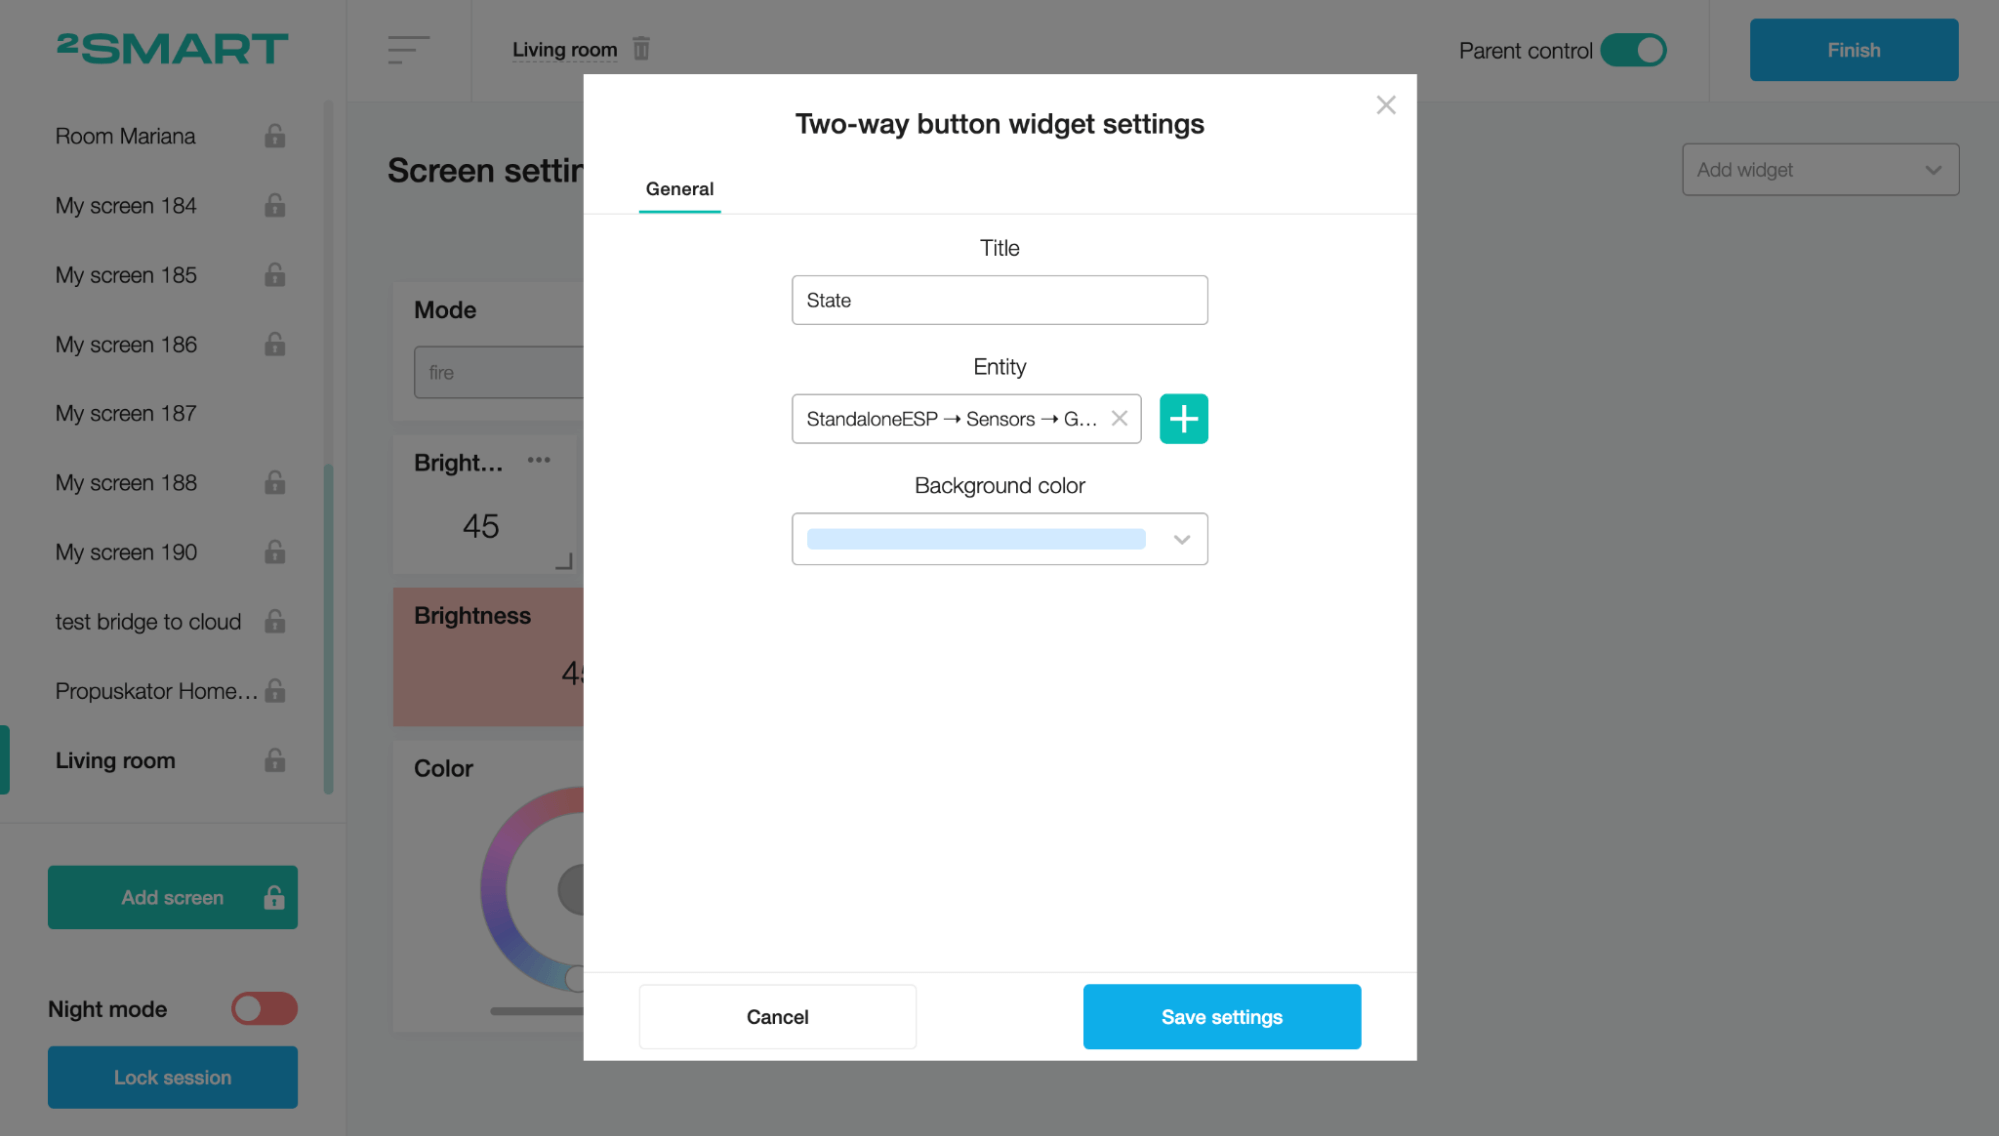
Click on the “Save settings” button.

Click the Finish button to add the Two-Way button widget to the screen.
After that, you can click on the two-way button and change the state of the device sensor.

LED
This widget indicates whether the sensor is on or off. It does not allow to toggle the value.
To create a LED widget, fill in the Title field and choose the device sensor in the Entity field on the "LED widget settings" modal window.
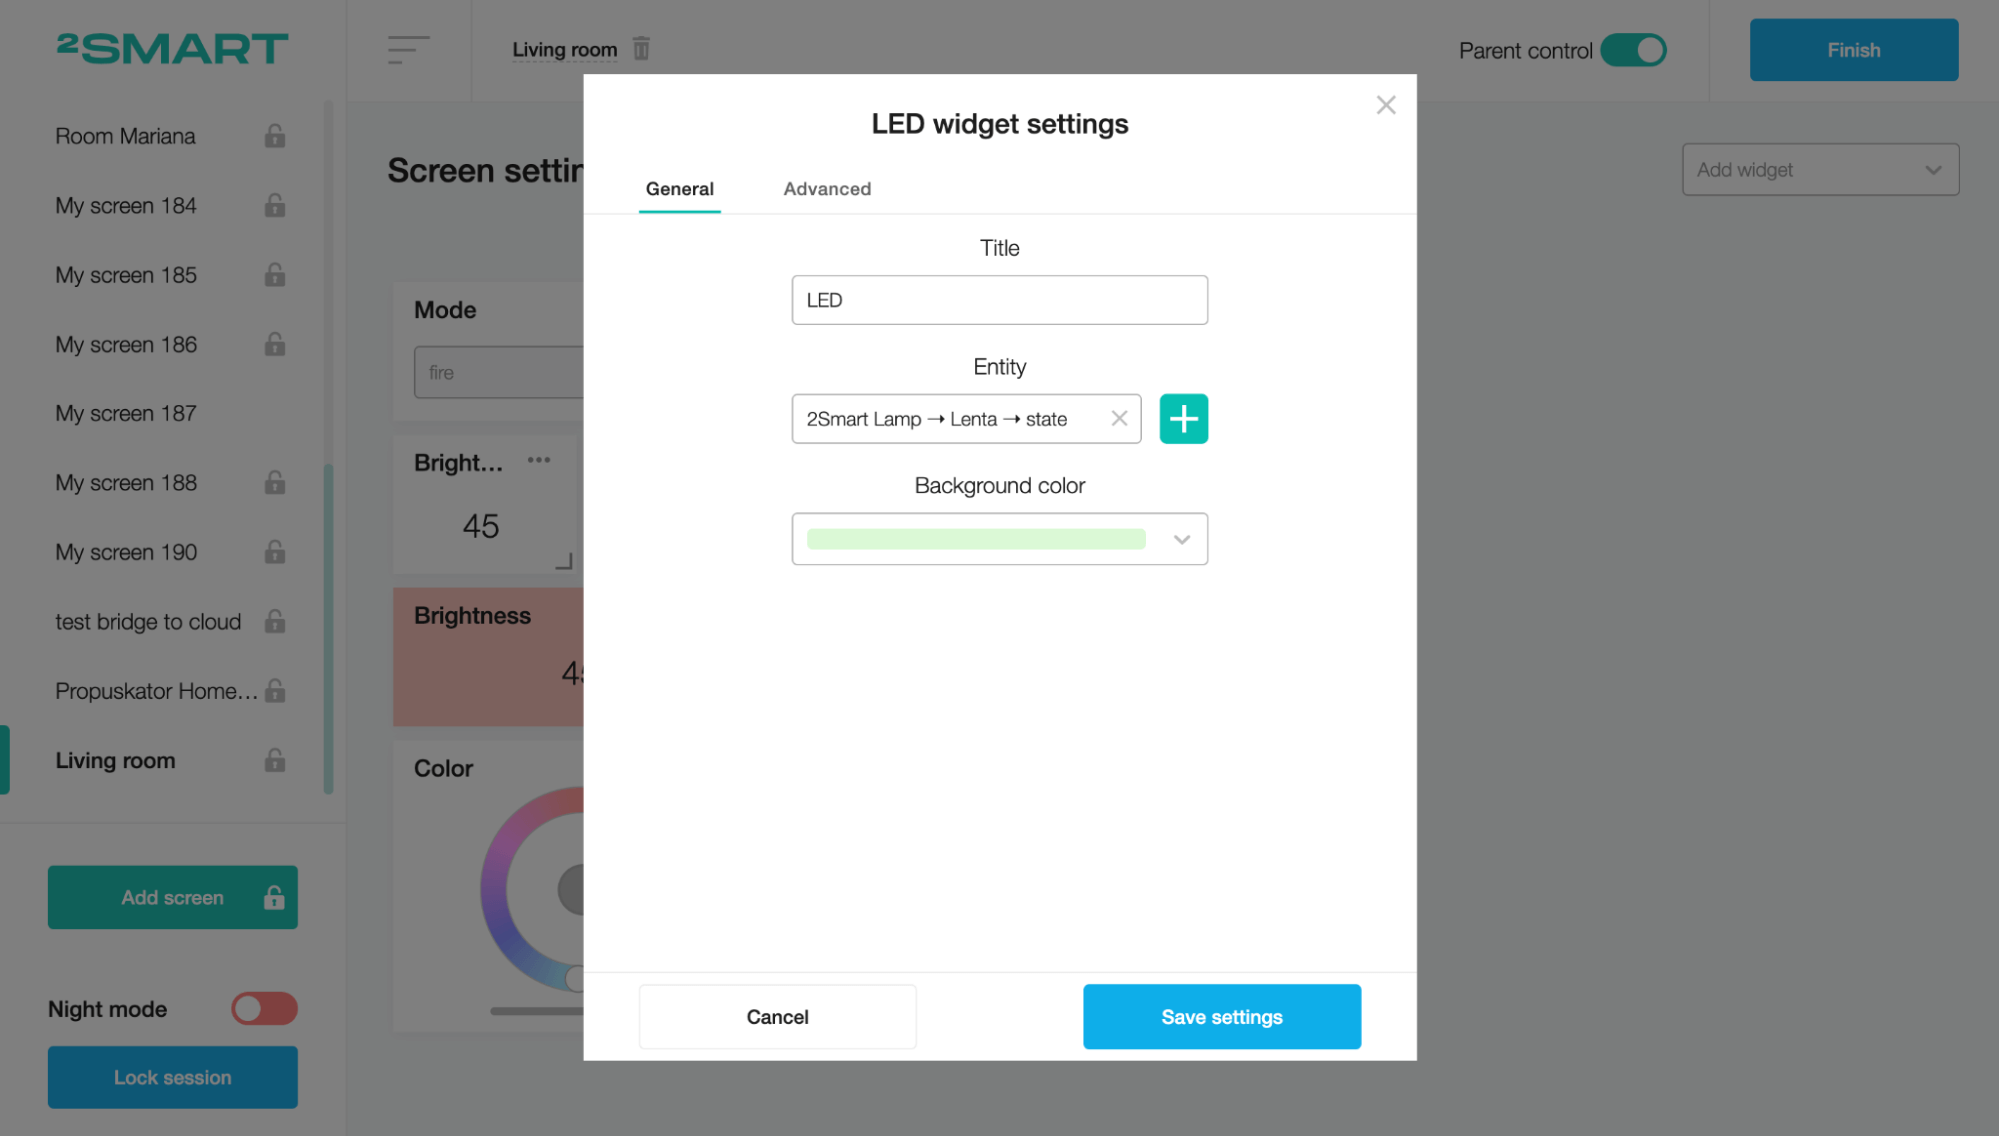
On the Advanced tab, you can edit the widget’s design. When finished, click on the “Save settings” button.
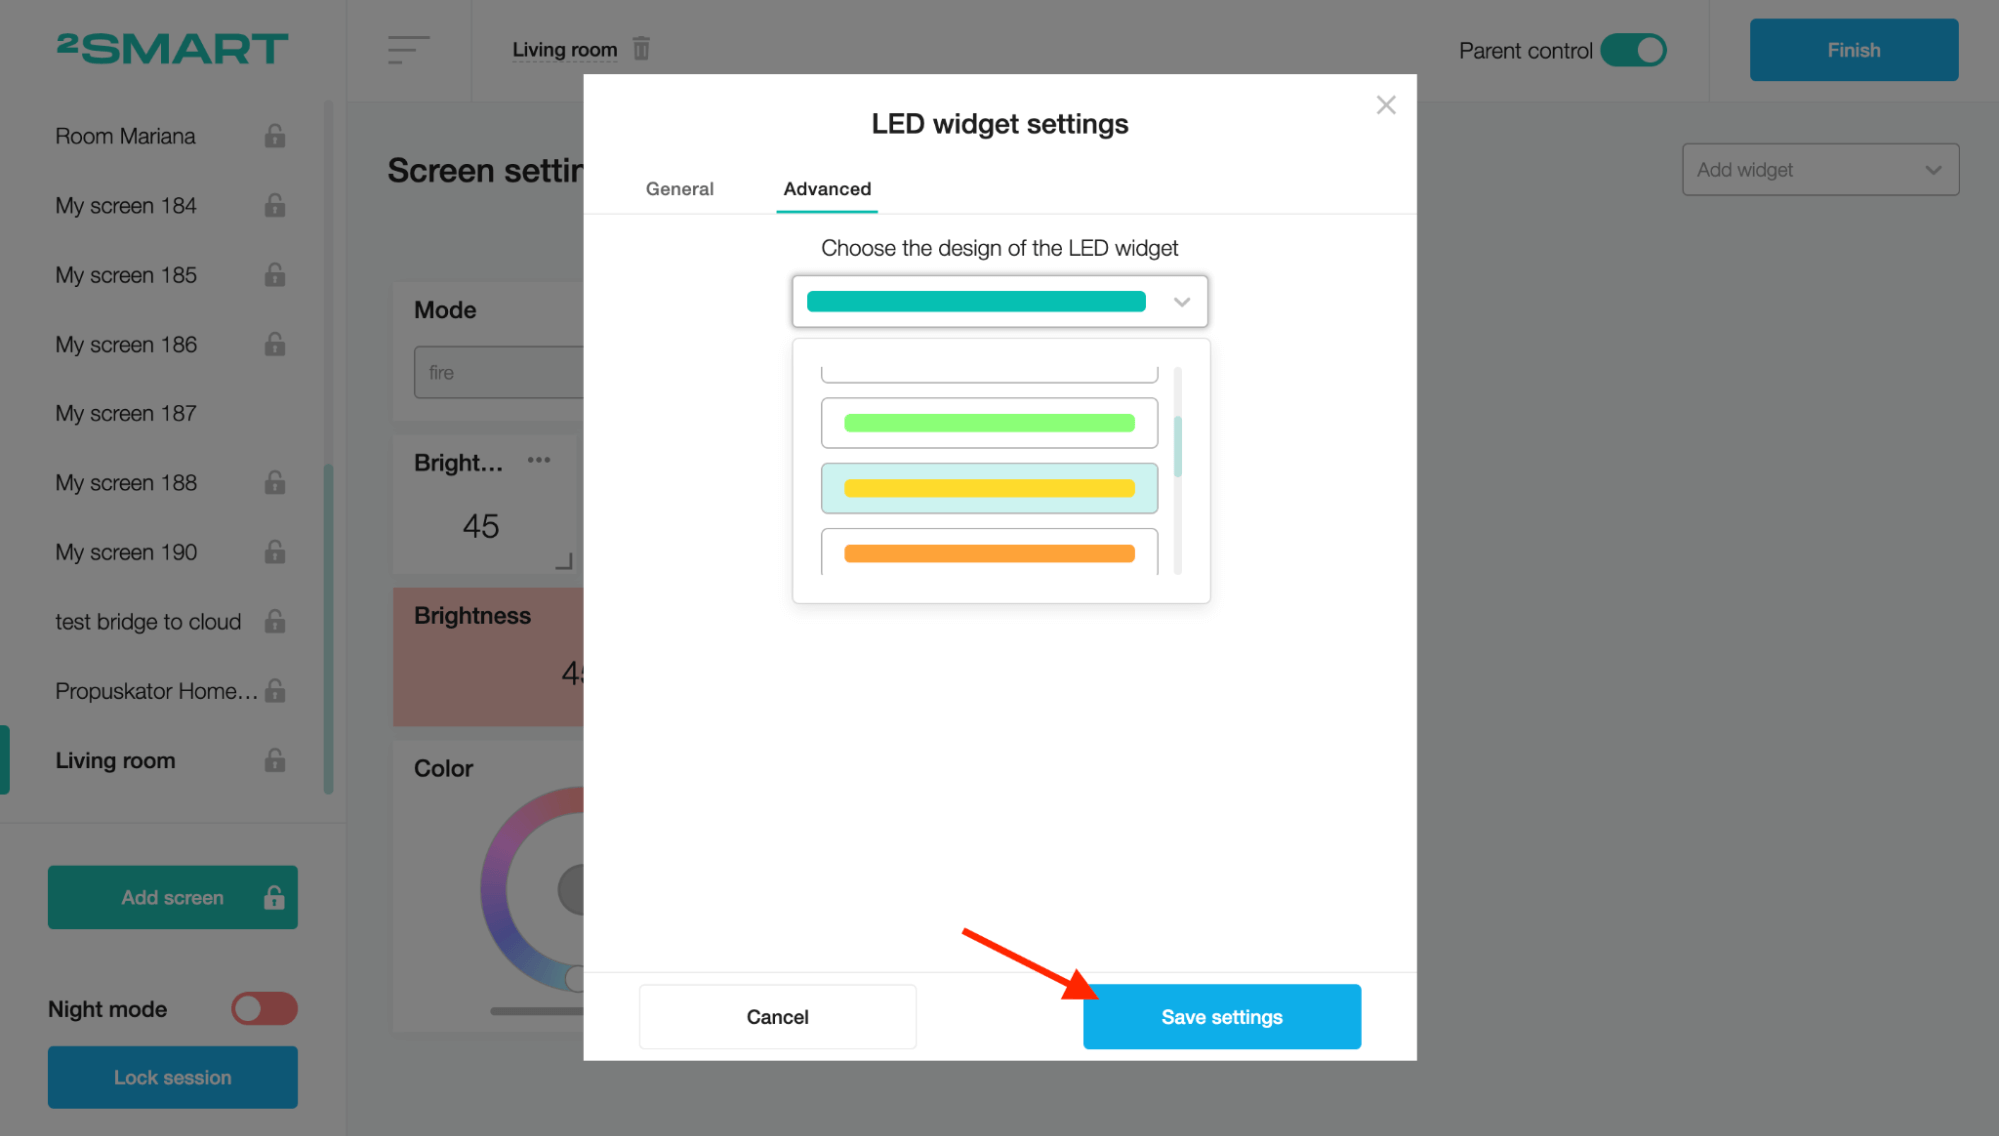
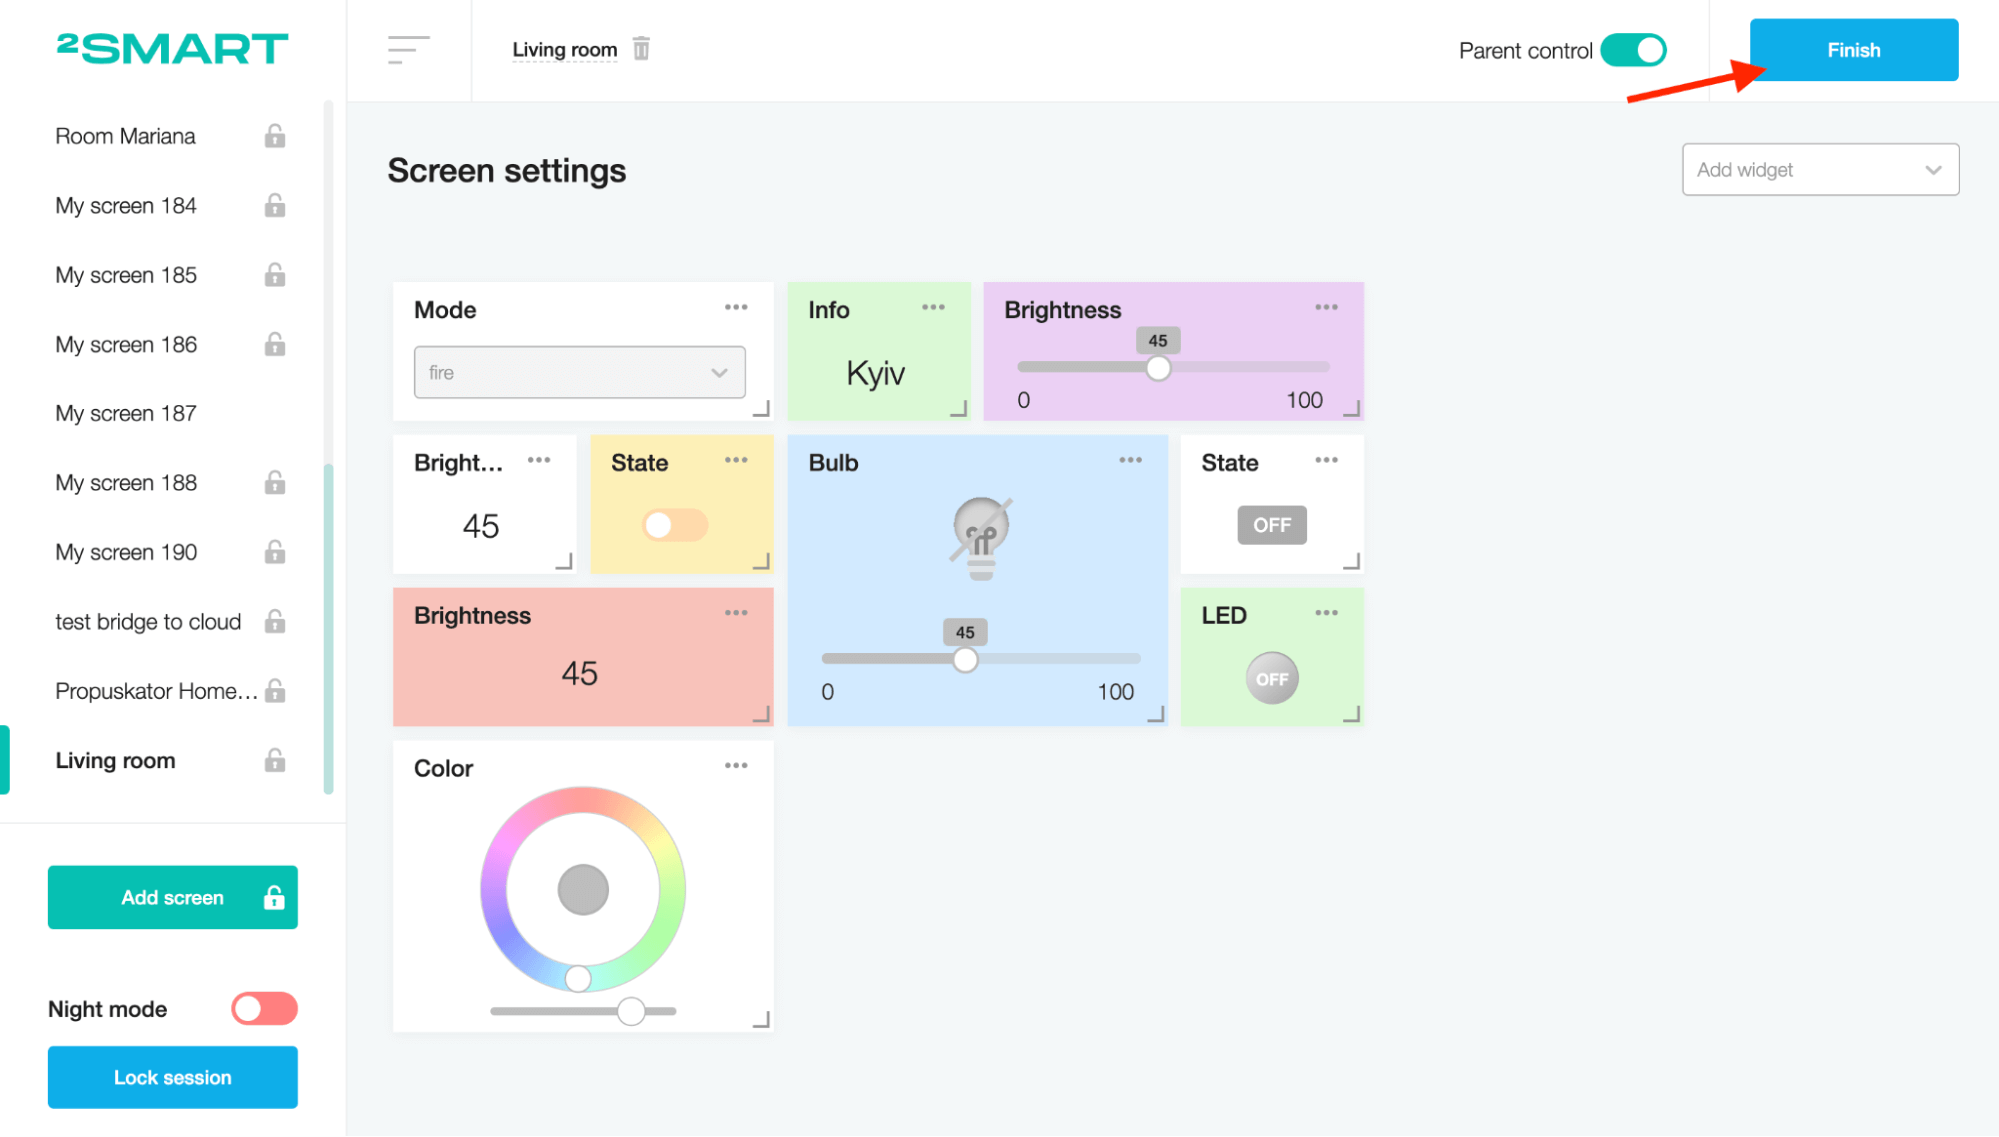
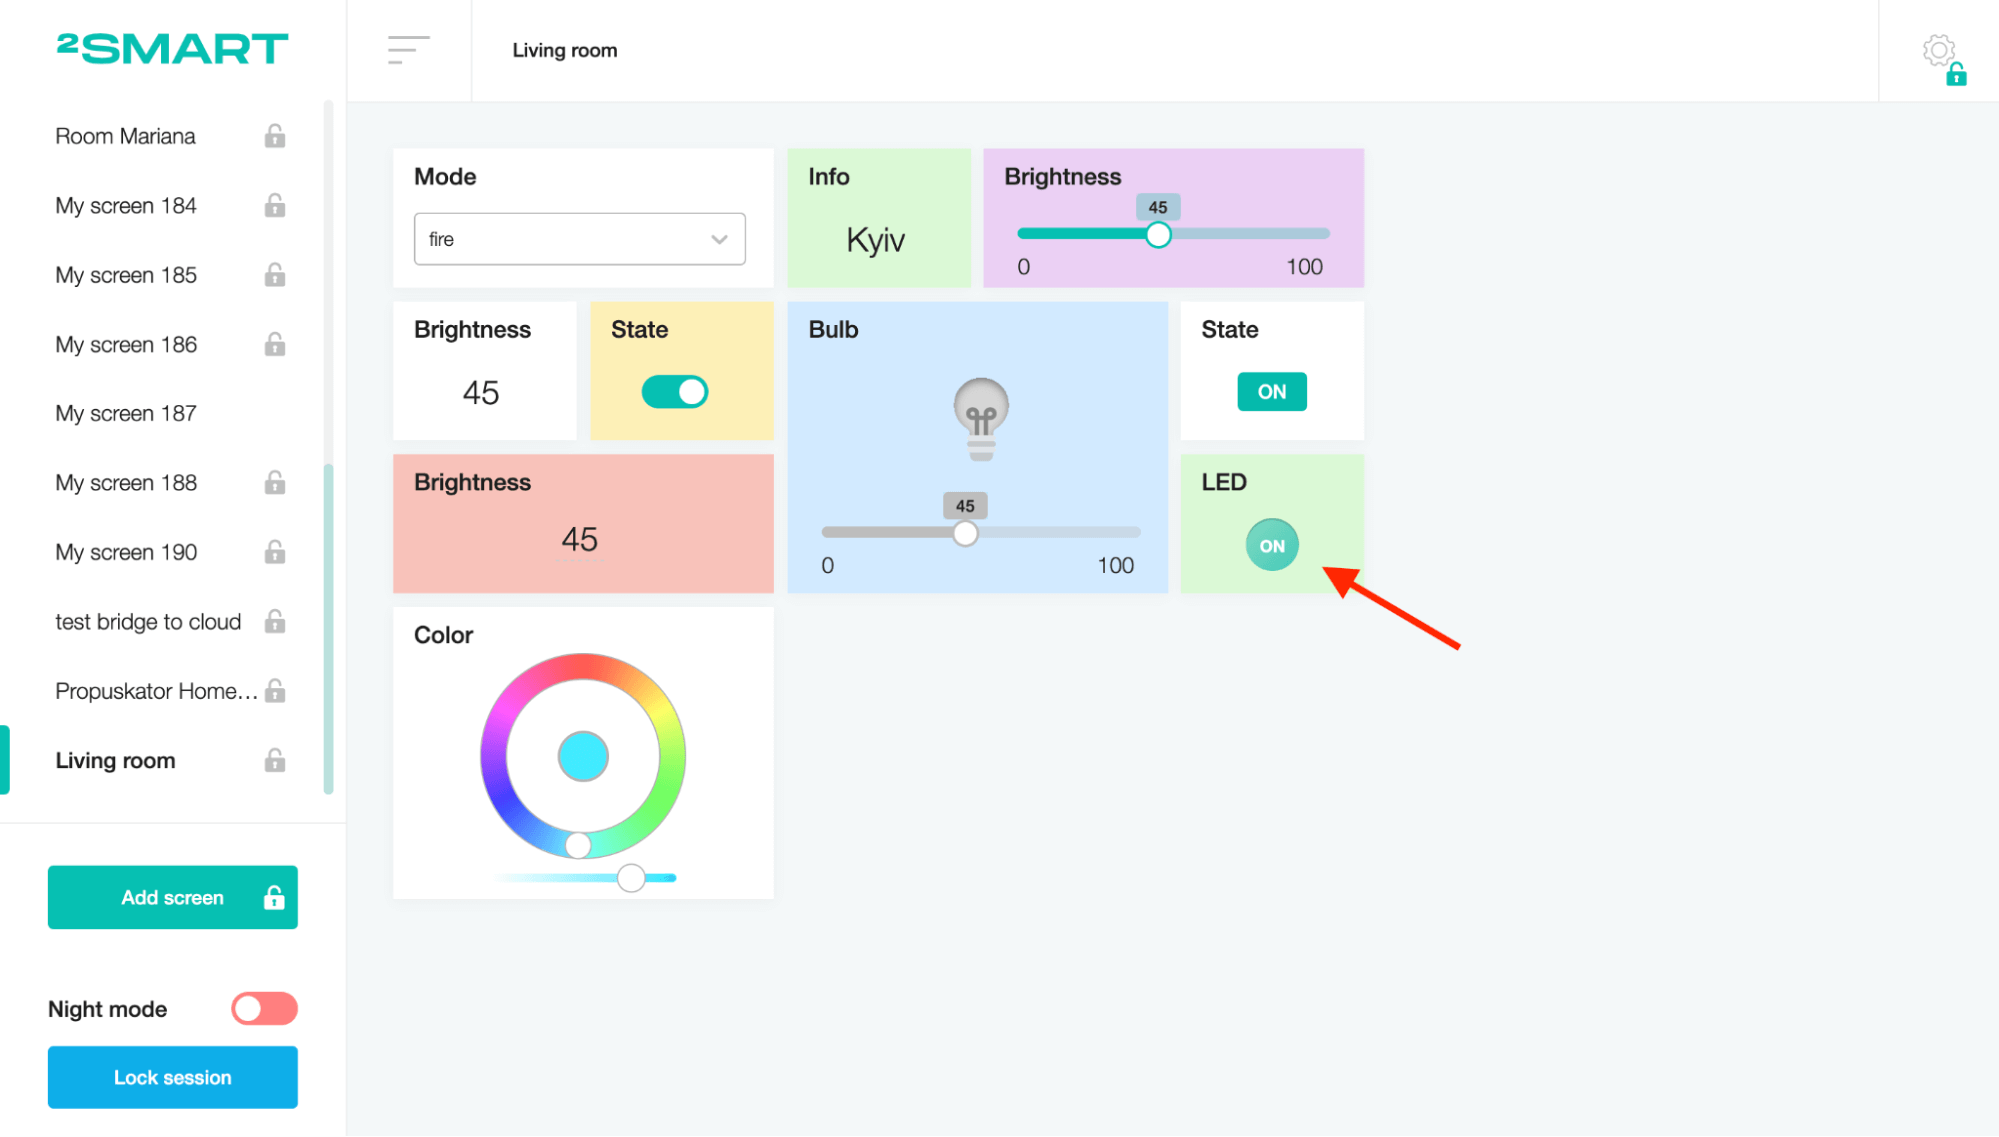
Click the Finish button to add the LED widget to the screen.
After that, you can control whether the device is turned on by changing the color of the widget.
Signal level
This widget displays the sensor signal's level in percentage and a scale.
To create a Signal level widget, fill in the Title field and choose the device sensor in the Entity field on the "Signal level widget settings" modal window.

On the Advanced tab, you can set the minimum and maximum values. When finished, click on the “Save settings” button.
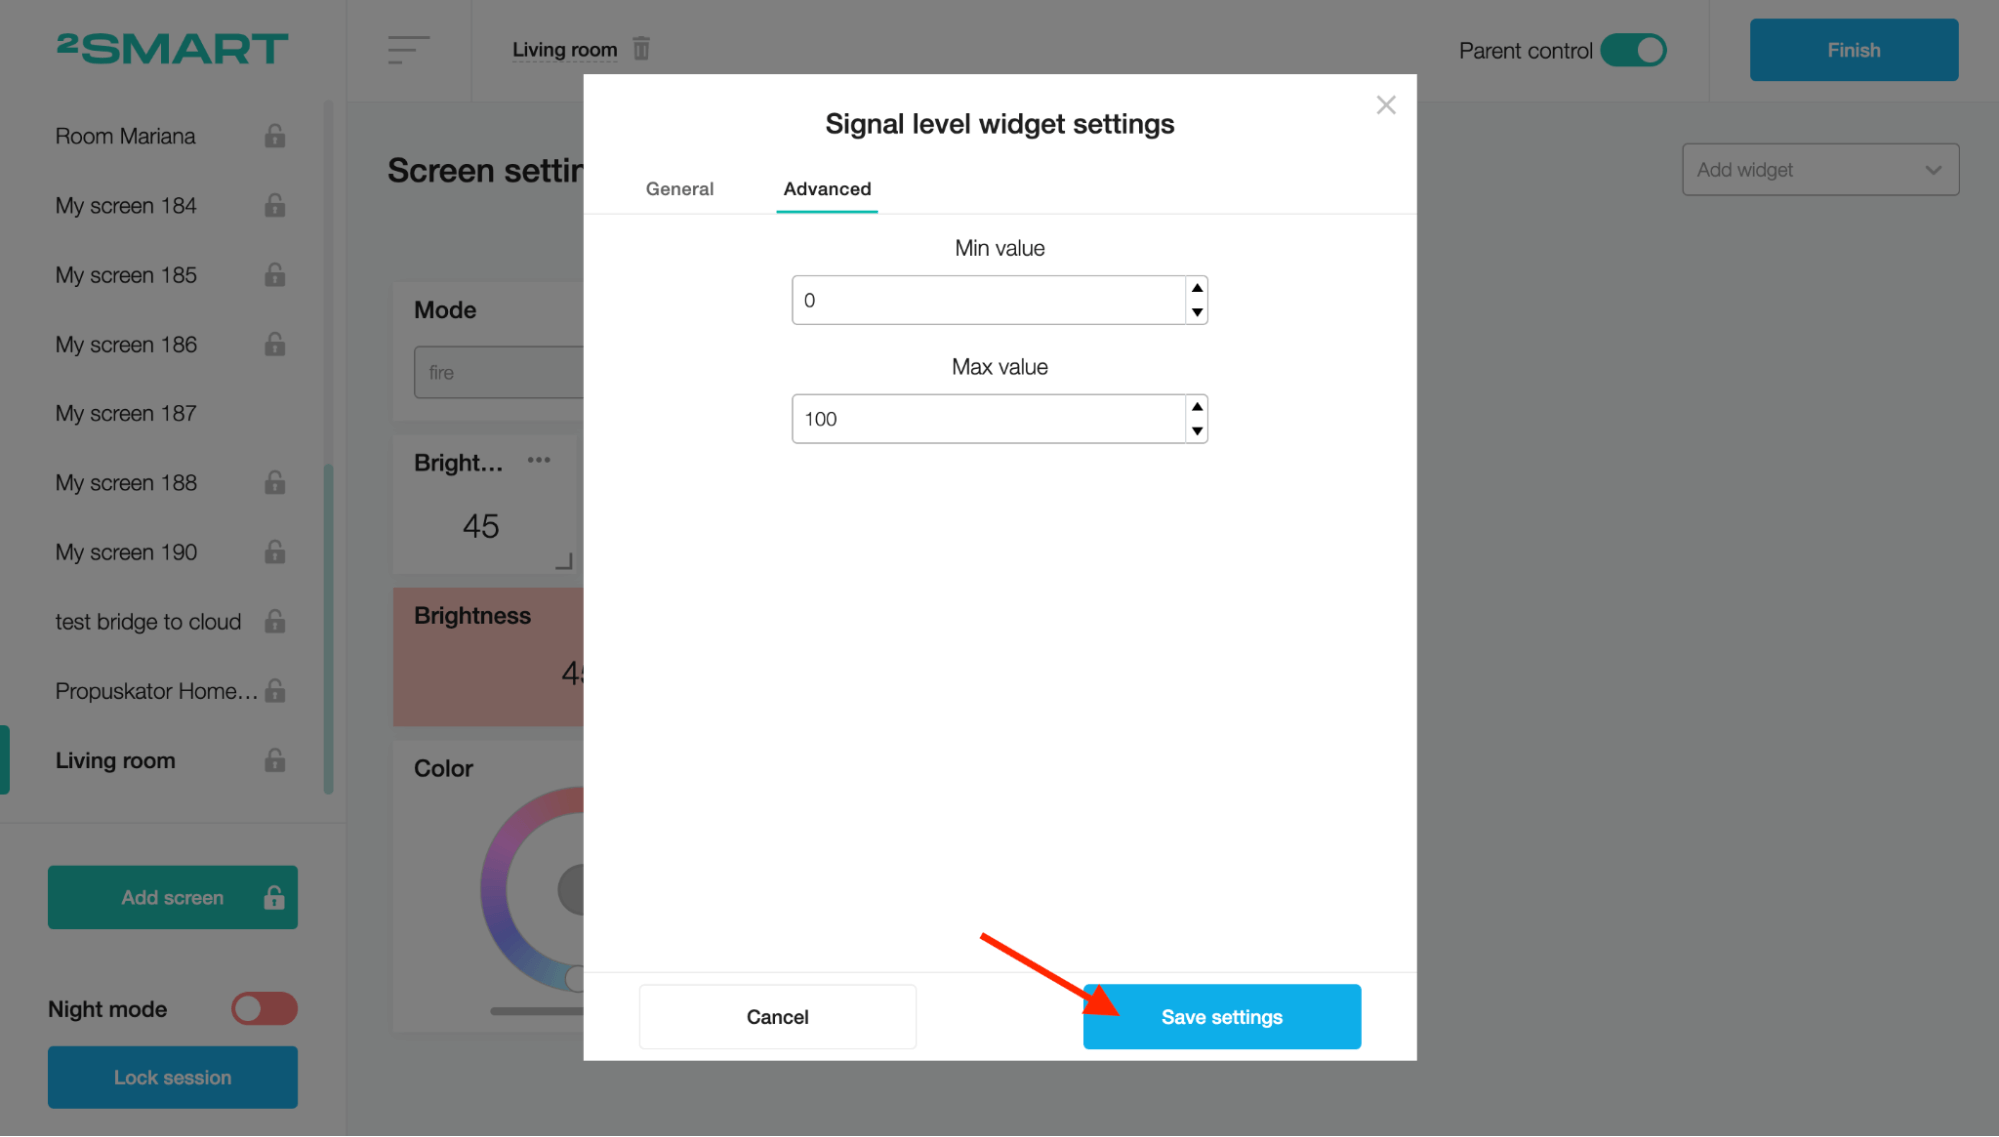
Click the Finish button to add the Signal level widget to the screen.

Tumbler
This widget is a standard tumbler for turning the sensor on and off.
To create a Tumbler widget, fill in the Title field and choose the device sensor in the Entity field on the "Tumbler widget settings" modal window.

Click on the “Save settings” button.
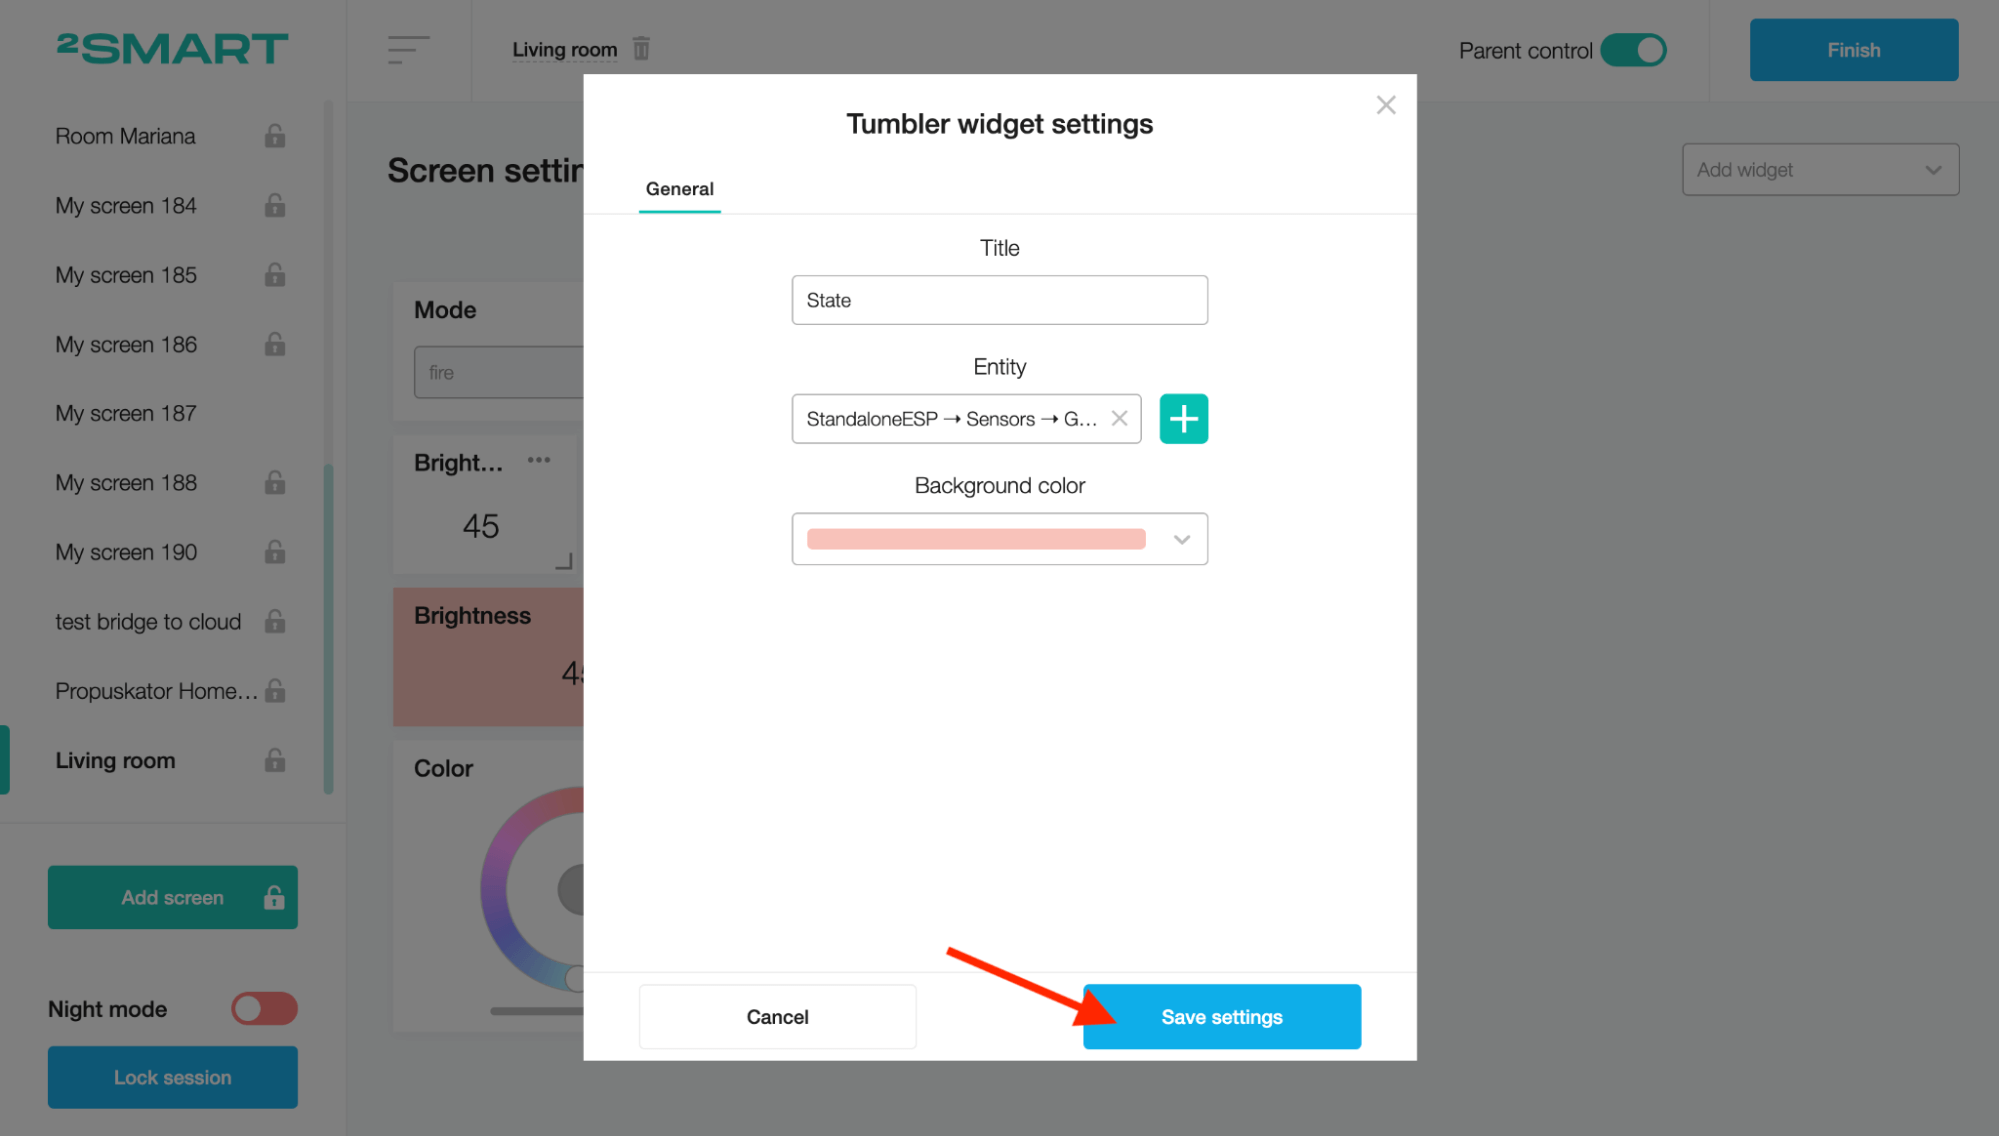
Click the Finish button to add the Tumbler widget to the screen.
After that, you can click on the tumbler and change the state of the device sensor.
Battery
This widget displays the sensor signal's level in percentage terms and visually as a battery.
To create a Battery widget, fill in the Title field and choose the device sensor in the Entity field on the "Battery widget settings" modal window.

On the Advanced tab, you can set the minimum and maximum values. When finished, click on the “Save settings” button.
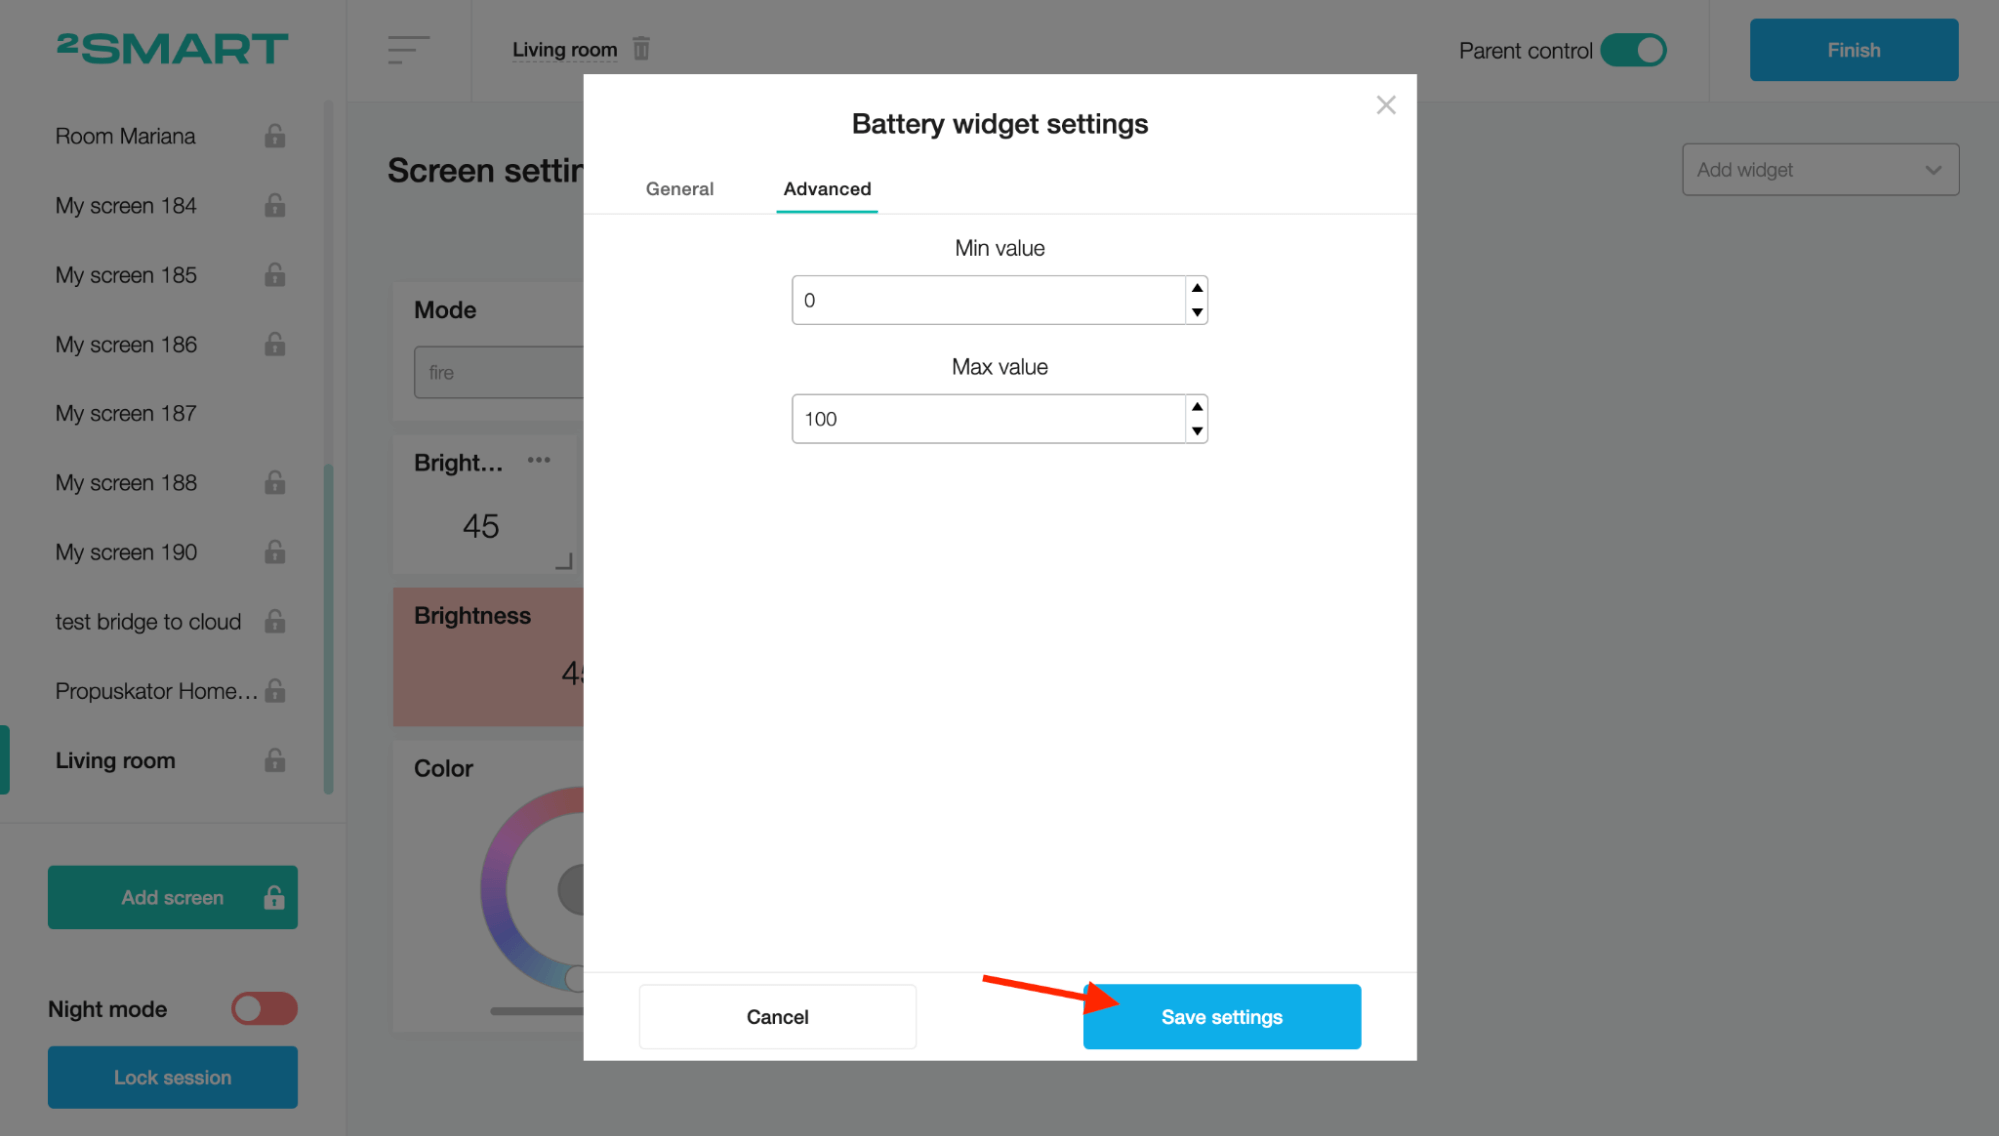
Click the Finish button to add the Battery widget to the screen.
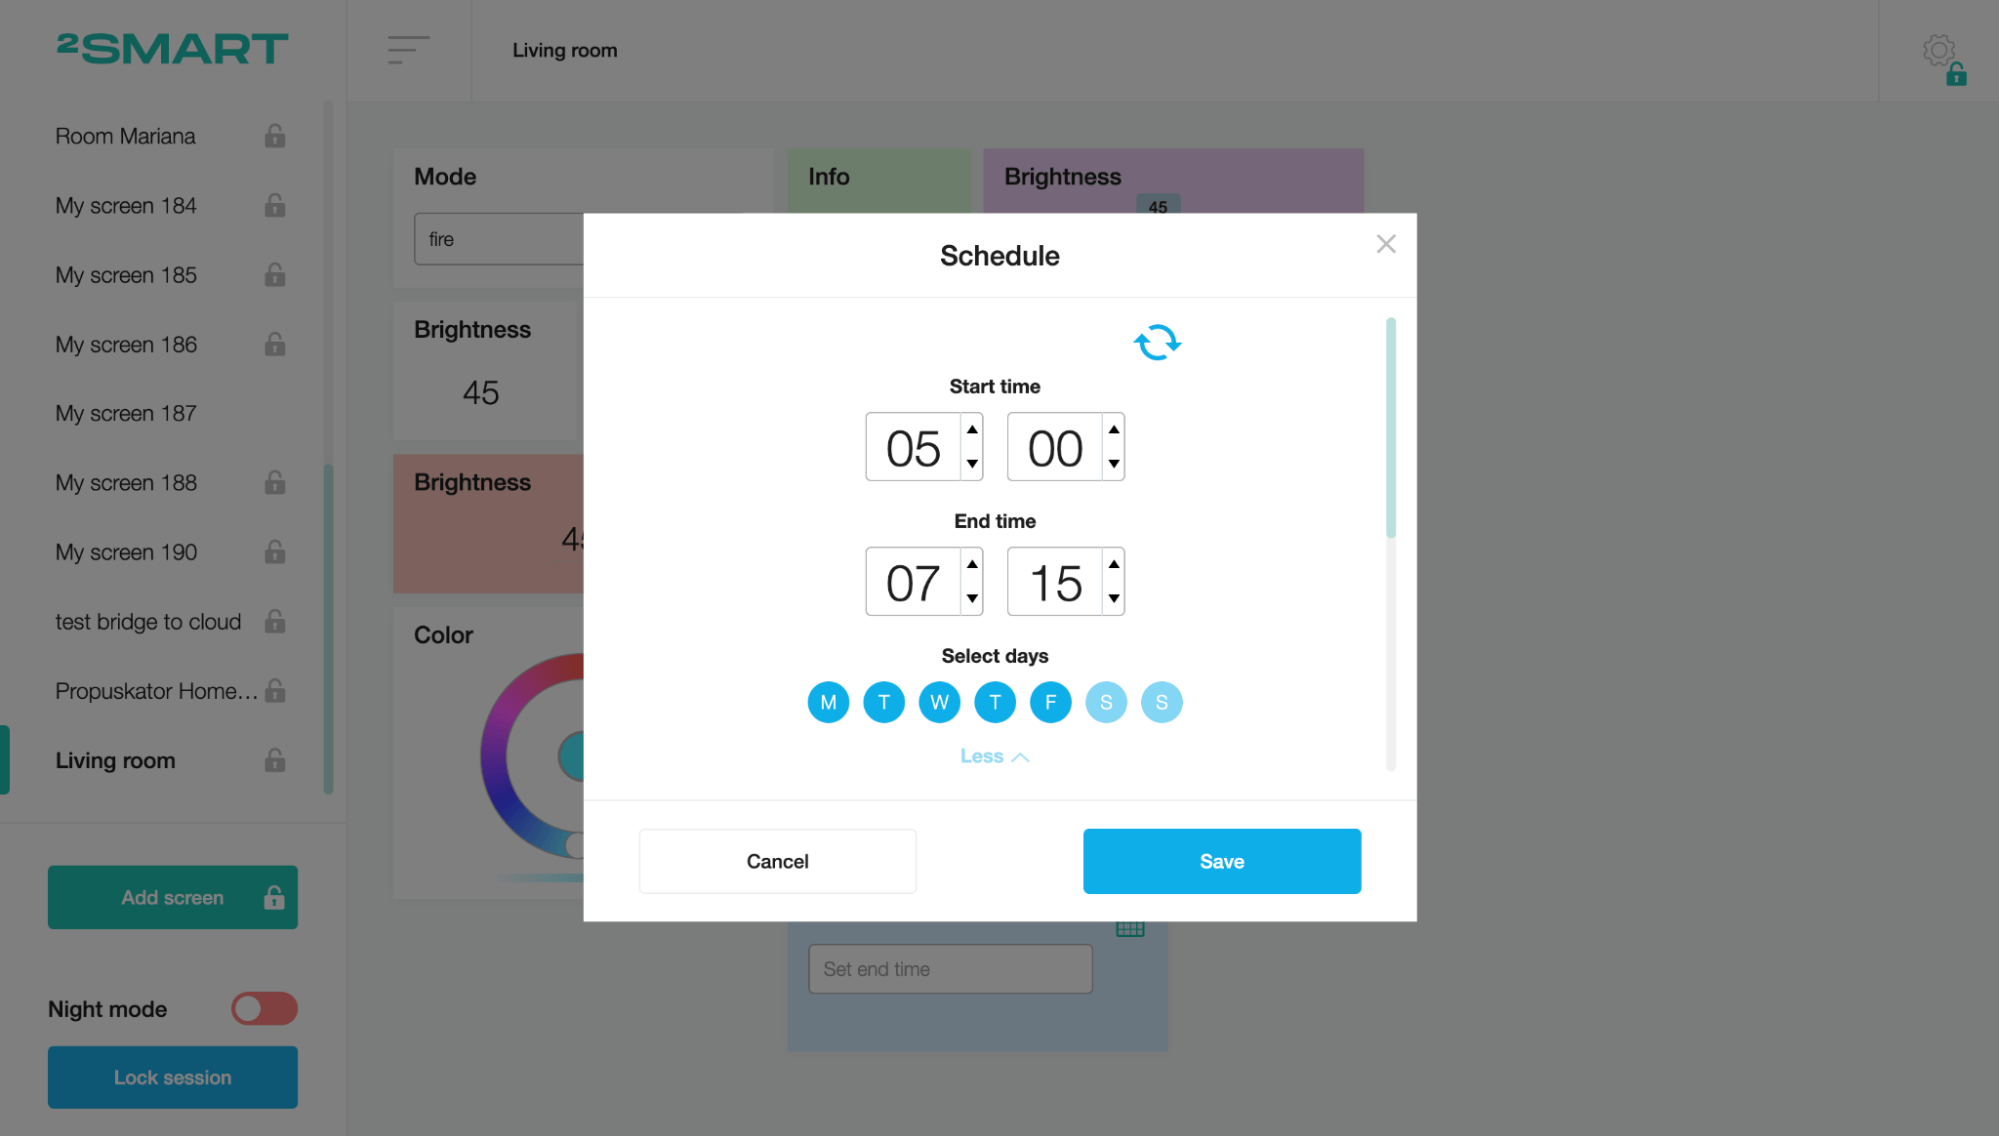
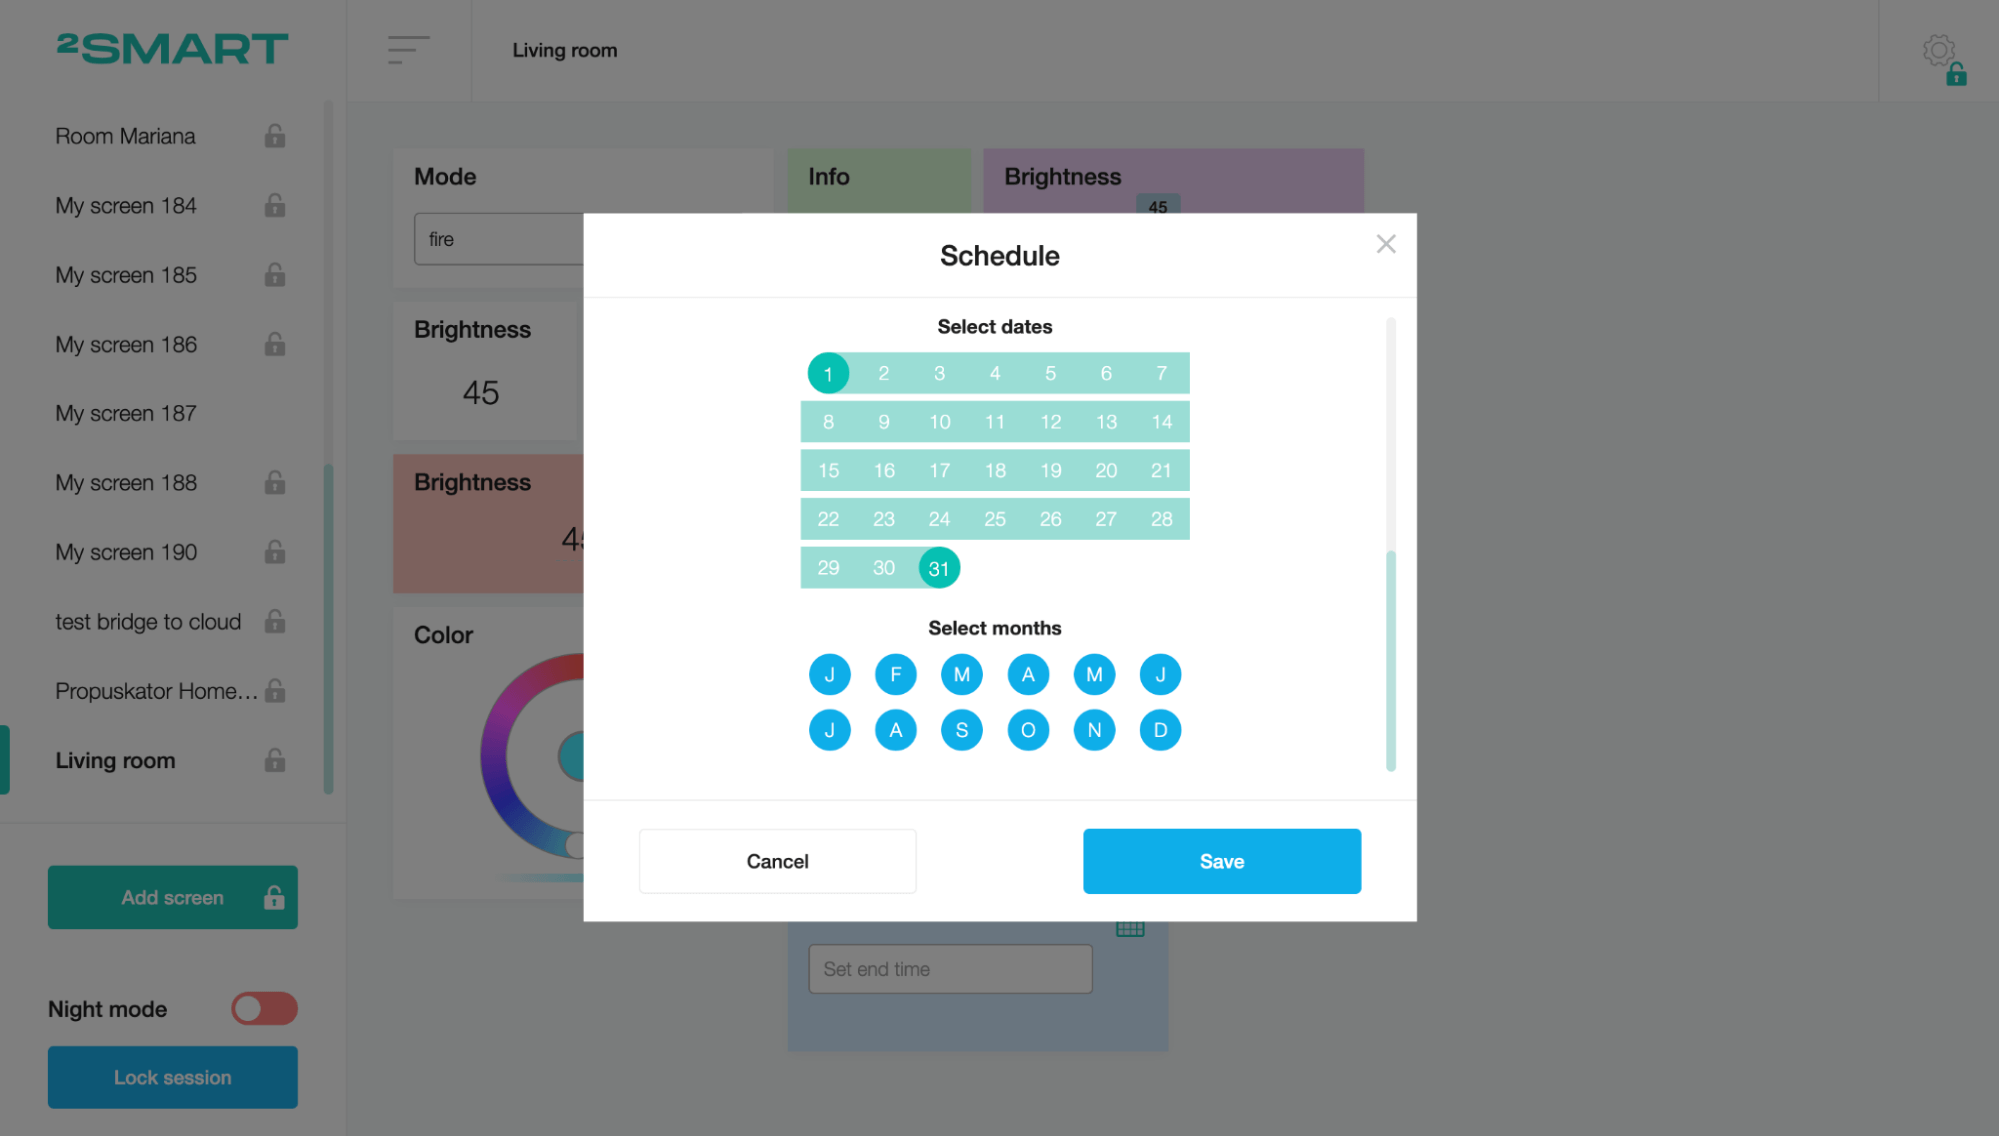
Schedule
This widget sets date and time values.
To create a Schedule widget, fill in the Title field, and choose the device sensors for the “Start time entity” and “End time entity” fields.

Click on the “Save settings” button.
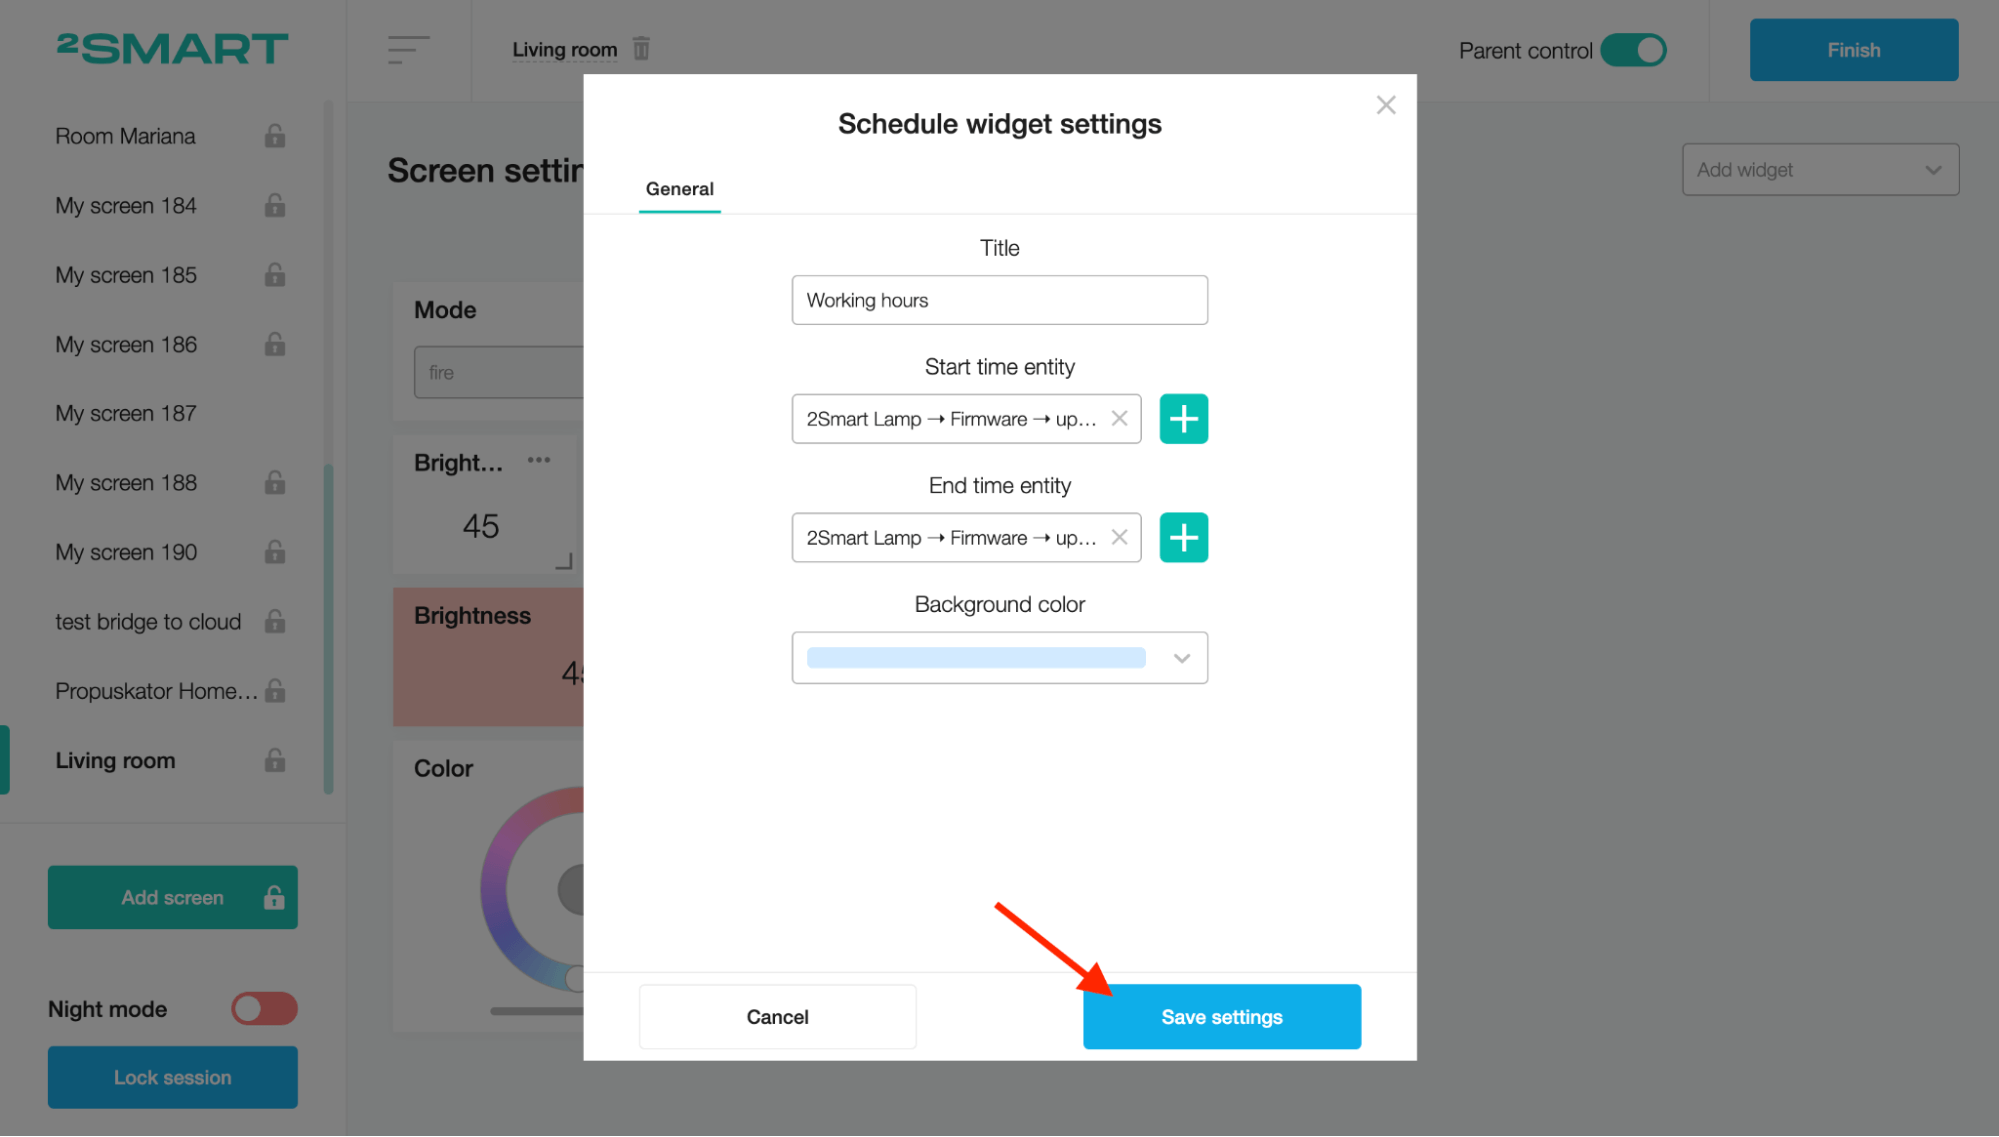
Click the Finish button to add the Schedule widget to the screen.
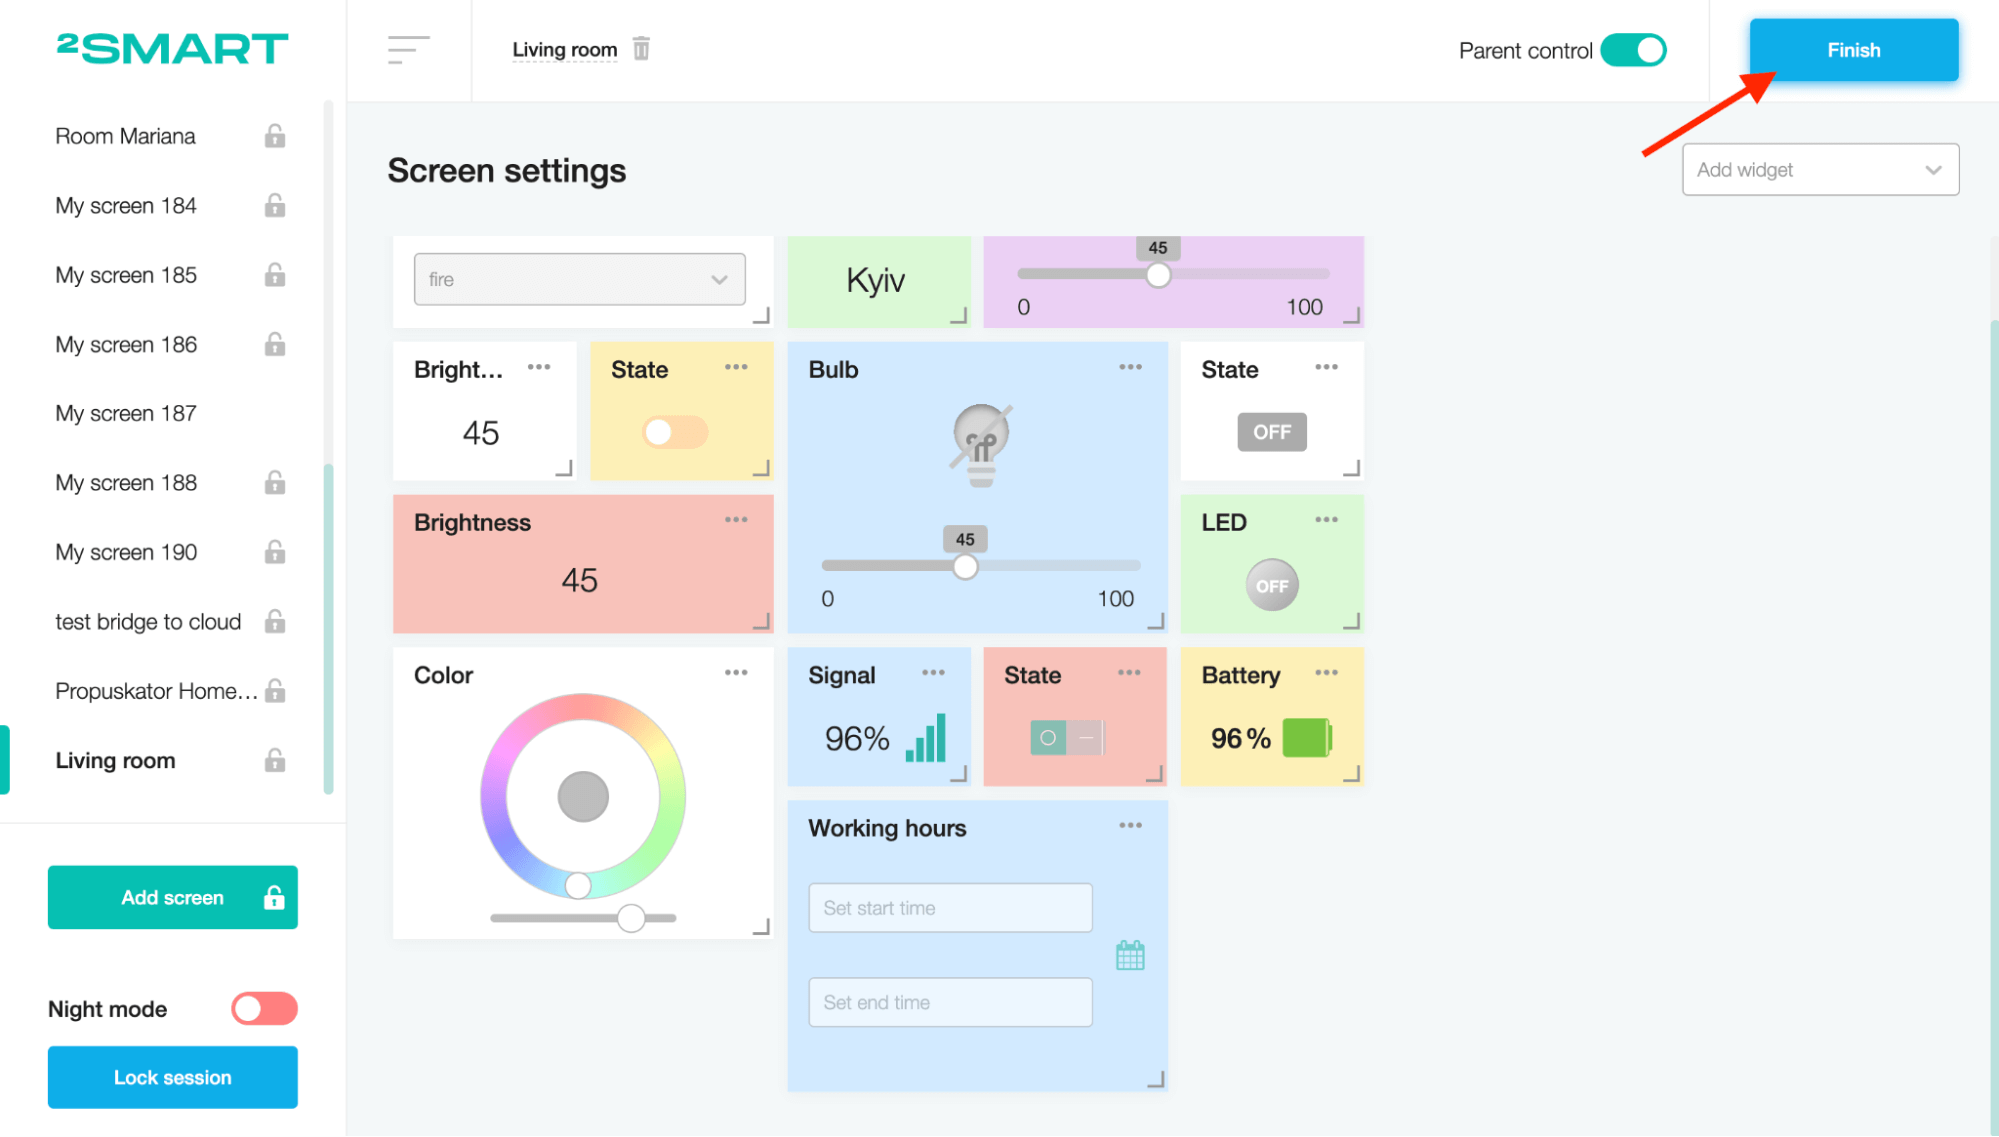
After that, you can set the time or date according to your needs.
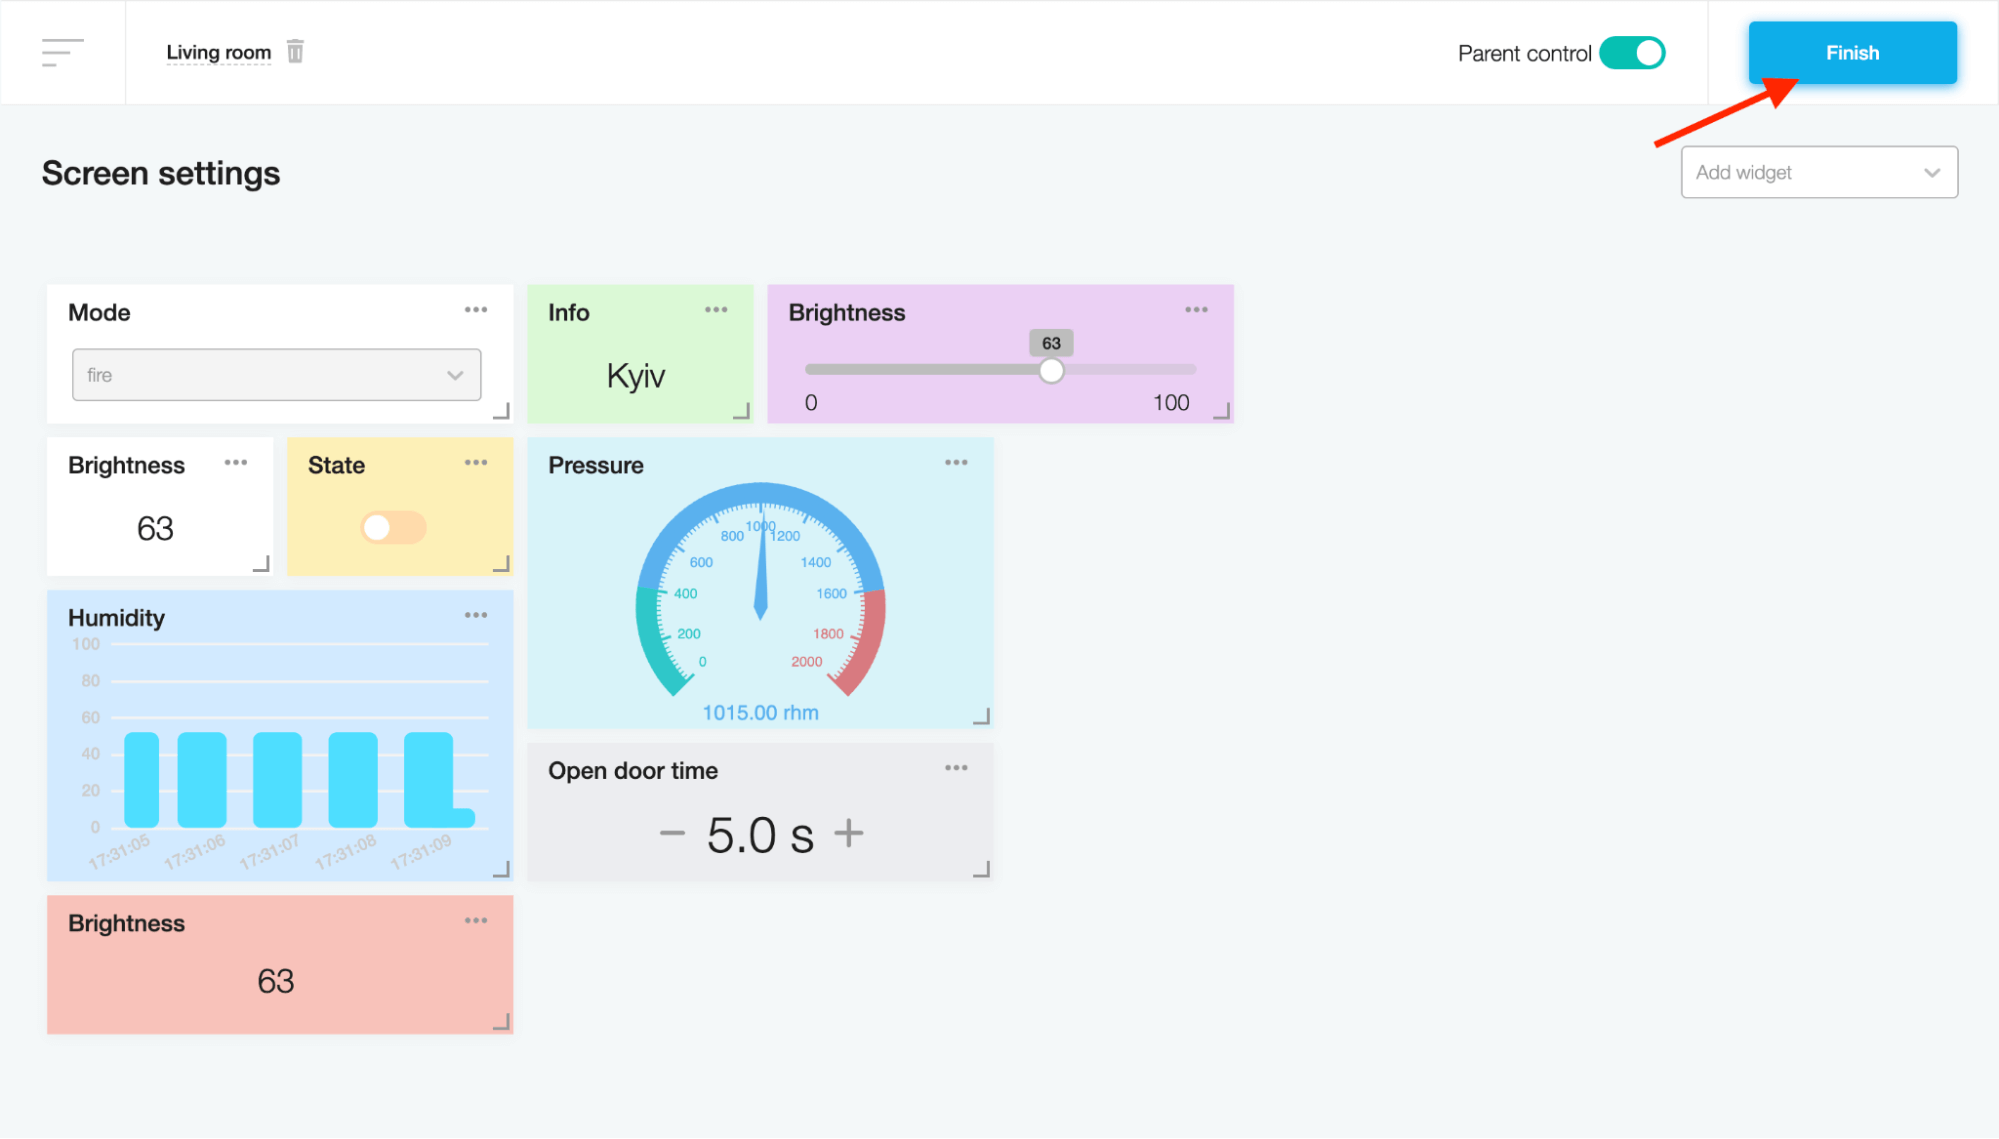
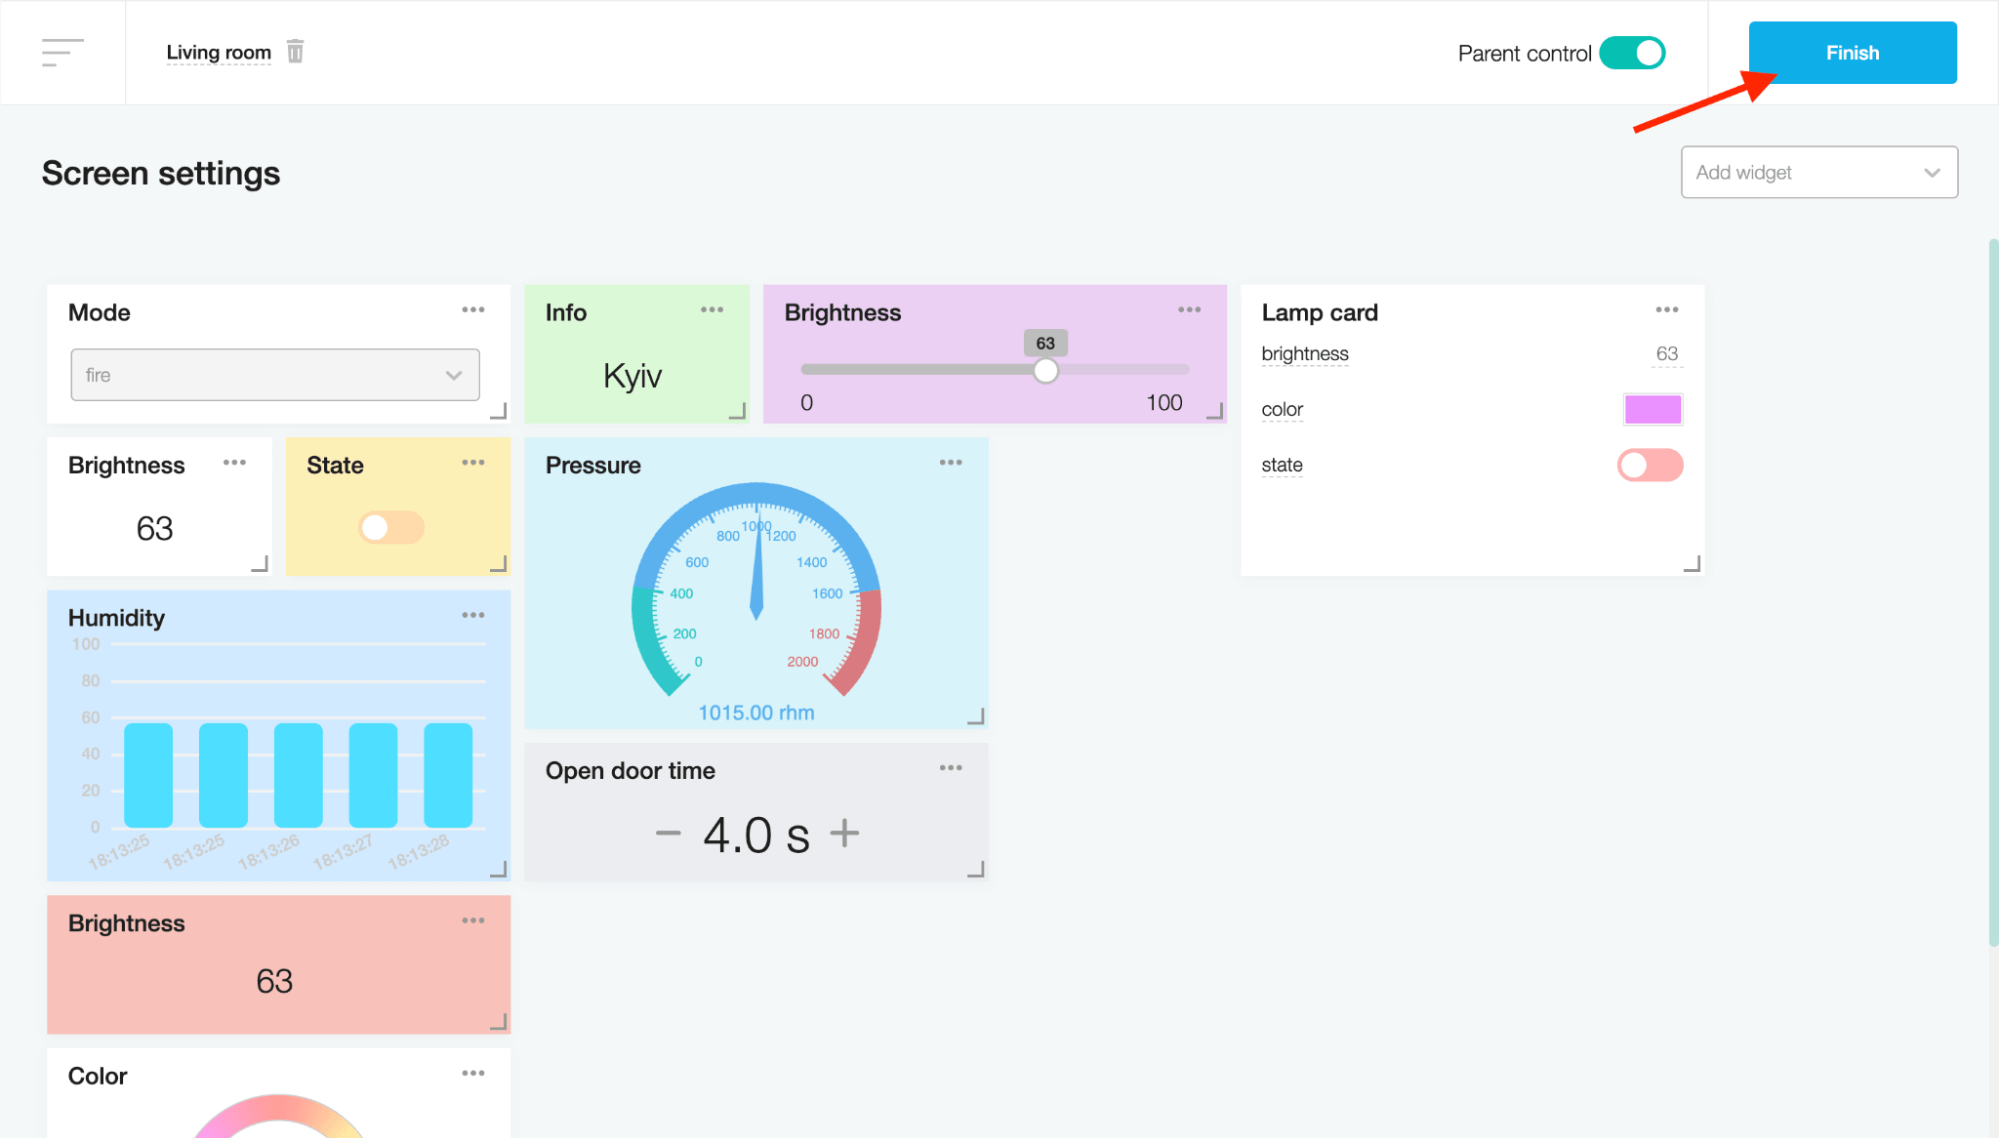
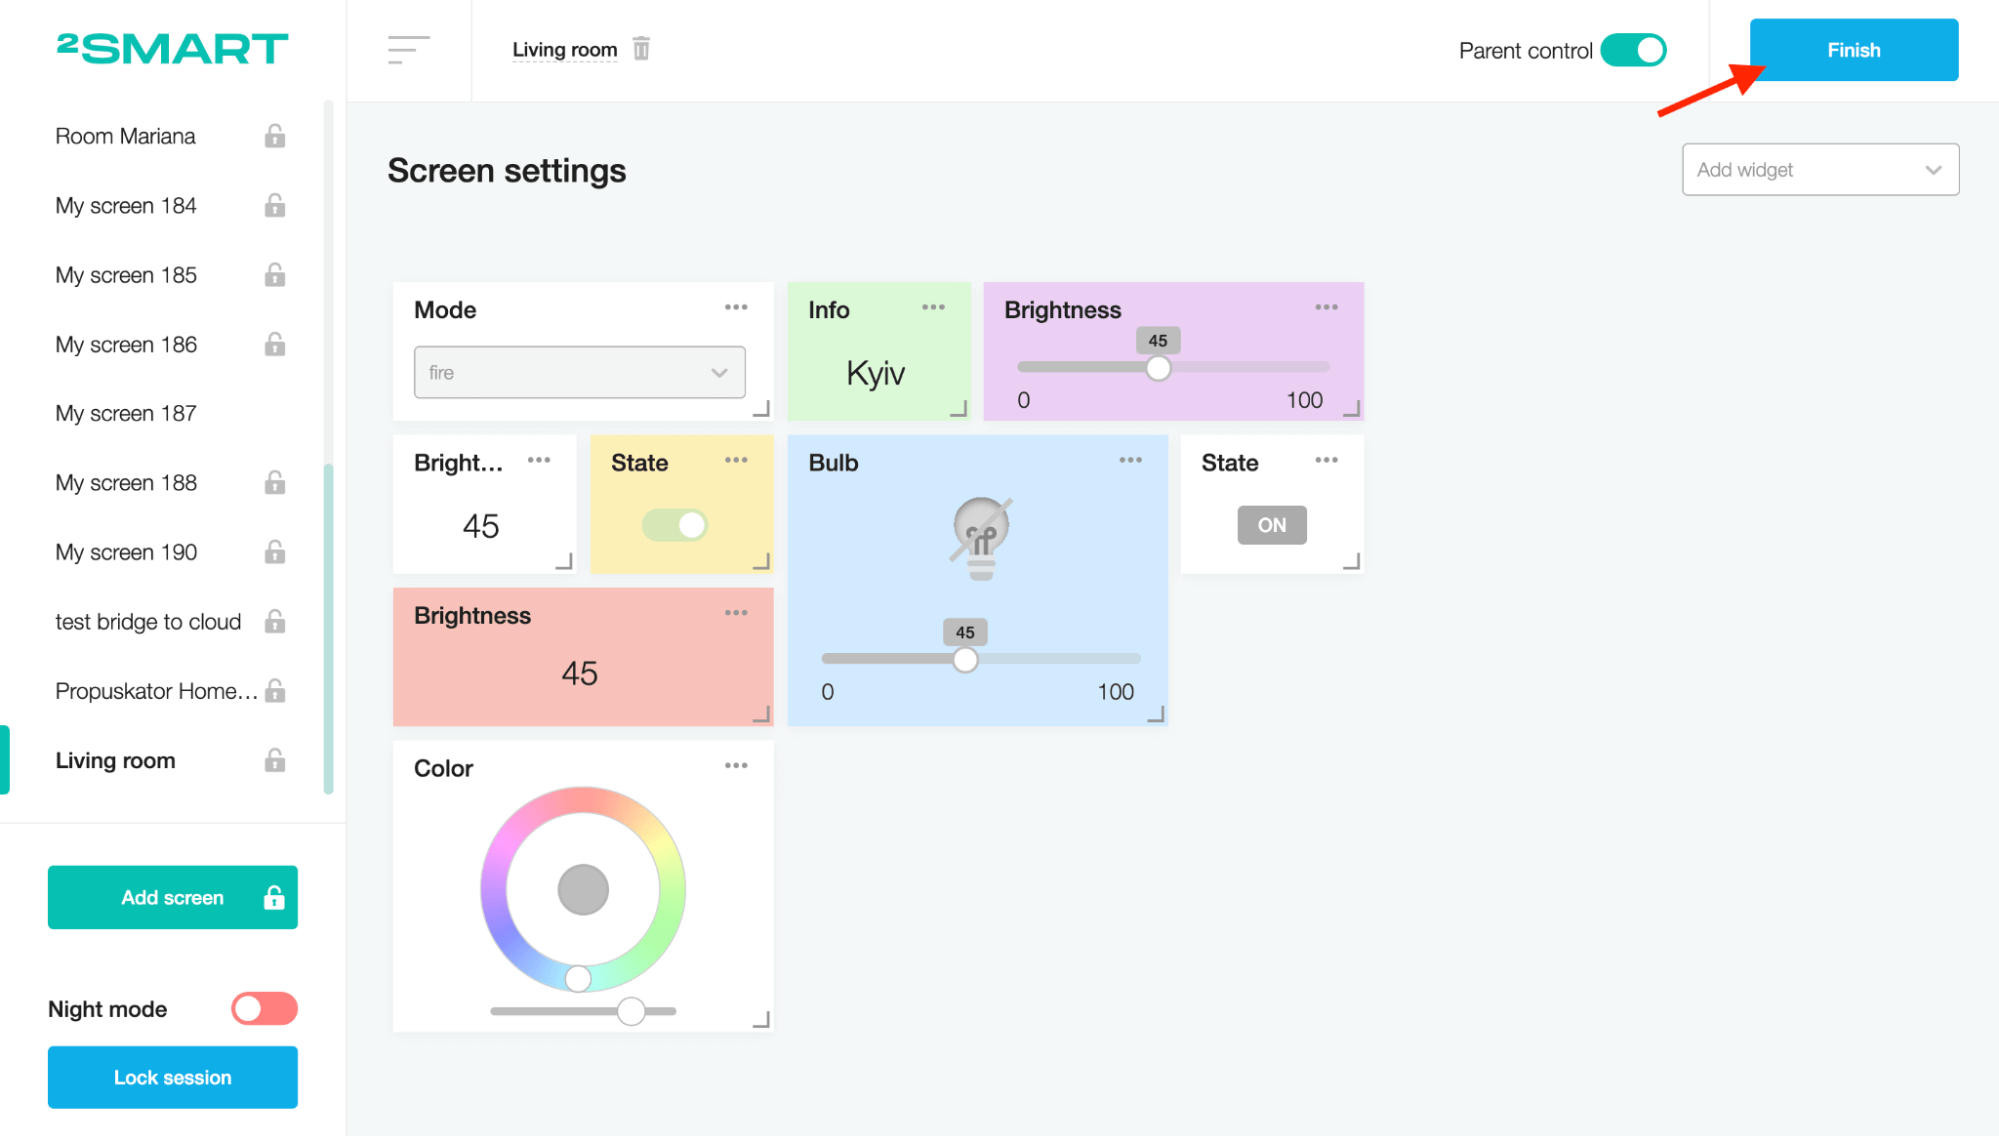
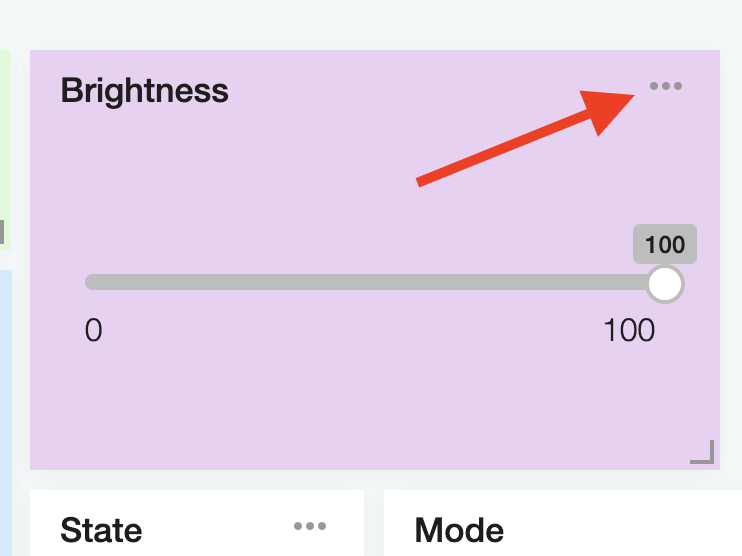
Screen settings
Click on the gear icon at the top right of the screen. The screen settings will appear.
Use drag and drop to arrange the widgets in a convenient order.
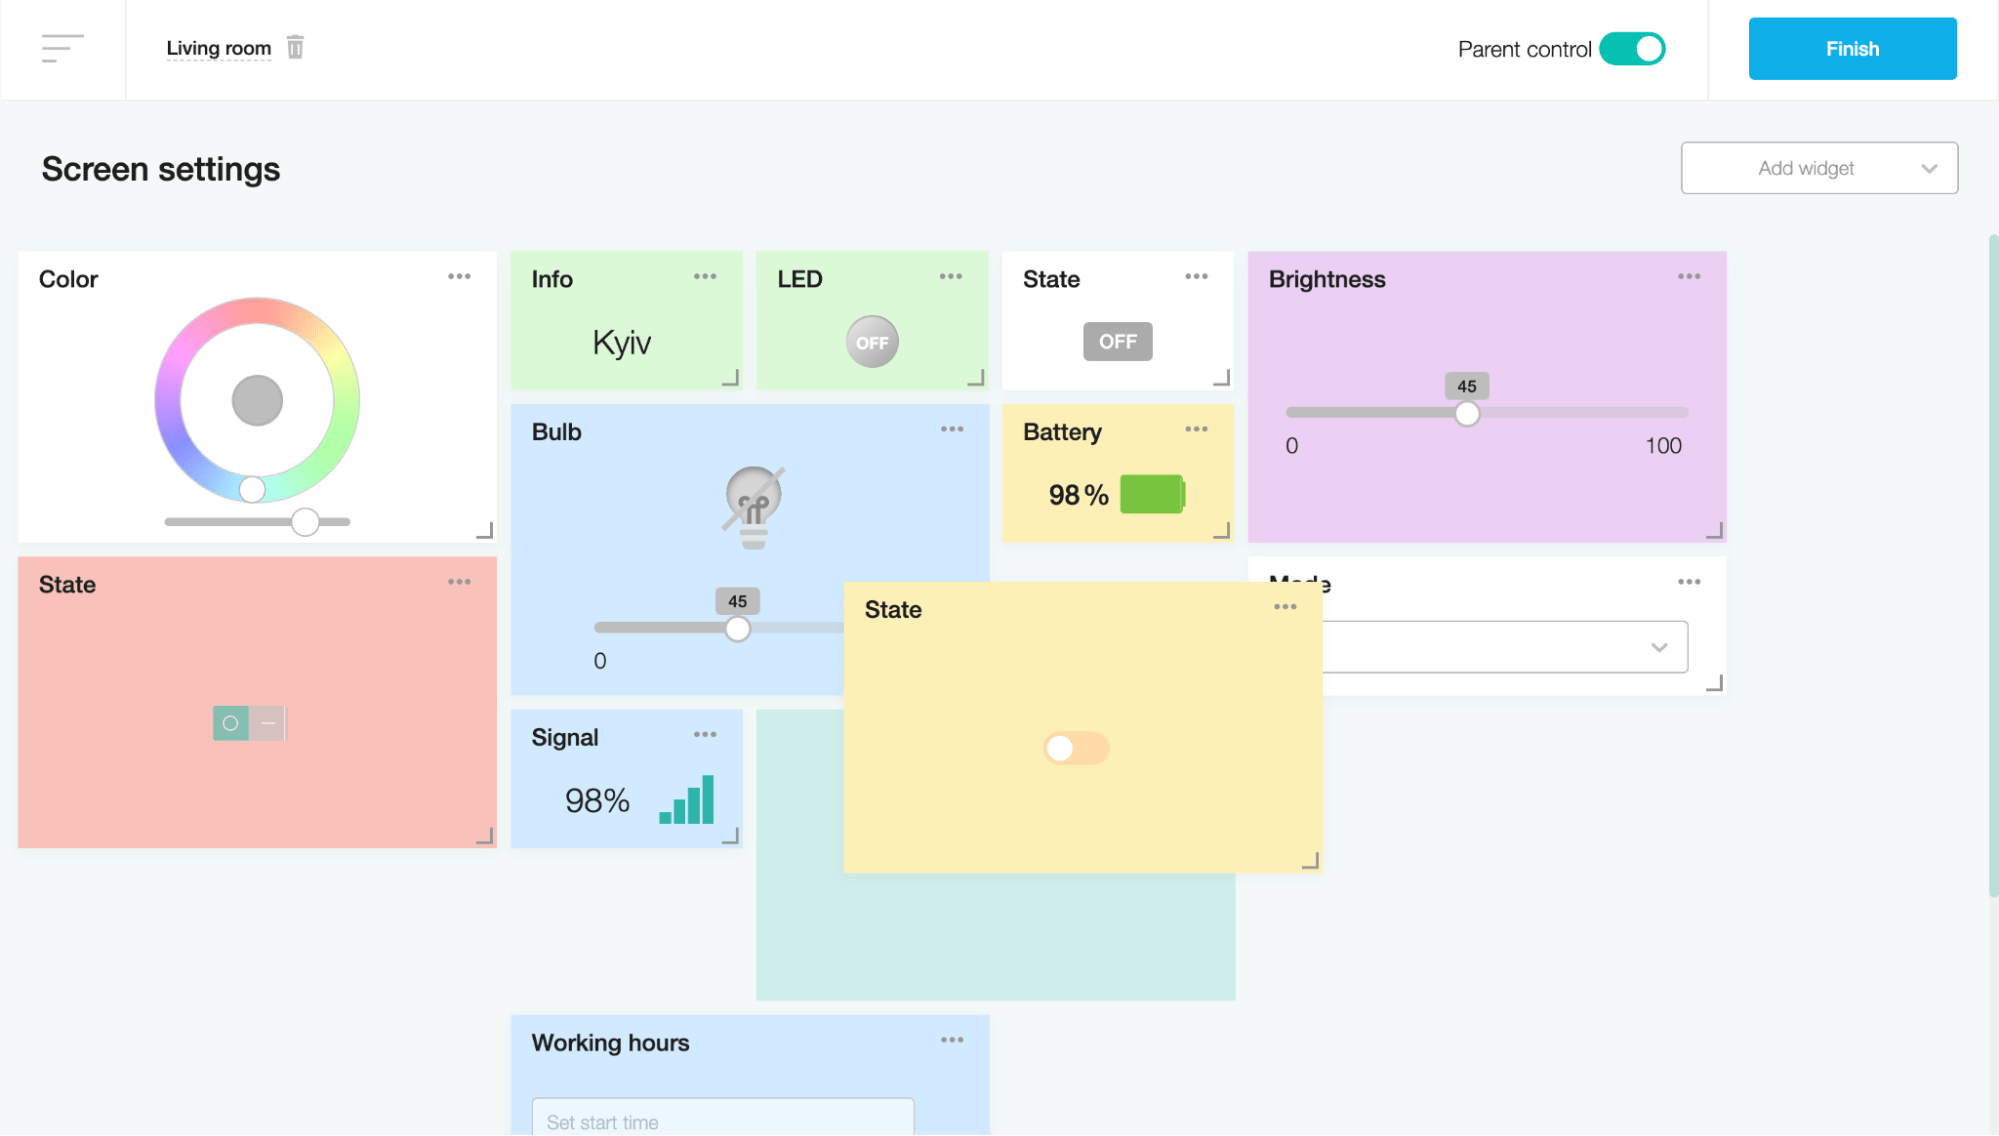
Note that you can customize three-dimensional grids: desktop, mobile, and tablet. The location of the widgets will be saved for each grid independently of each other.
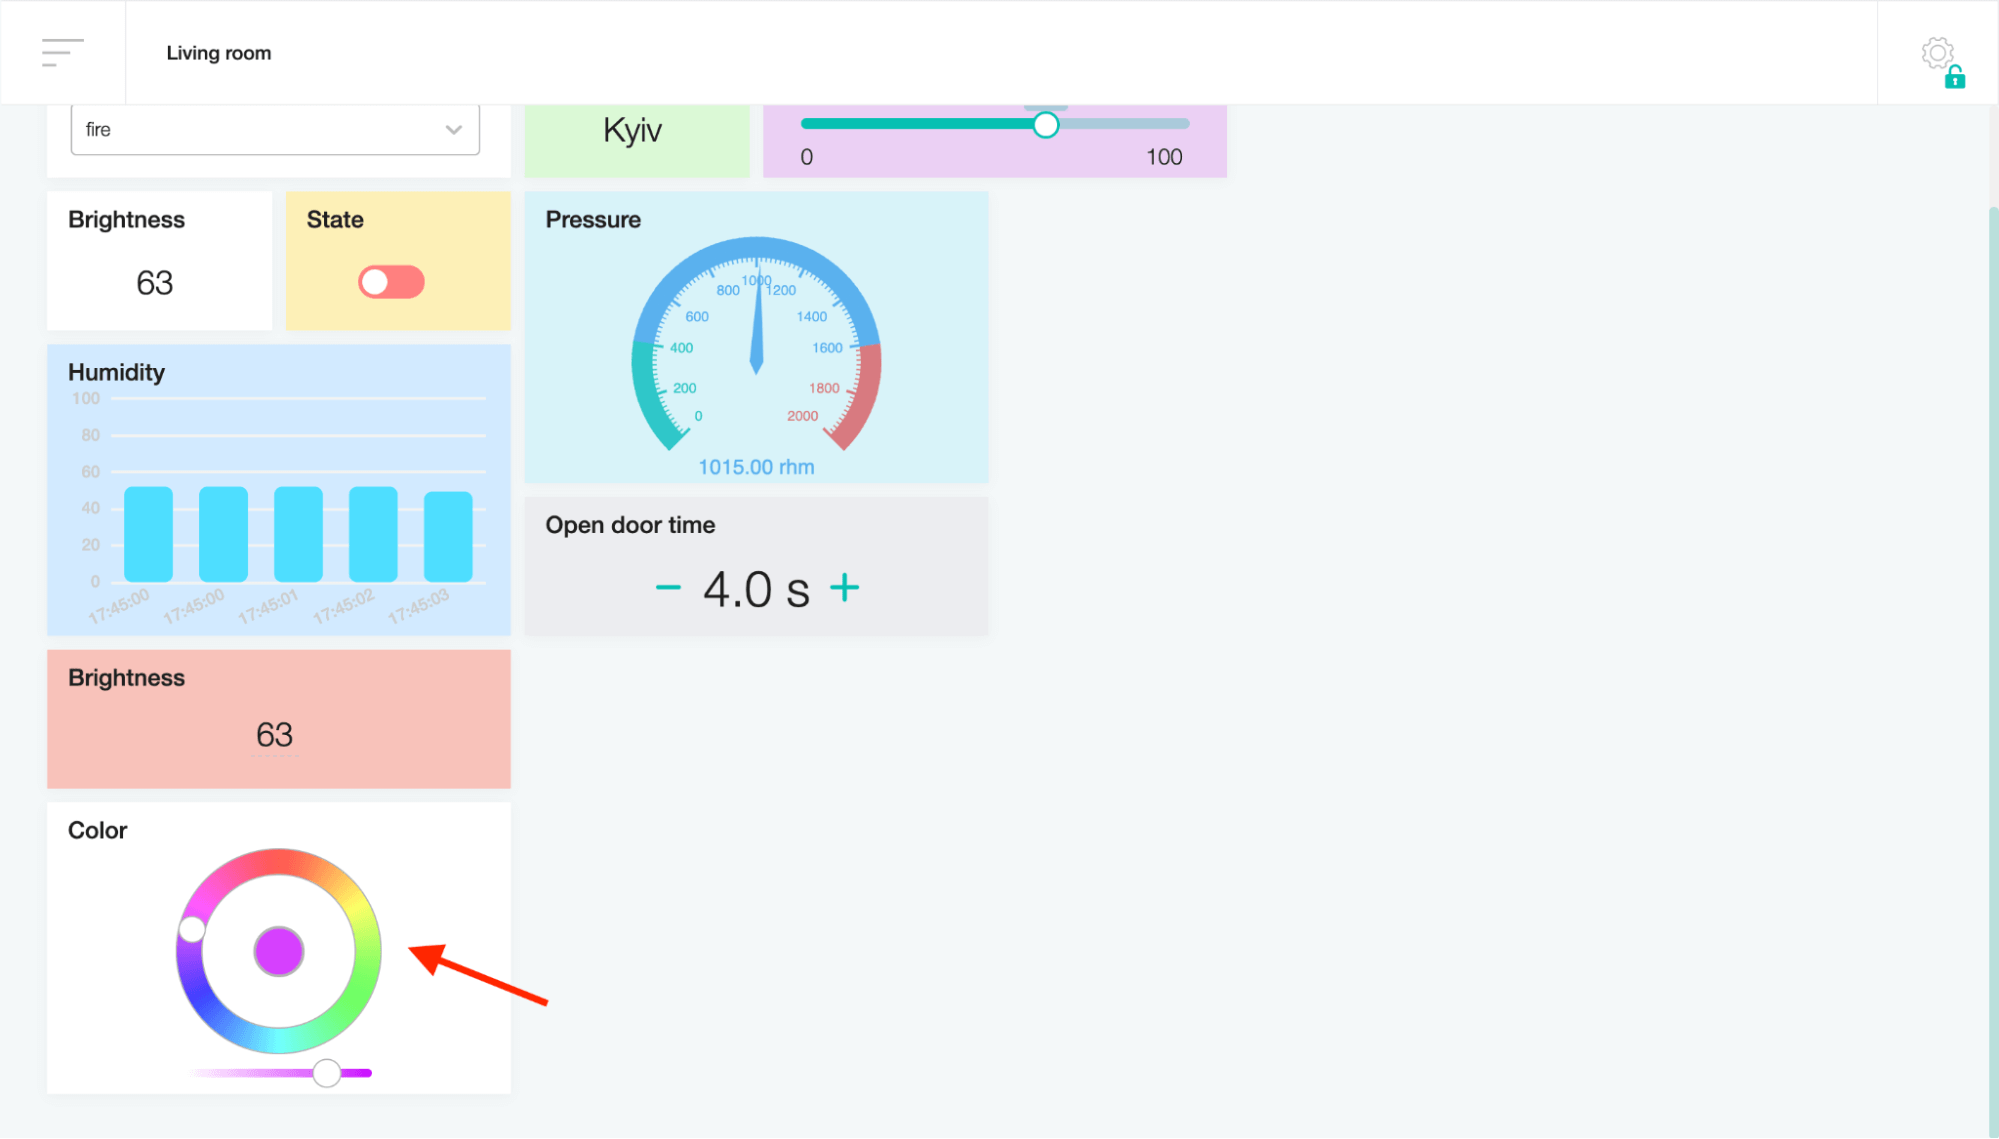
To change the widget's size, click on the lower right corner and drag according to settings for resizing.

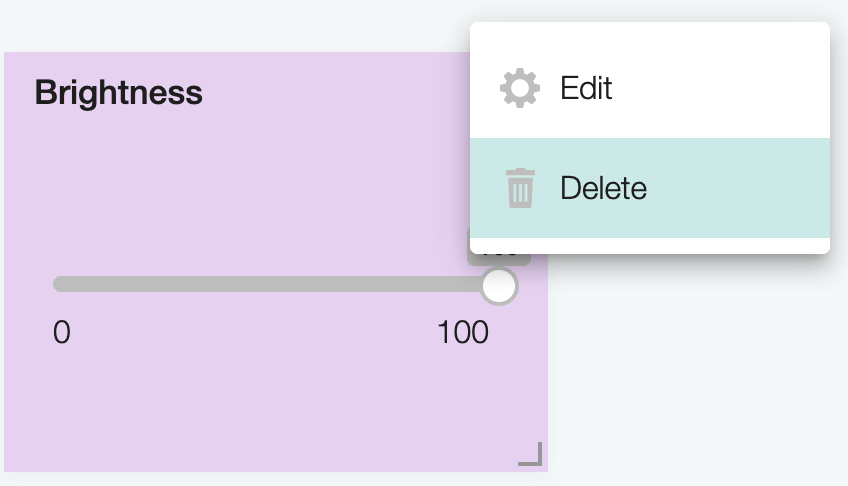
Editing the widget
Click on the three dots in the upper right corner of the widget.
Click on the “Edit” button to edit widget settings.
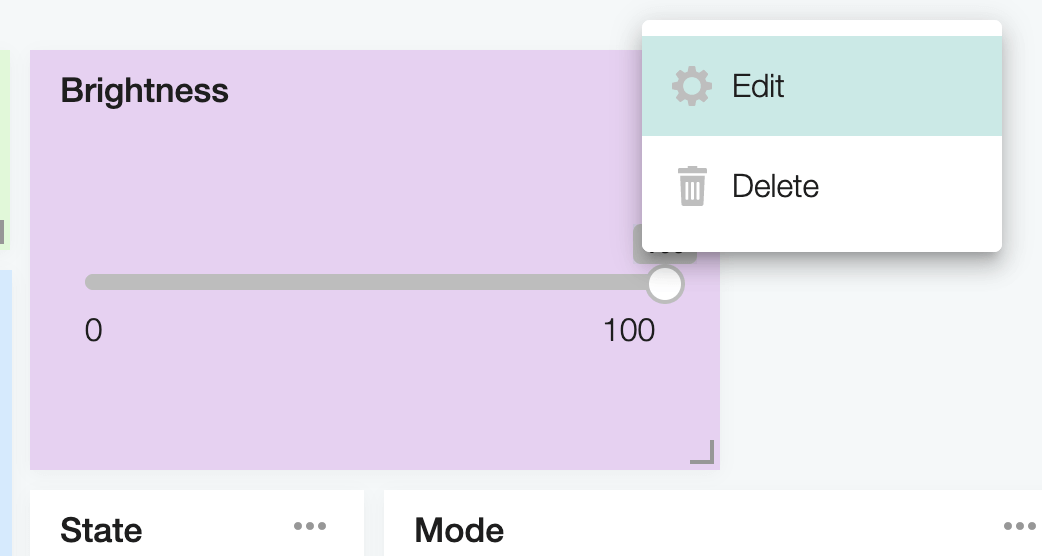
Click on the “Delete” button to delete the widget.
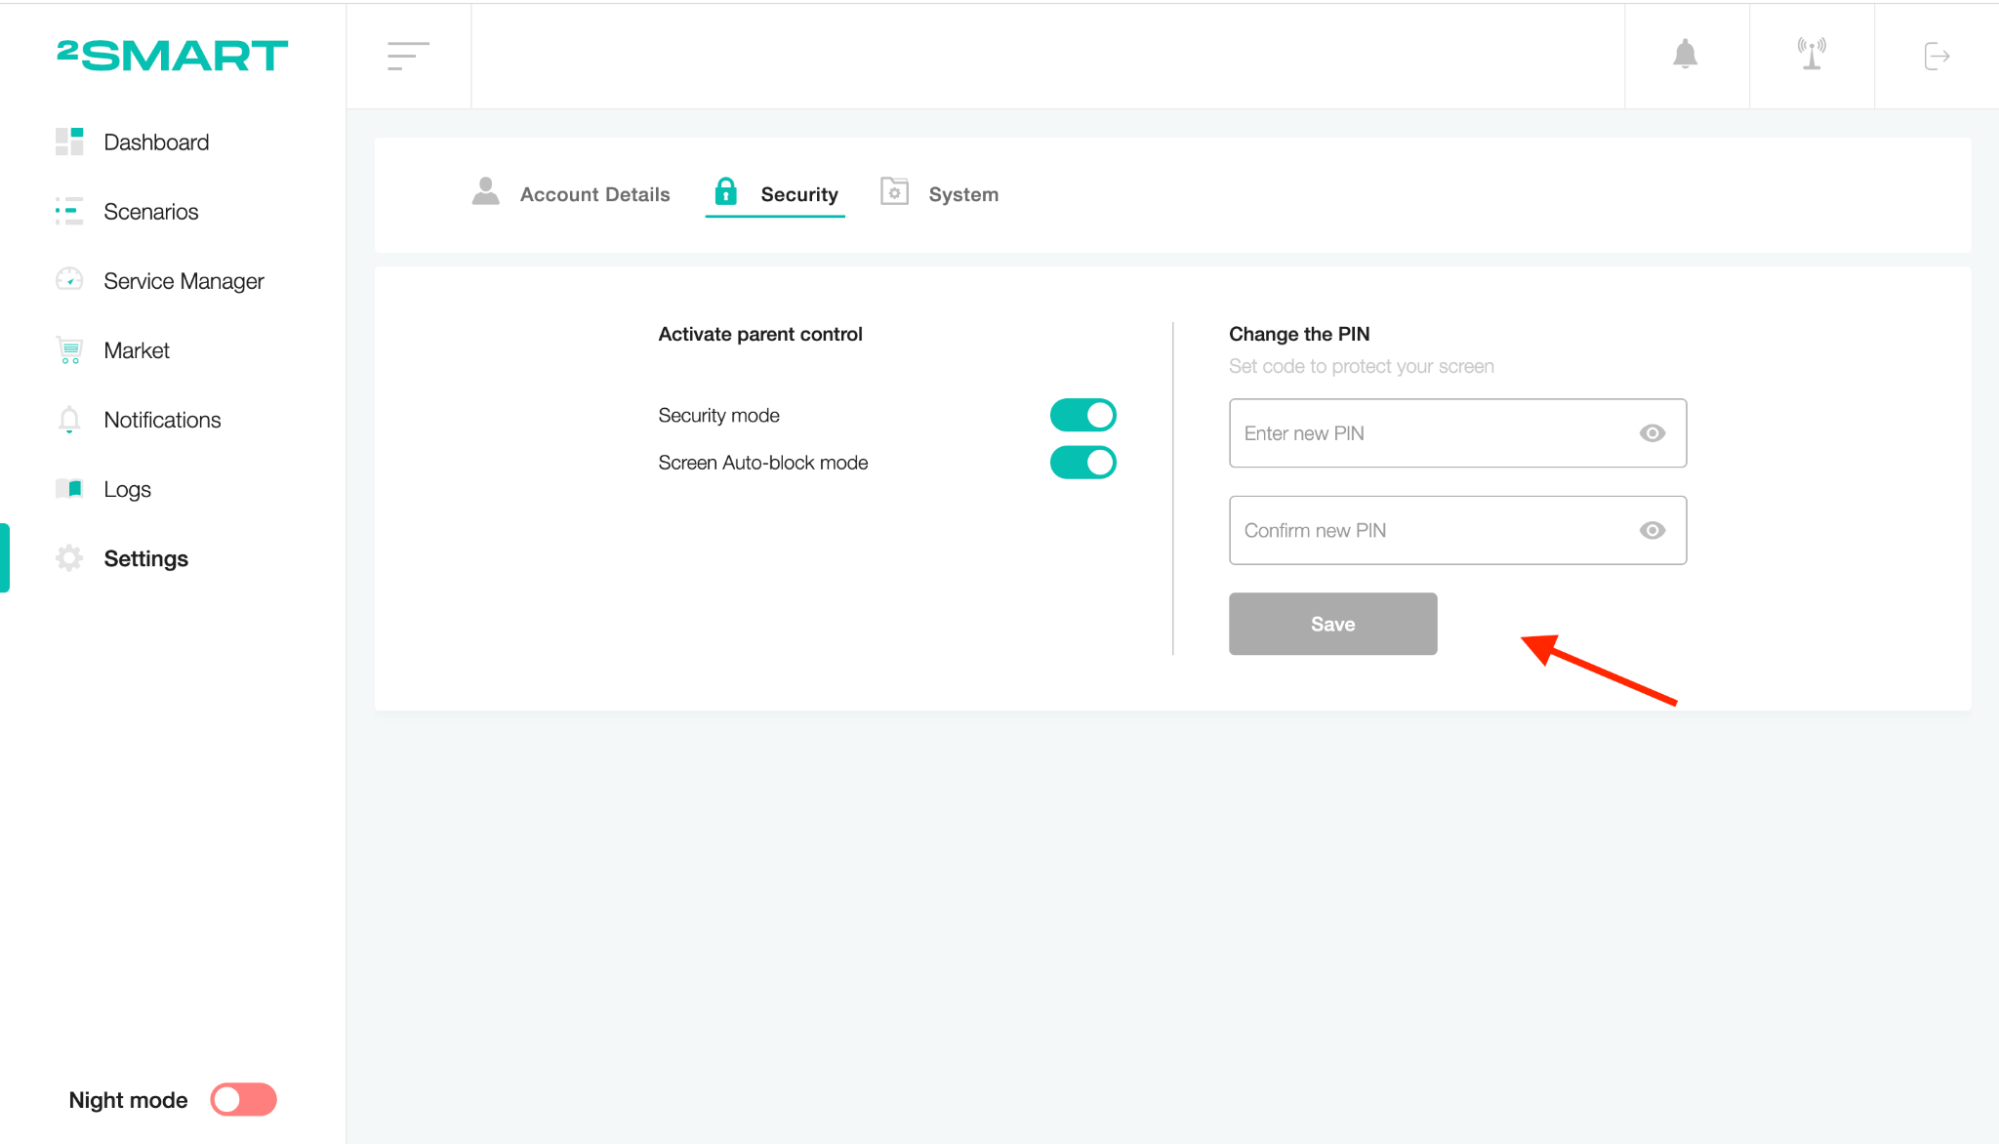
Parent control
Parental control allows users to restrict access to screens. To activate it, set a password and save it in the admin settings in the “Security” tab.
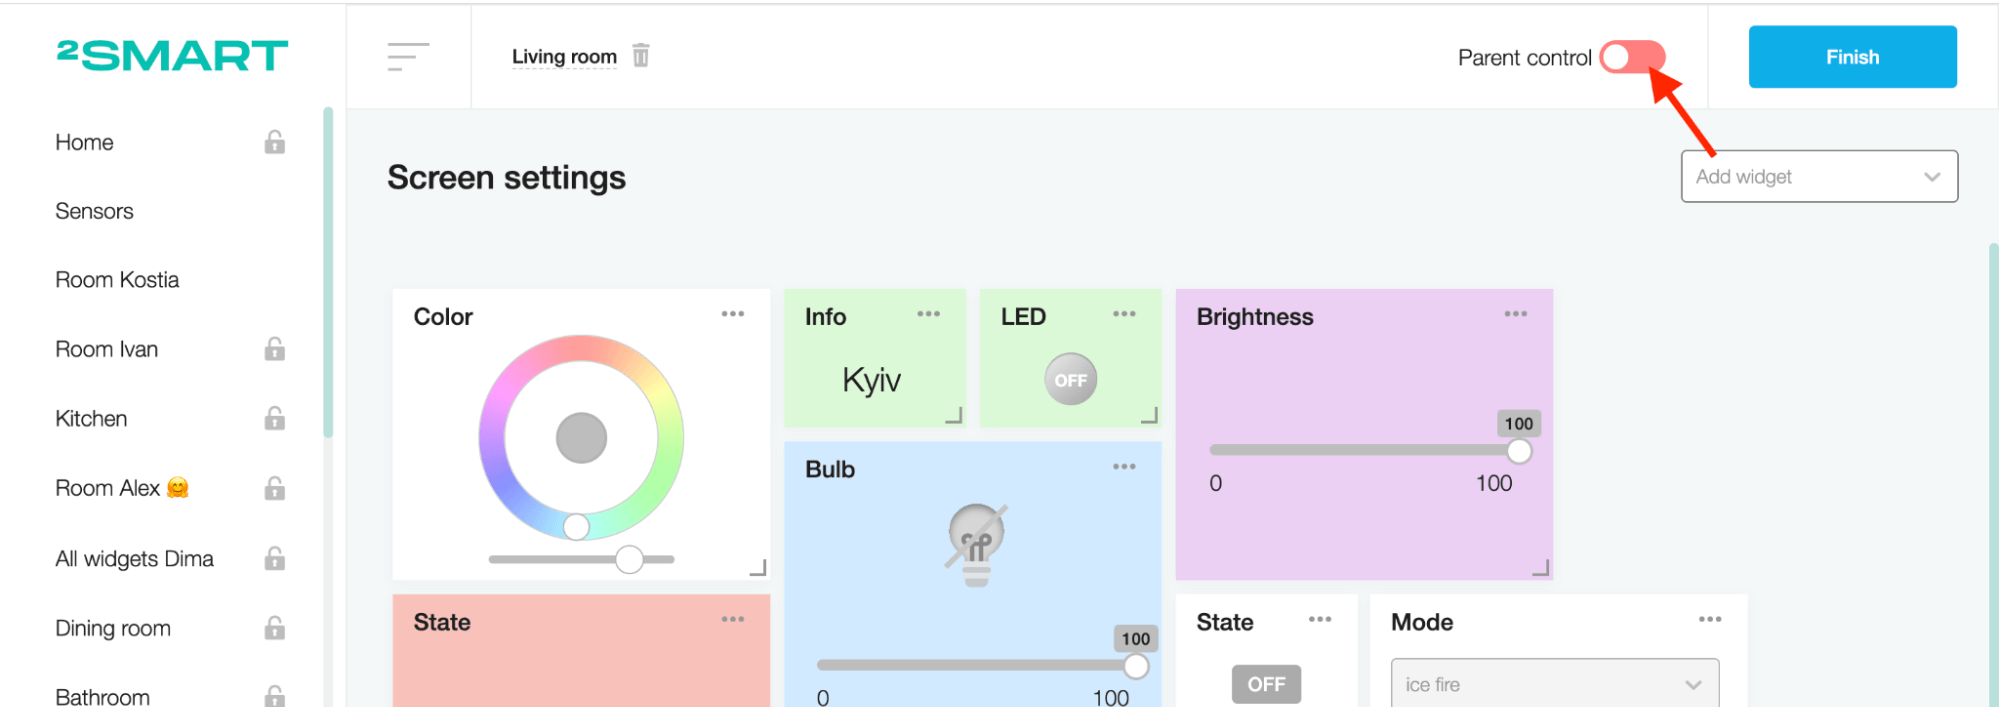
Click the “Parent control” toggle on the header to activate the password before opening the screen.
Click on the “Lock session” button to close access to the screen.
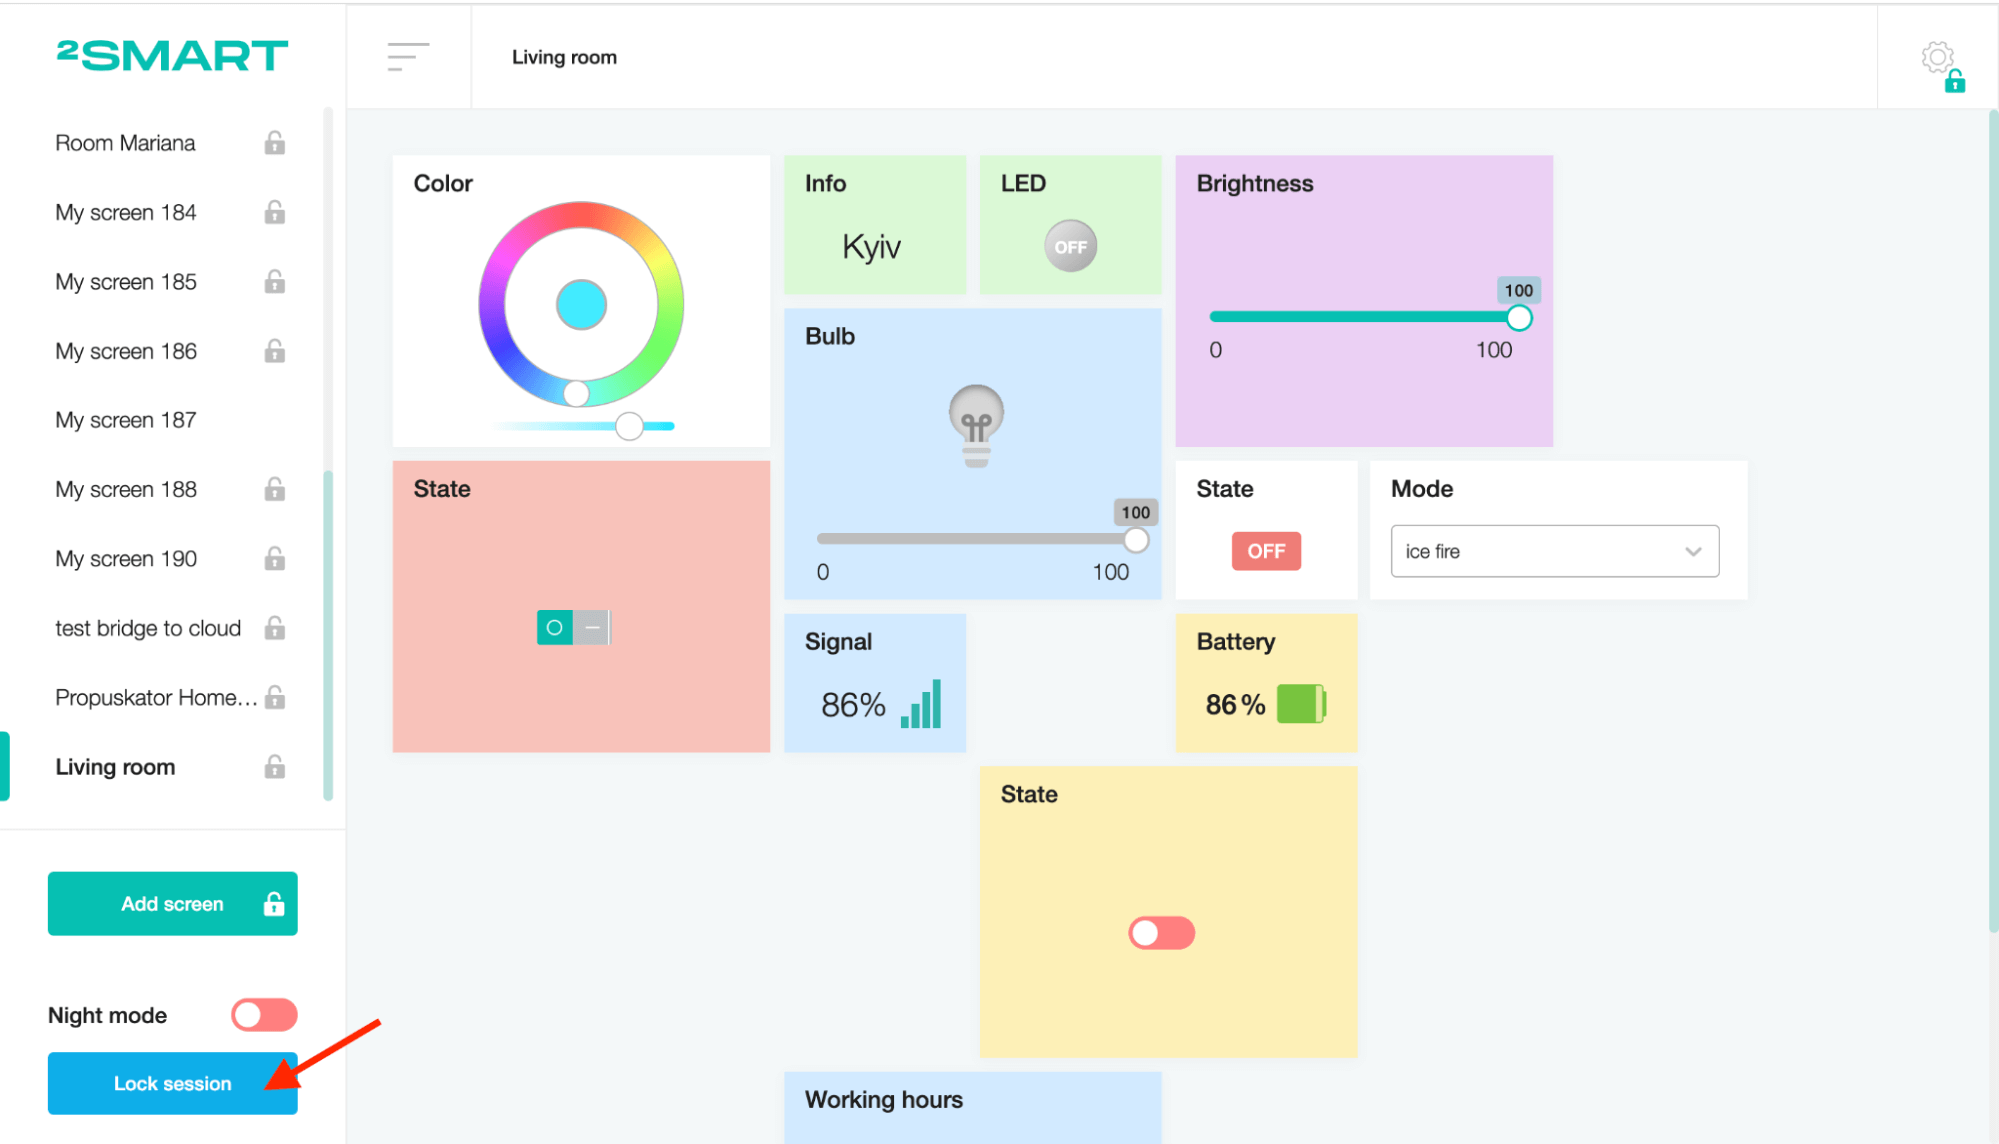
After that, the user has to enter the password to enter the screen.
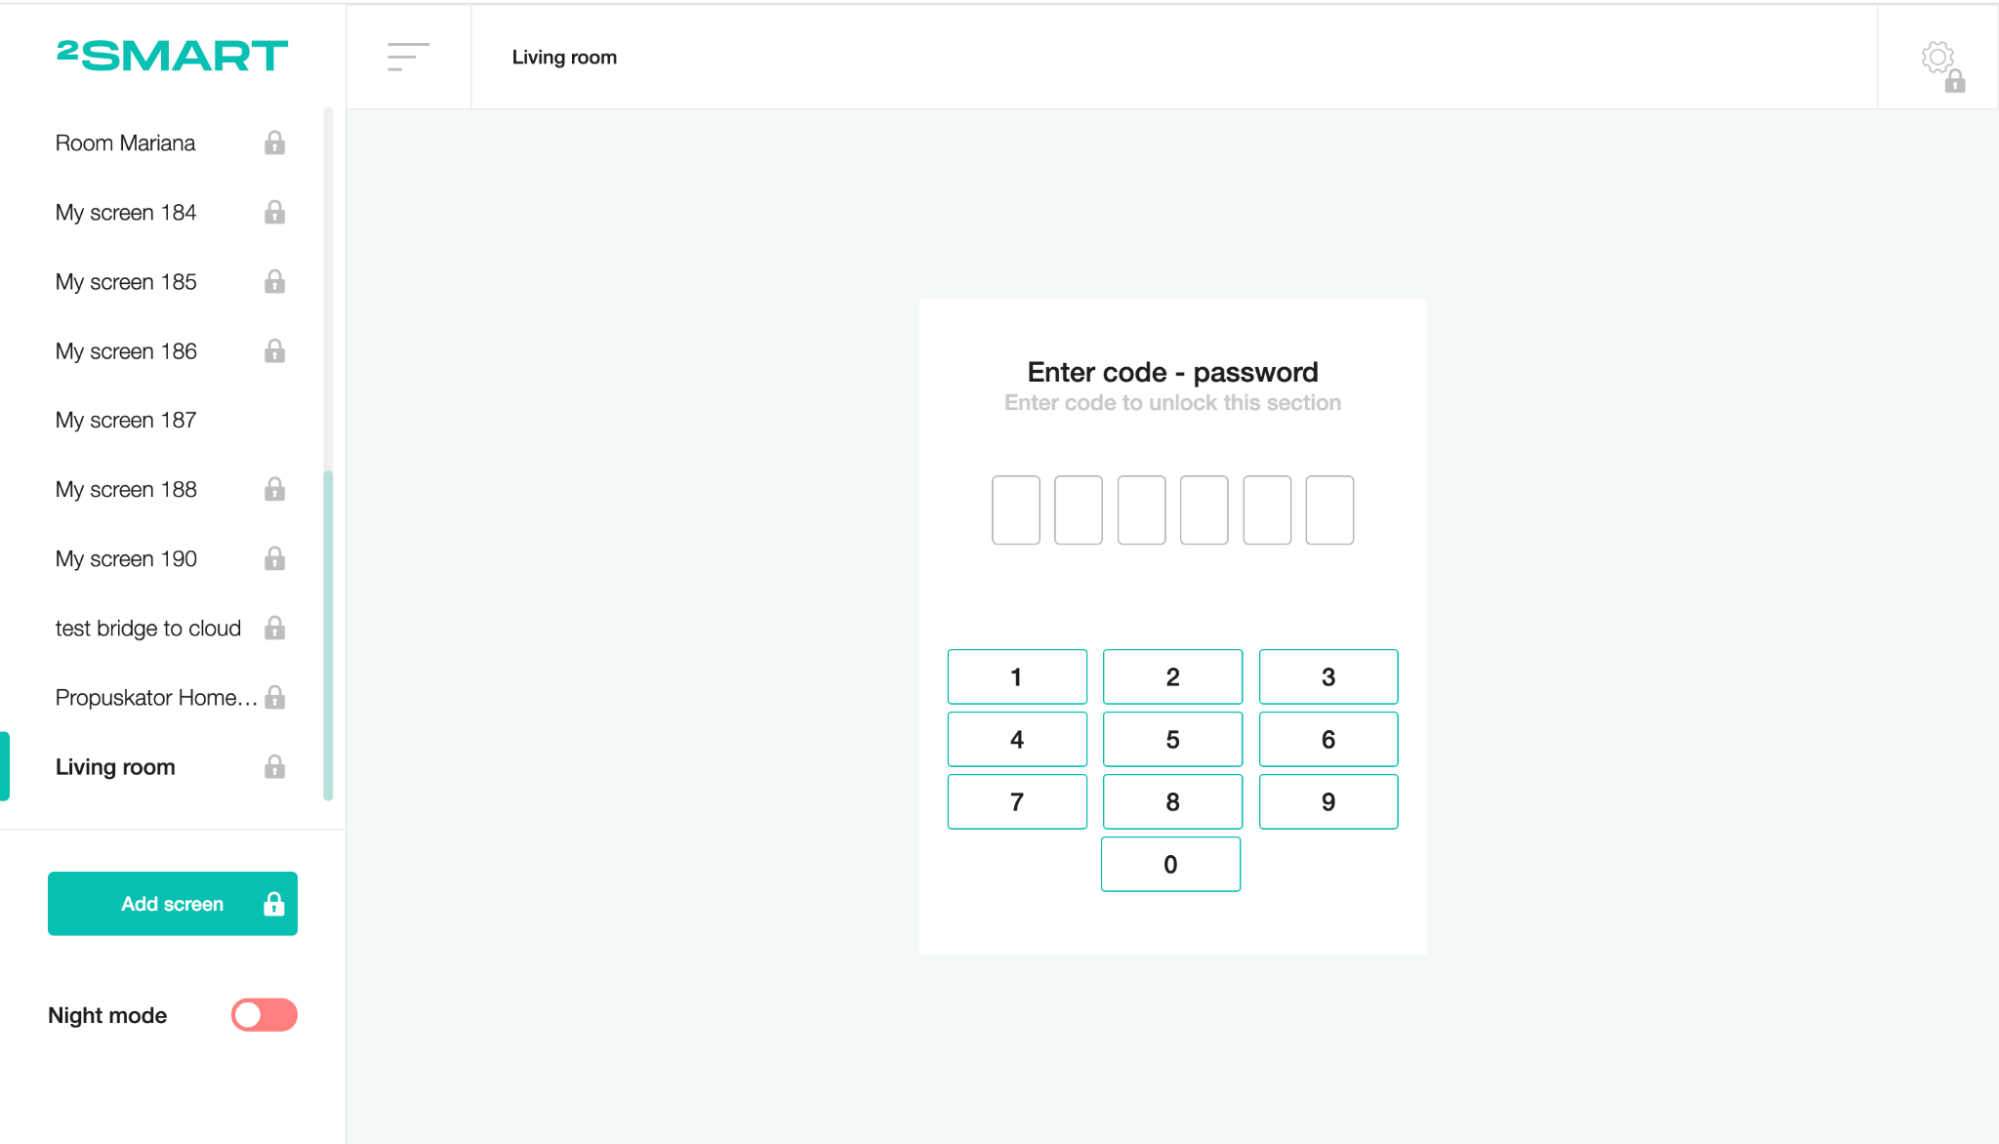
If the user enters a pin code and leaves the screen unlocked, then after a while, if there is no activity in the window, the session will end automatically. The same flow will happen after clicking on the “Lock session” button.
Night mode
Click on the “Night mode” toggle to activate the dark appearance for the design.
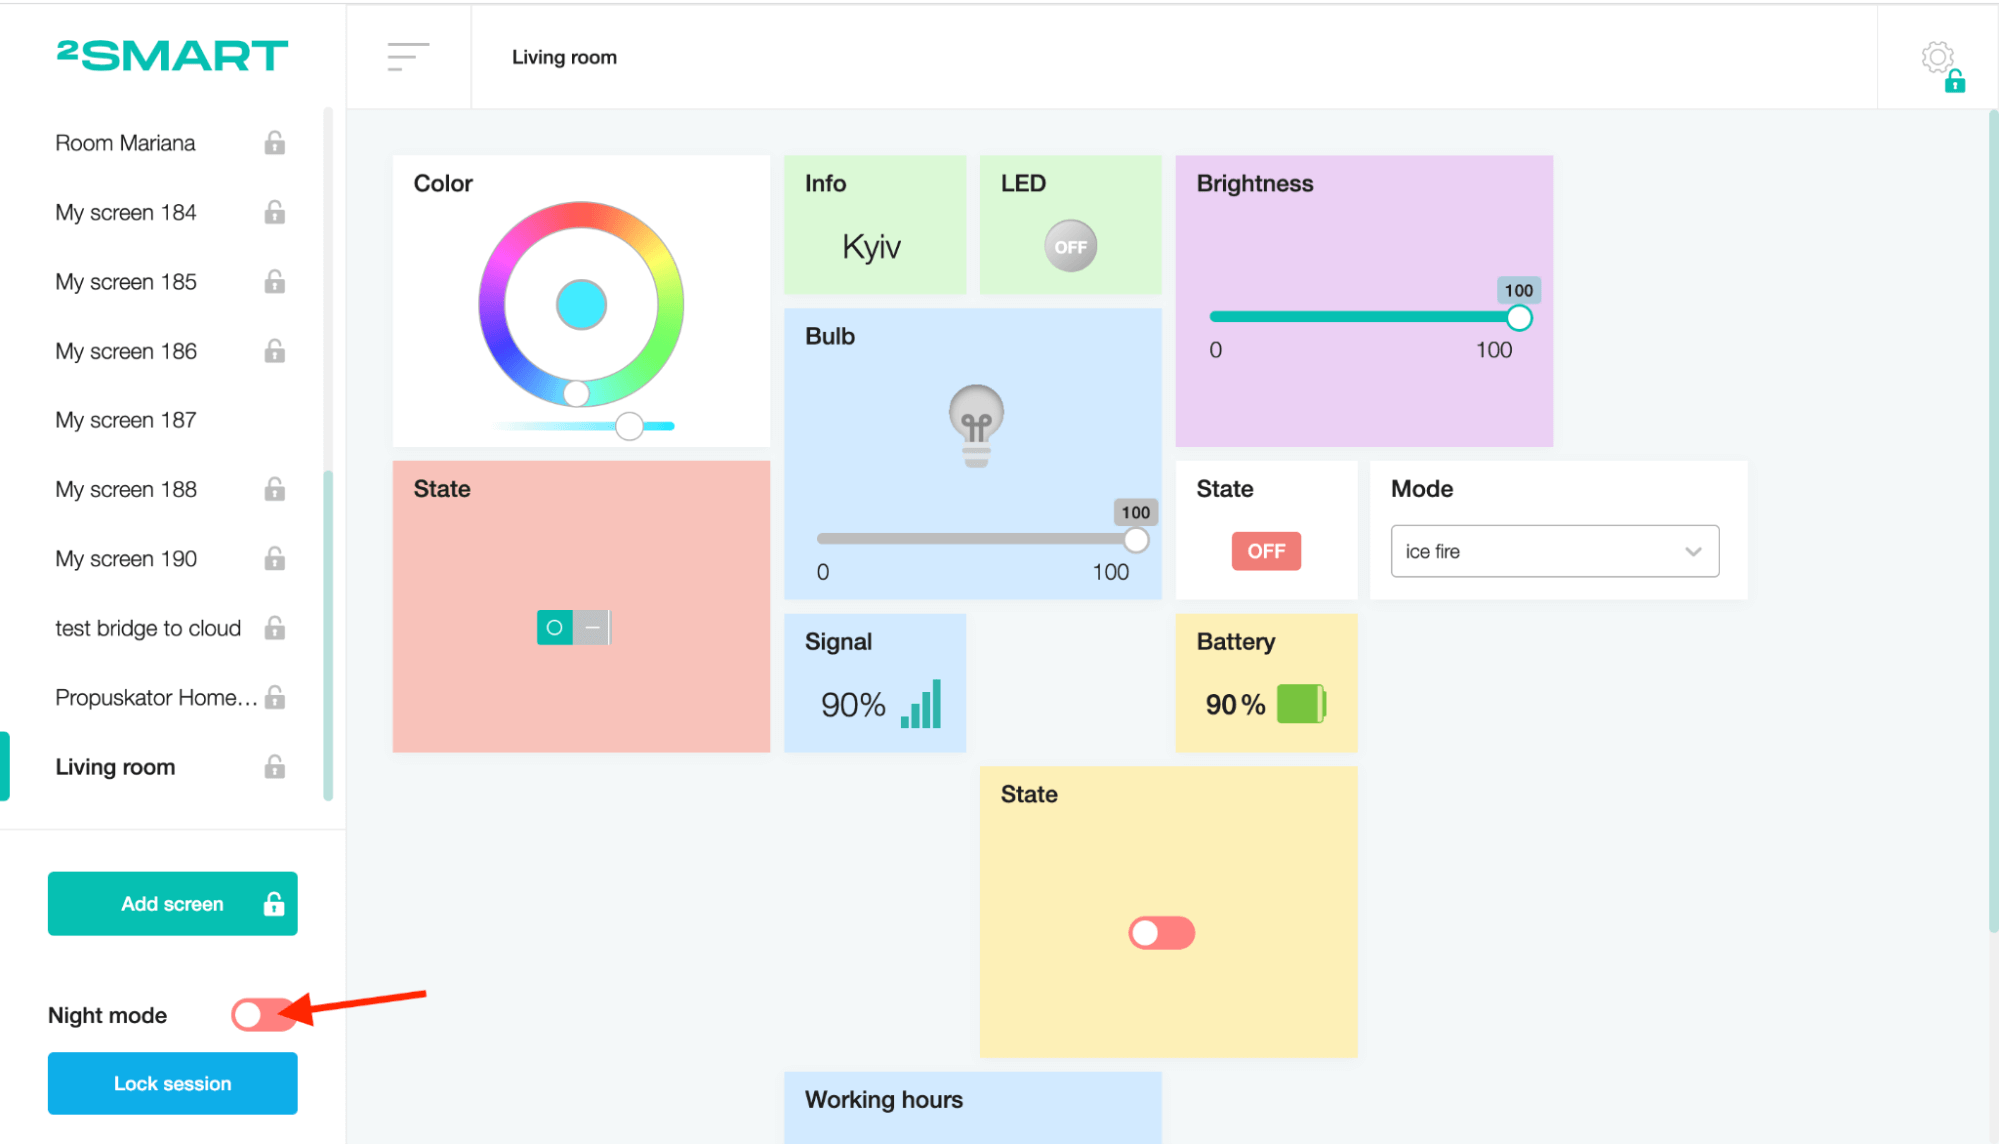
Customize the widget background according to the selected color mode.