Voice Control
The bridge will allow you to set up integration with Siri and Google Assistant voice assistants.
This integration provides the following features:
- 2Smart Standalone devices control by voice commands;
- remote devices control via the Google Home mobile app on iOS and Android;
- sharing devices with trusted users;
- integration of 2Smart devices into Apple or Google smart home infrastructure.
Please note! The bridge currently only works on the Ubuntu operating system.
Configuring the voice control service
- On the Market page, open the Addons tab and click on the download icon near the selected item.
- Go to the Service Manager page, click the “Setup Service” list and select the downloaded addon.
- In the editor that appears, specify the config with the mapping of sensors to accessories.
The illustration below shows the default config displayed when starting the bridge.
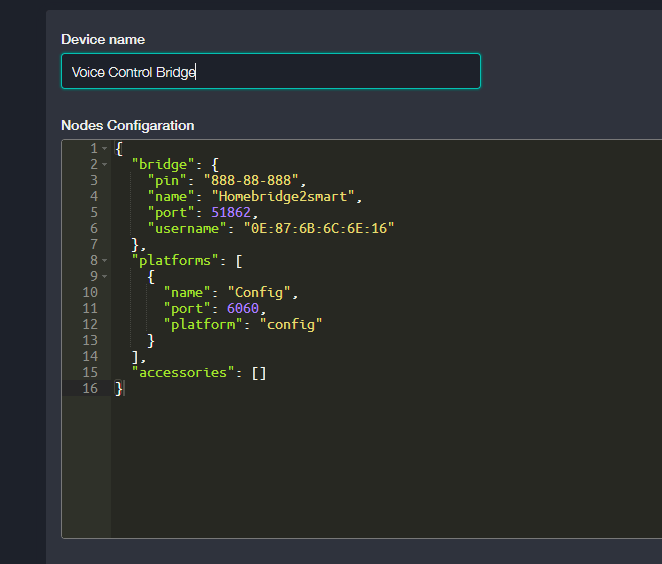
Config example:
{
    "bridge": {
      "pin": "888-88-888",
      "name": "Homebridge2smart",
      "port": 51862,
      "username": "0E:87:7B:7C:6E:16"
    },
    "platforms": [
      {
        "name": "Config",
        "port": 6060,
        "platform": "config"
      }
    ],
    "accessories": [
      {
        "accessory": "mqttthing",
        "type": "switch",
        "name": "camera down",
        "topics": {
          "getOn": "sweet-home/yx7ccz9u788s7wtm7tn6/camera-vertical-motors/vertical-down/set",
          "setOn": "sweet-home/yx7ccz9u788s7wtm7tn6/camera-vertical-motors/vertical-down/set"
        }
      },
      {
        "accessory": "mqttthing",
        "type": "switch",
        "name": "air conditioner",
        "topics": {
          "getOn": "sweet-home/4686819a-0/relay/switch",
          "setOn": "sweet-home/4686819a-0/relay/switch/set"
        }
      }
    ]
  }
}
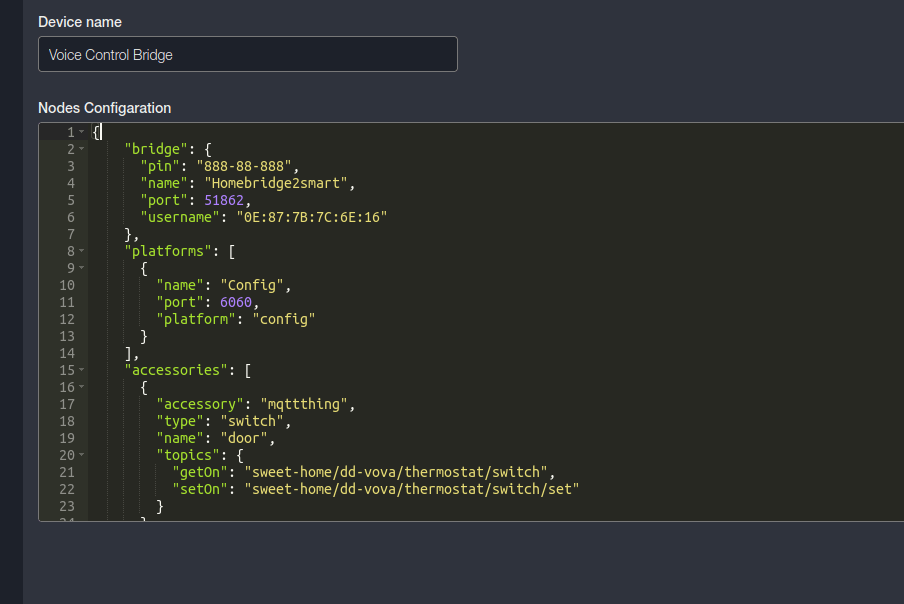
The config consists of the "bridge", "platforms", and "accessories" blocks. You can leave the first two blocks unchanged by default.
Specify a set of necessary accessories in the "accessories" array that the voice control can handle.
Each accessory consists of a set of mandatory fields ("accessory", "type", "name", "topics") and several options.
You can find a complete description of all accessories here: https://github.com/arachnetech/homebridge-mqttthing/blob/HEAD/docs/Accessories.md.
In each accessory in the topics object, specify those from which the information will be retrieved and in which the new value will be set (for setups, such as setOn, you must specify /set at the end of the normal topics).
Configuration Example for an actual device
Using the "Copy topic" button, we've copied the toggle topic value to paste into the “accessories” field.
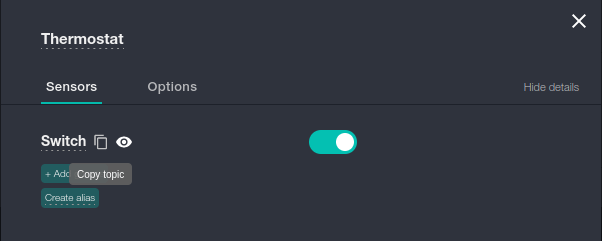
We leave the "bridge" and "platforms" blocks unchanged, and in the "accessories" array, we specify the accessories to work. In this case, it is only 1 switching topiary.
In the "bridge" block, we are interested in the Pin field - this is essentially the password for integrating devices into the Home app.
In the "platforms" block, only the Port field is required, which specifies the “Homebridge” administration port. Knowing the port number, you can enter the administration panel and add the device to the mobile application using the QR code. Also, using this panel, you can work with the device directly (http://localhost:6060).
After completing the basic settings, save and run the bridge.
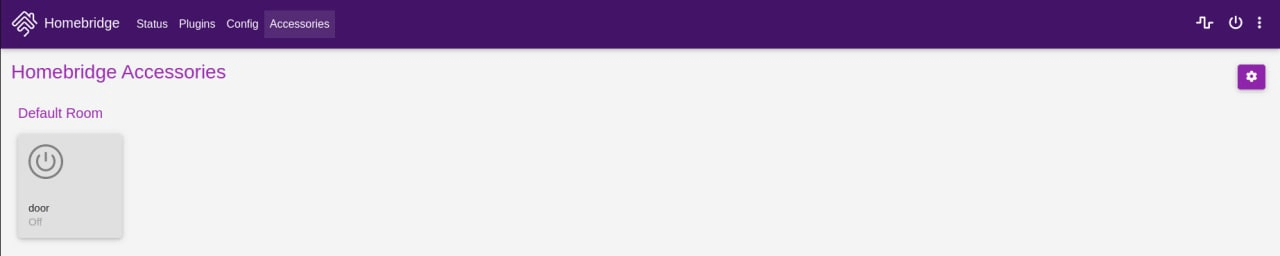
After starting the bridge, you can log in to the “Homebridge” admin interface using the port number that is specified in the "platforms" block (default 6060). You will see a list of your accessories, and you can also manage devices using the web interface.
Integration with Home mobile app
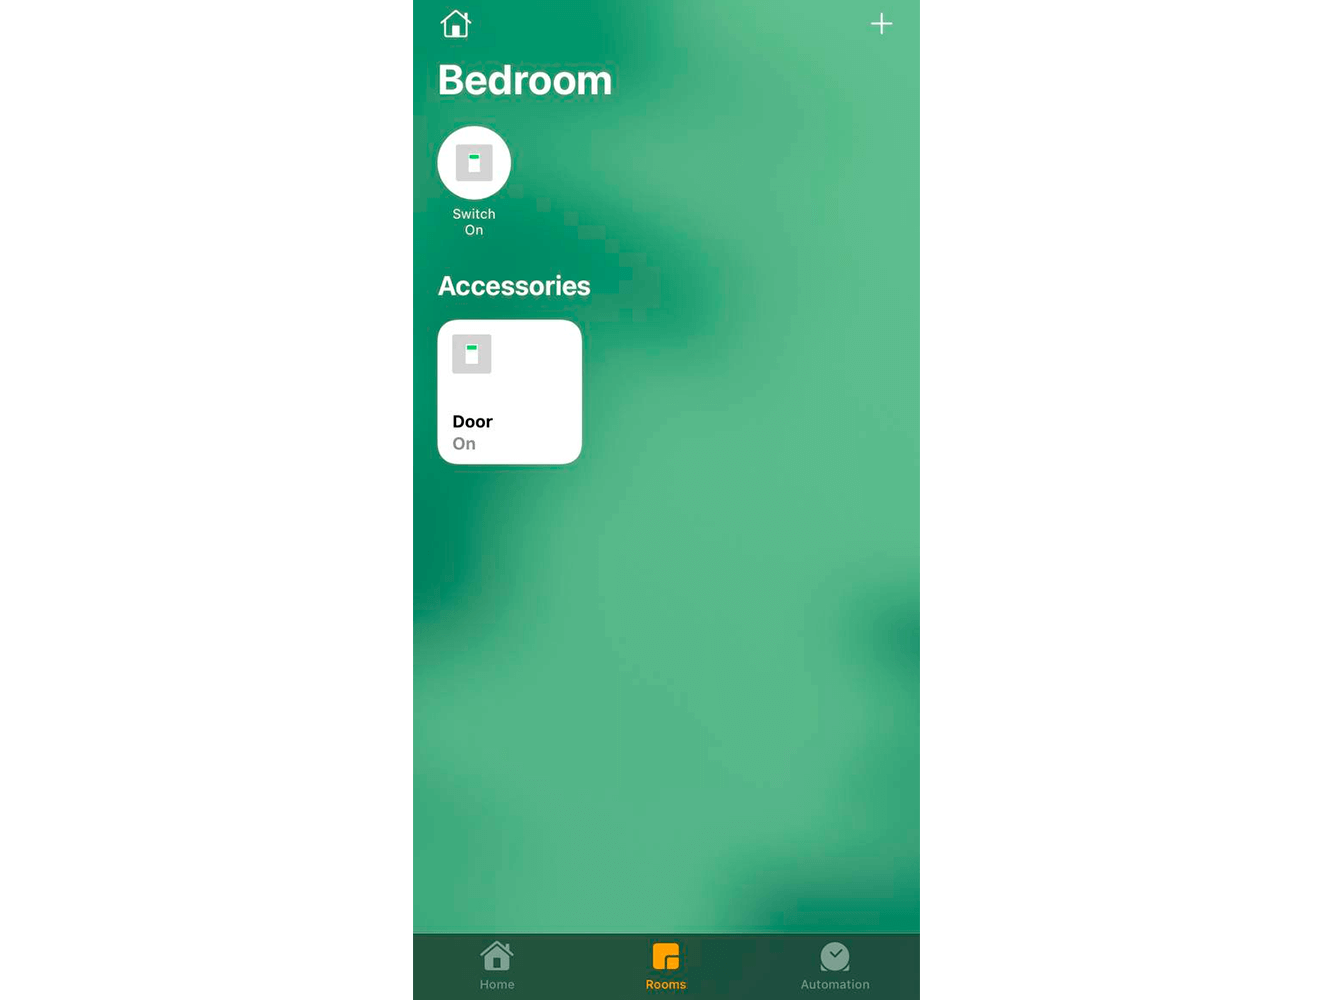
After starting the bridge, open the Home mobile app on your iPhone or iPad, press "+" -> "Add accessory" -> "I don't have a code", and select the available bridge. Its name will correspond to specified in the "bridge" config block (by default, Homebridge2smart). Then enter the password from the same block (by default 888-88-888) and confirm the addition of all accessories created in the config.
Voice control with Siri is now complete. You can control devices both by voice and from the Home app.
Note: you also can add your device using a QR code. To do this, go to the admin panel of the bridge and scan it with your smartphone.
Integration with Google Home mobile app
To configure control via Google Assistant or Google Home, specify the following object in the "platforms" config block:
{
        "name": "Google Smart Home",
        "token": "your token",
        "notice": "Keep your token a secret!",
        "platform": "google-smarthome"
}
In the “token” field, specify the token you can get as follows:
- Log in at https://homebridge-gsh.iot.oz.nu/link-account.
- Open the page https://homebridge-gsh.iot.oz.nu/user/token and copy the token.
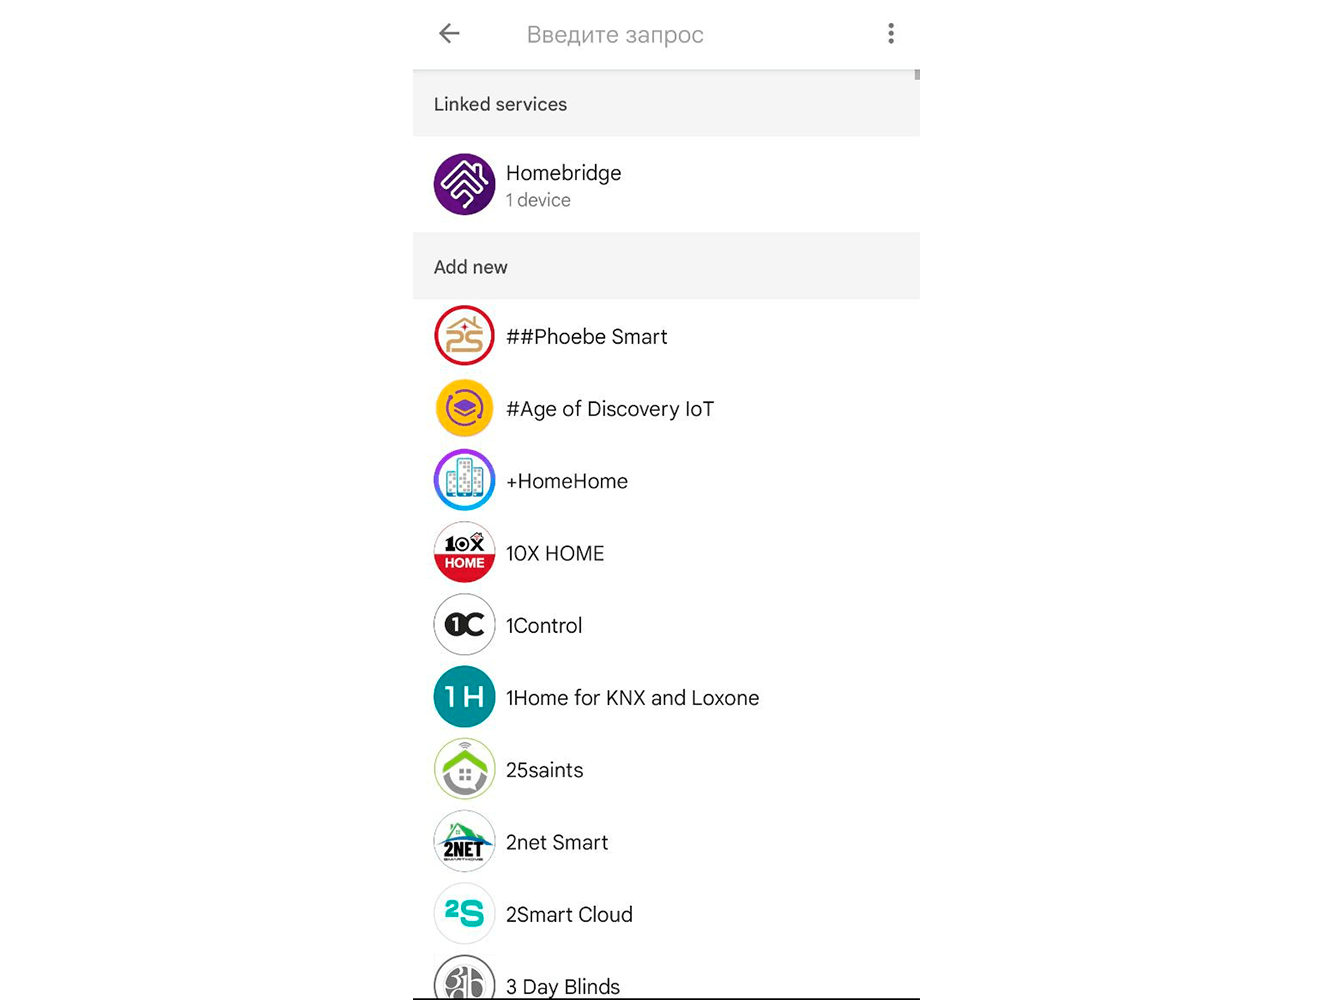
After receiving the token, go to the "Work with Google" tab in the Google Home app settings. Find the “Homebridge” extension, install it, and link the account for which you received the token. The application should automatically offer to add all the available accessories.
Notes:
- To work with Google Home, it is best to specify the accessories' names in English, as Google Home does not support Russian. If you need Russian, rename the accessories in the Google Home settings.
- Some accessories from the list of supported will not be available in the Google Home application, as the library is designed only to control with Siri.
Remote access via the Home app and sharing access with other users
Apple provides remote access to added devices from anywhere in the world. To work correctly in the local network must be a hub; it can be your iPad, iPod or AppleTV. For full functionality, switch one of these devices to the hub mode, and all invited users and you from other devices will be able to control 2SMART devices from anywhere in the world.
For detailed instructions on setting up remote management, see the Apple website.