Standalone to Cloud
The bridge will allow you to use the 2Smart Cloud mobile app to control 2Smart Standalone devices.
What you need to use the bridge
- installed 2Smart Standalone,
- the added device in the 2Smart Standalone,
- account in 2Smart Cloud,
- installed 2Smart Cloud mobile app.
Getting the credentials from the 2Smart Cloud via Account setting
Go to your account on the 2Smart Cloud platform - https://cloud.2smart.com/
Please note! The 2Smart Cloud uses a single account for the developer and the mobile application user. Therefore, device end-users can also use their credentials to log into the platform.
Go to the Account settings page.
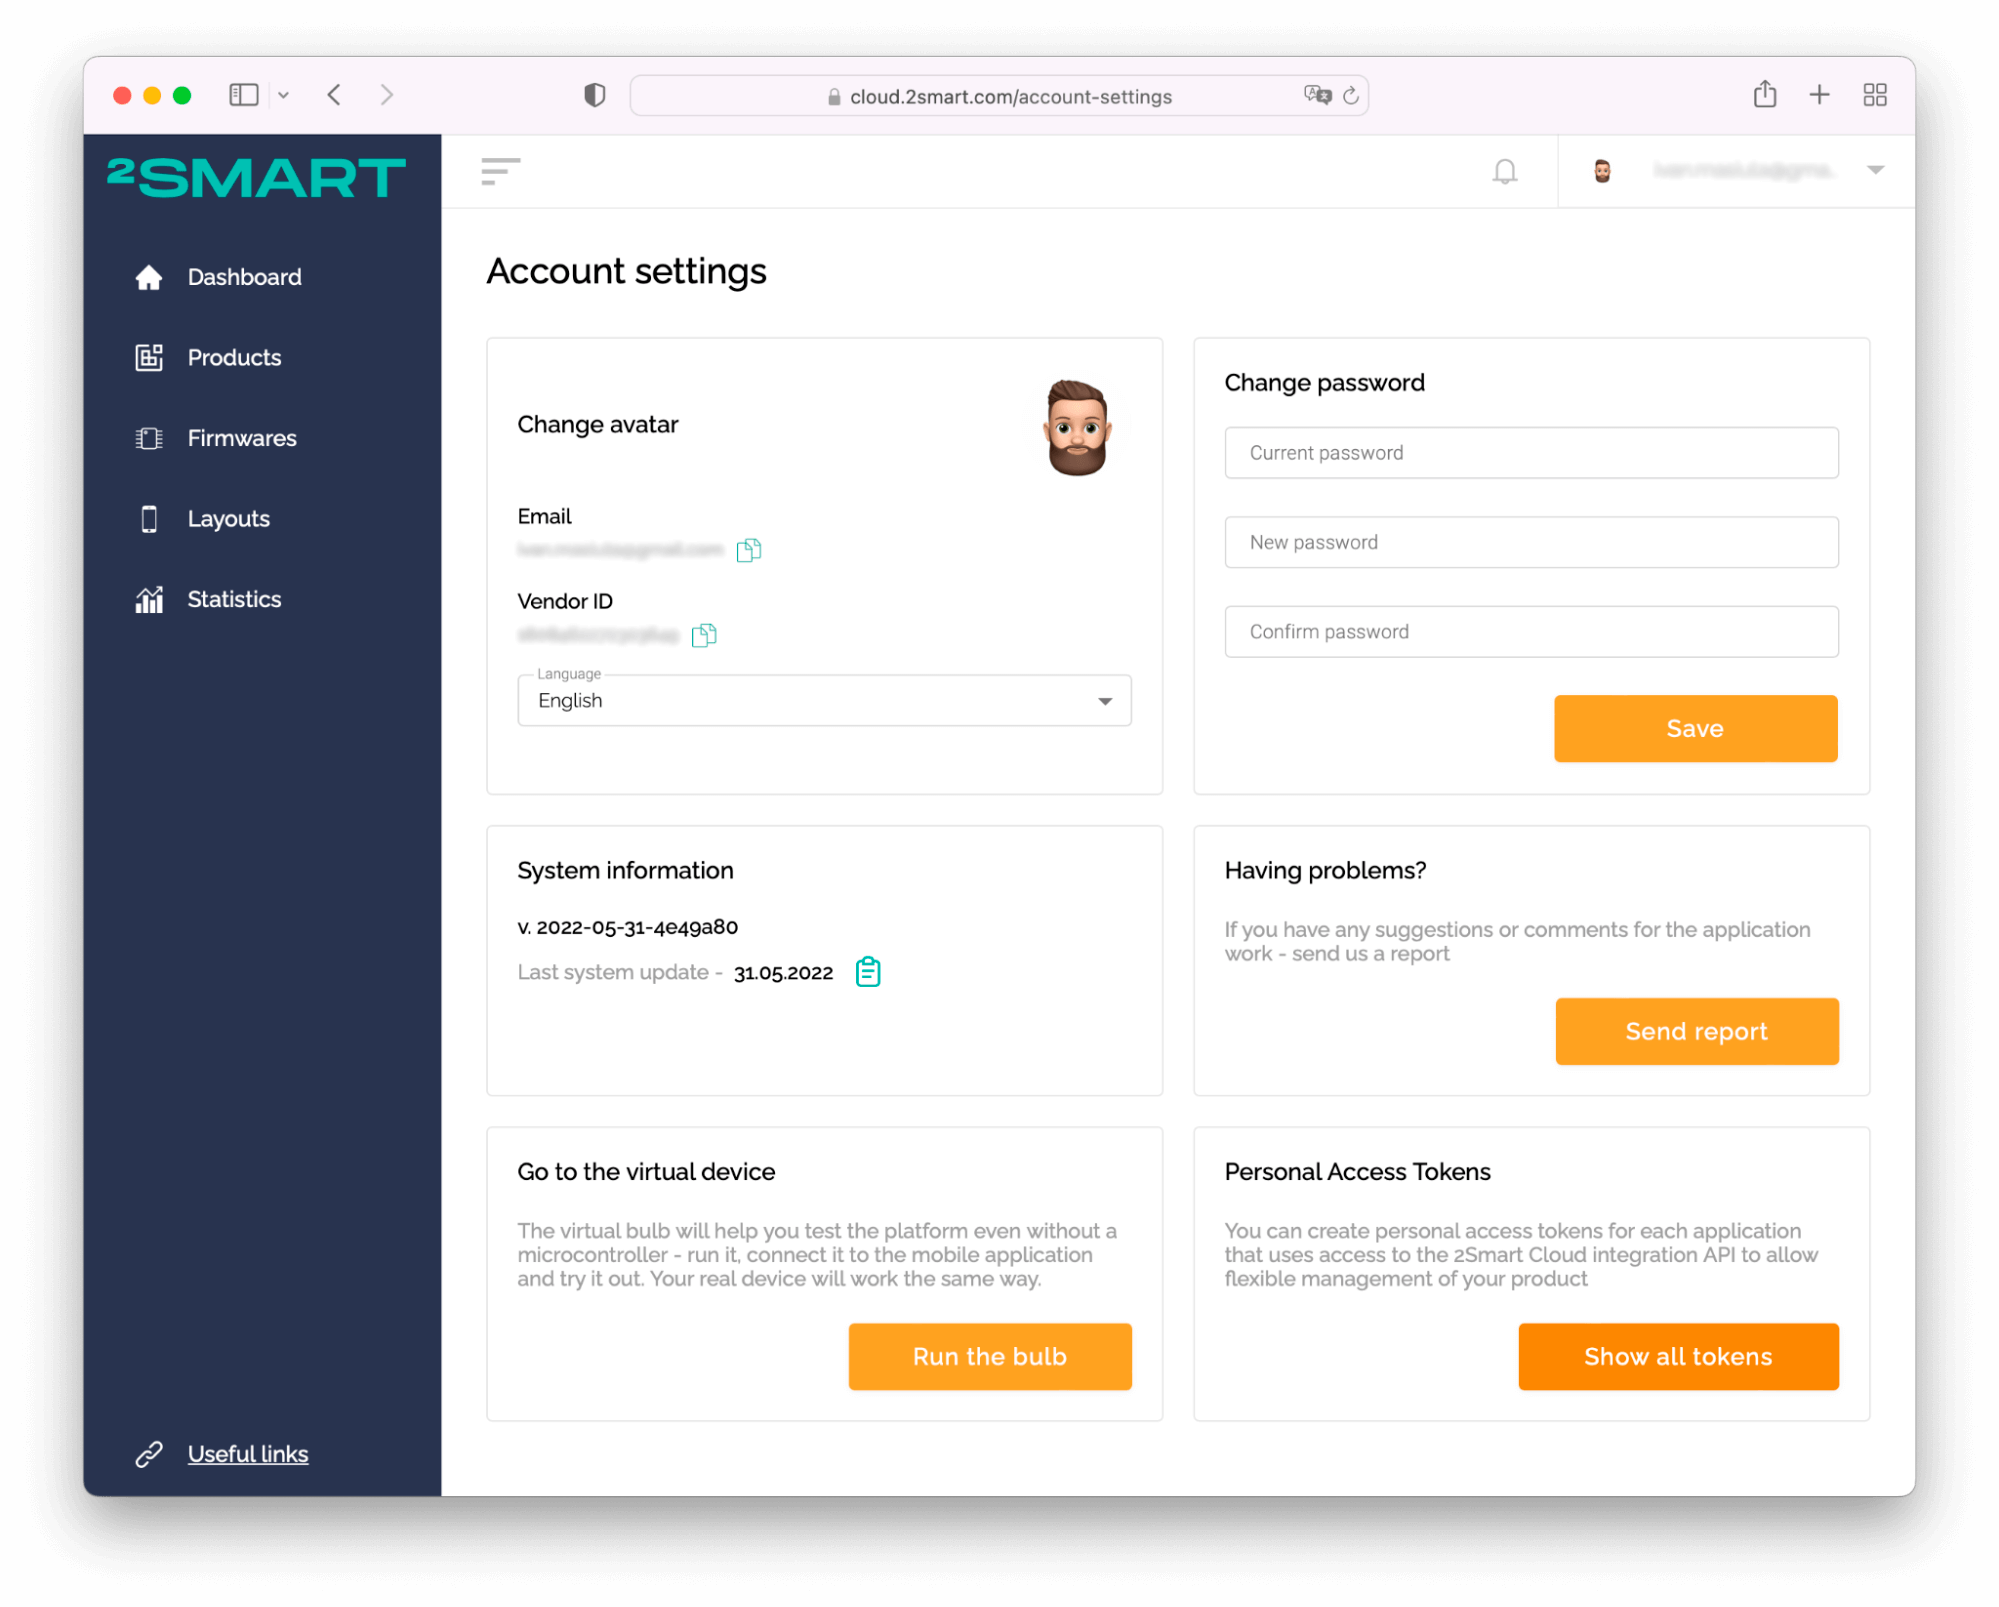
Click the “Show all tokens” button.
In the window that appears, click the “Generate token" button.
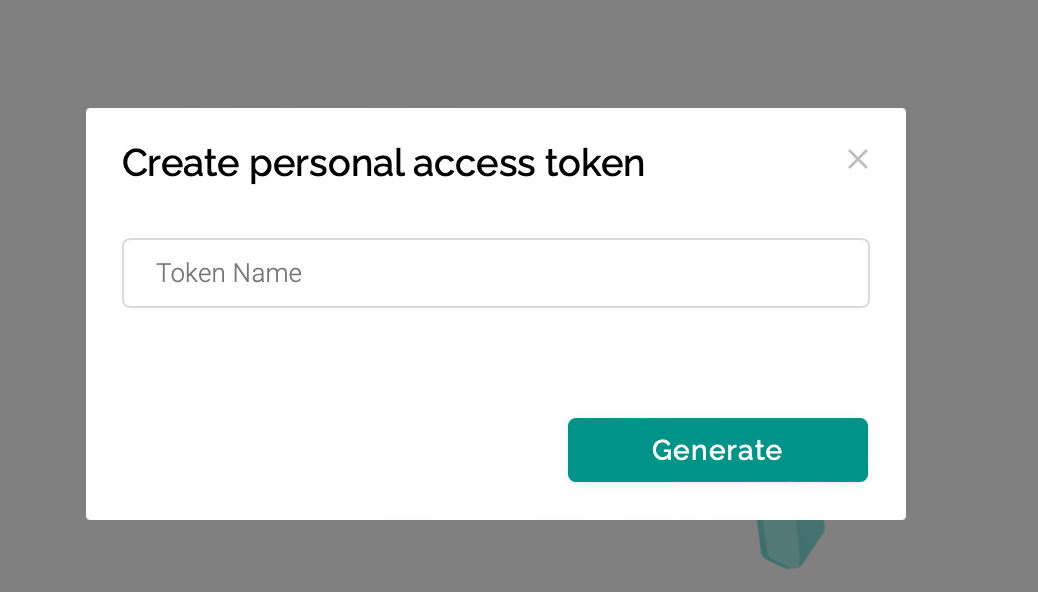
Specify a name for the new token – for example, “Test". Click the “Generate” button.
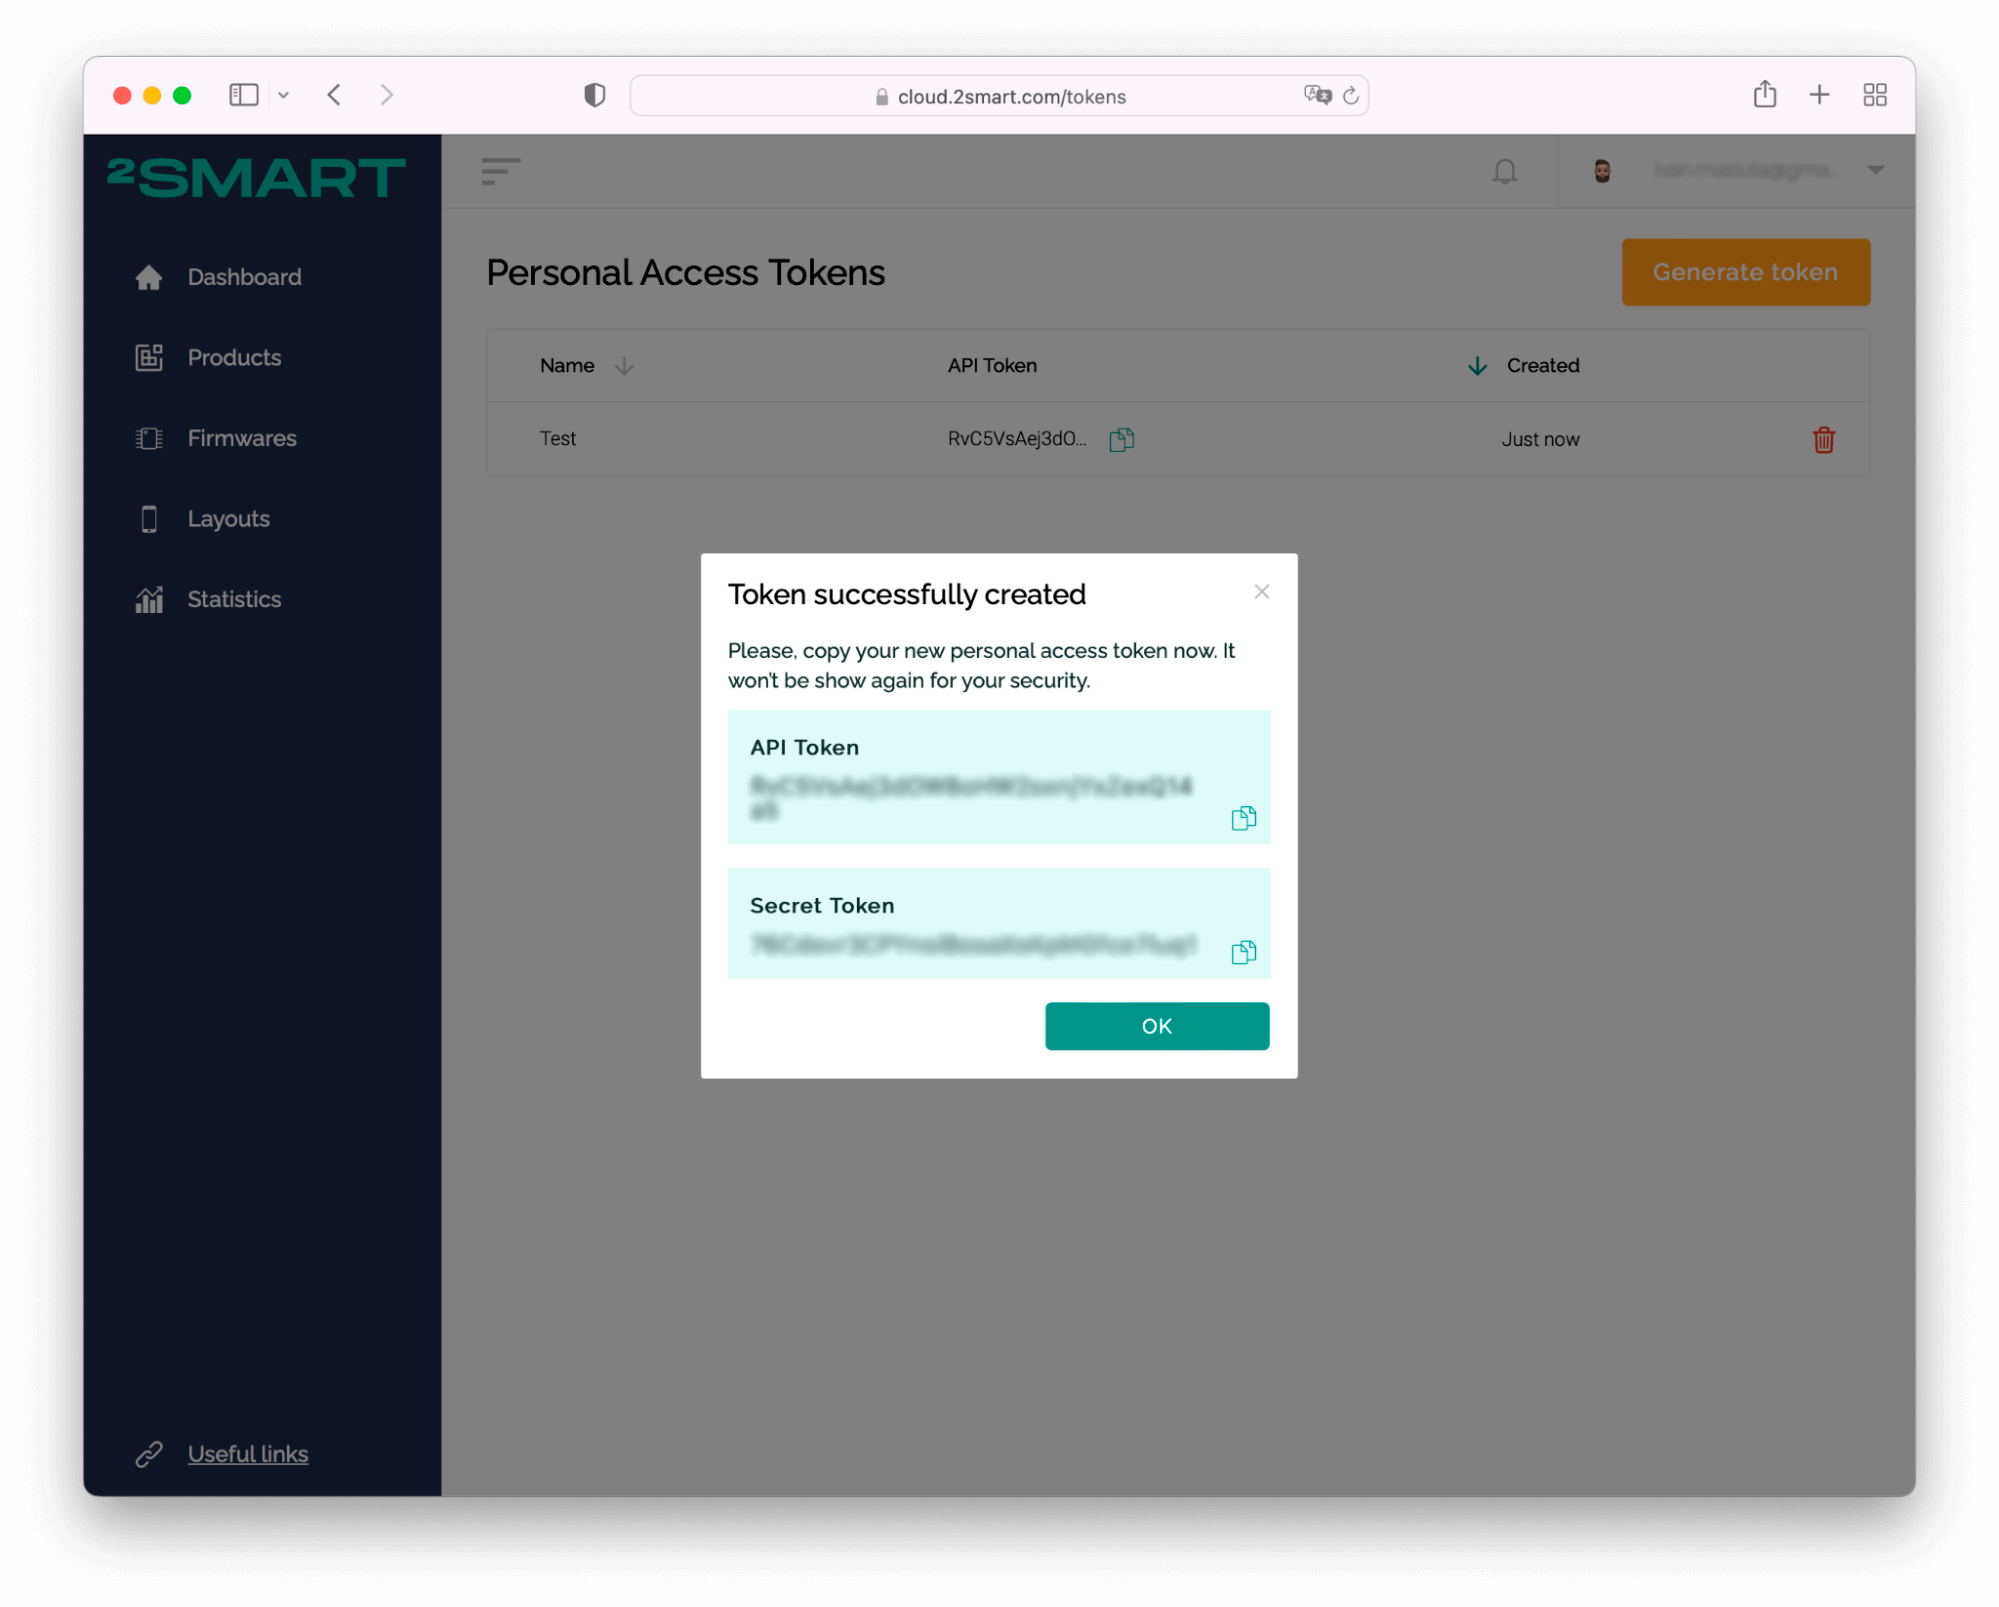
Copy the API Token and Secret Token values to the corresponding fields of the Standalone to Cloud bridge settings window.
Please note! The Secret Token value is displayed only once, right after the token is generated, so you must copy it immediately.
Getting the credentials from 2Smart Cloud via Swagger
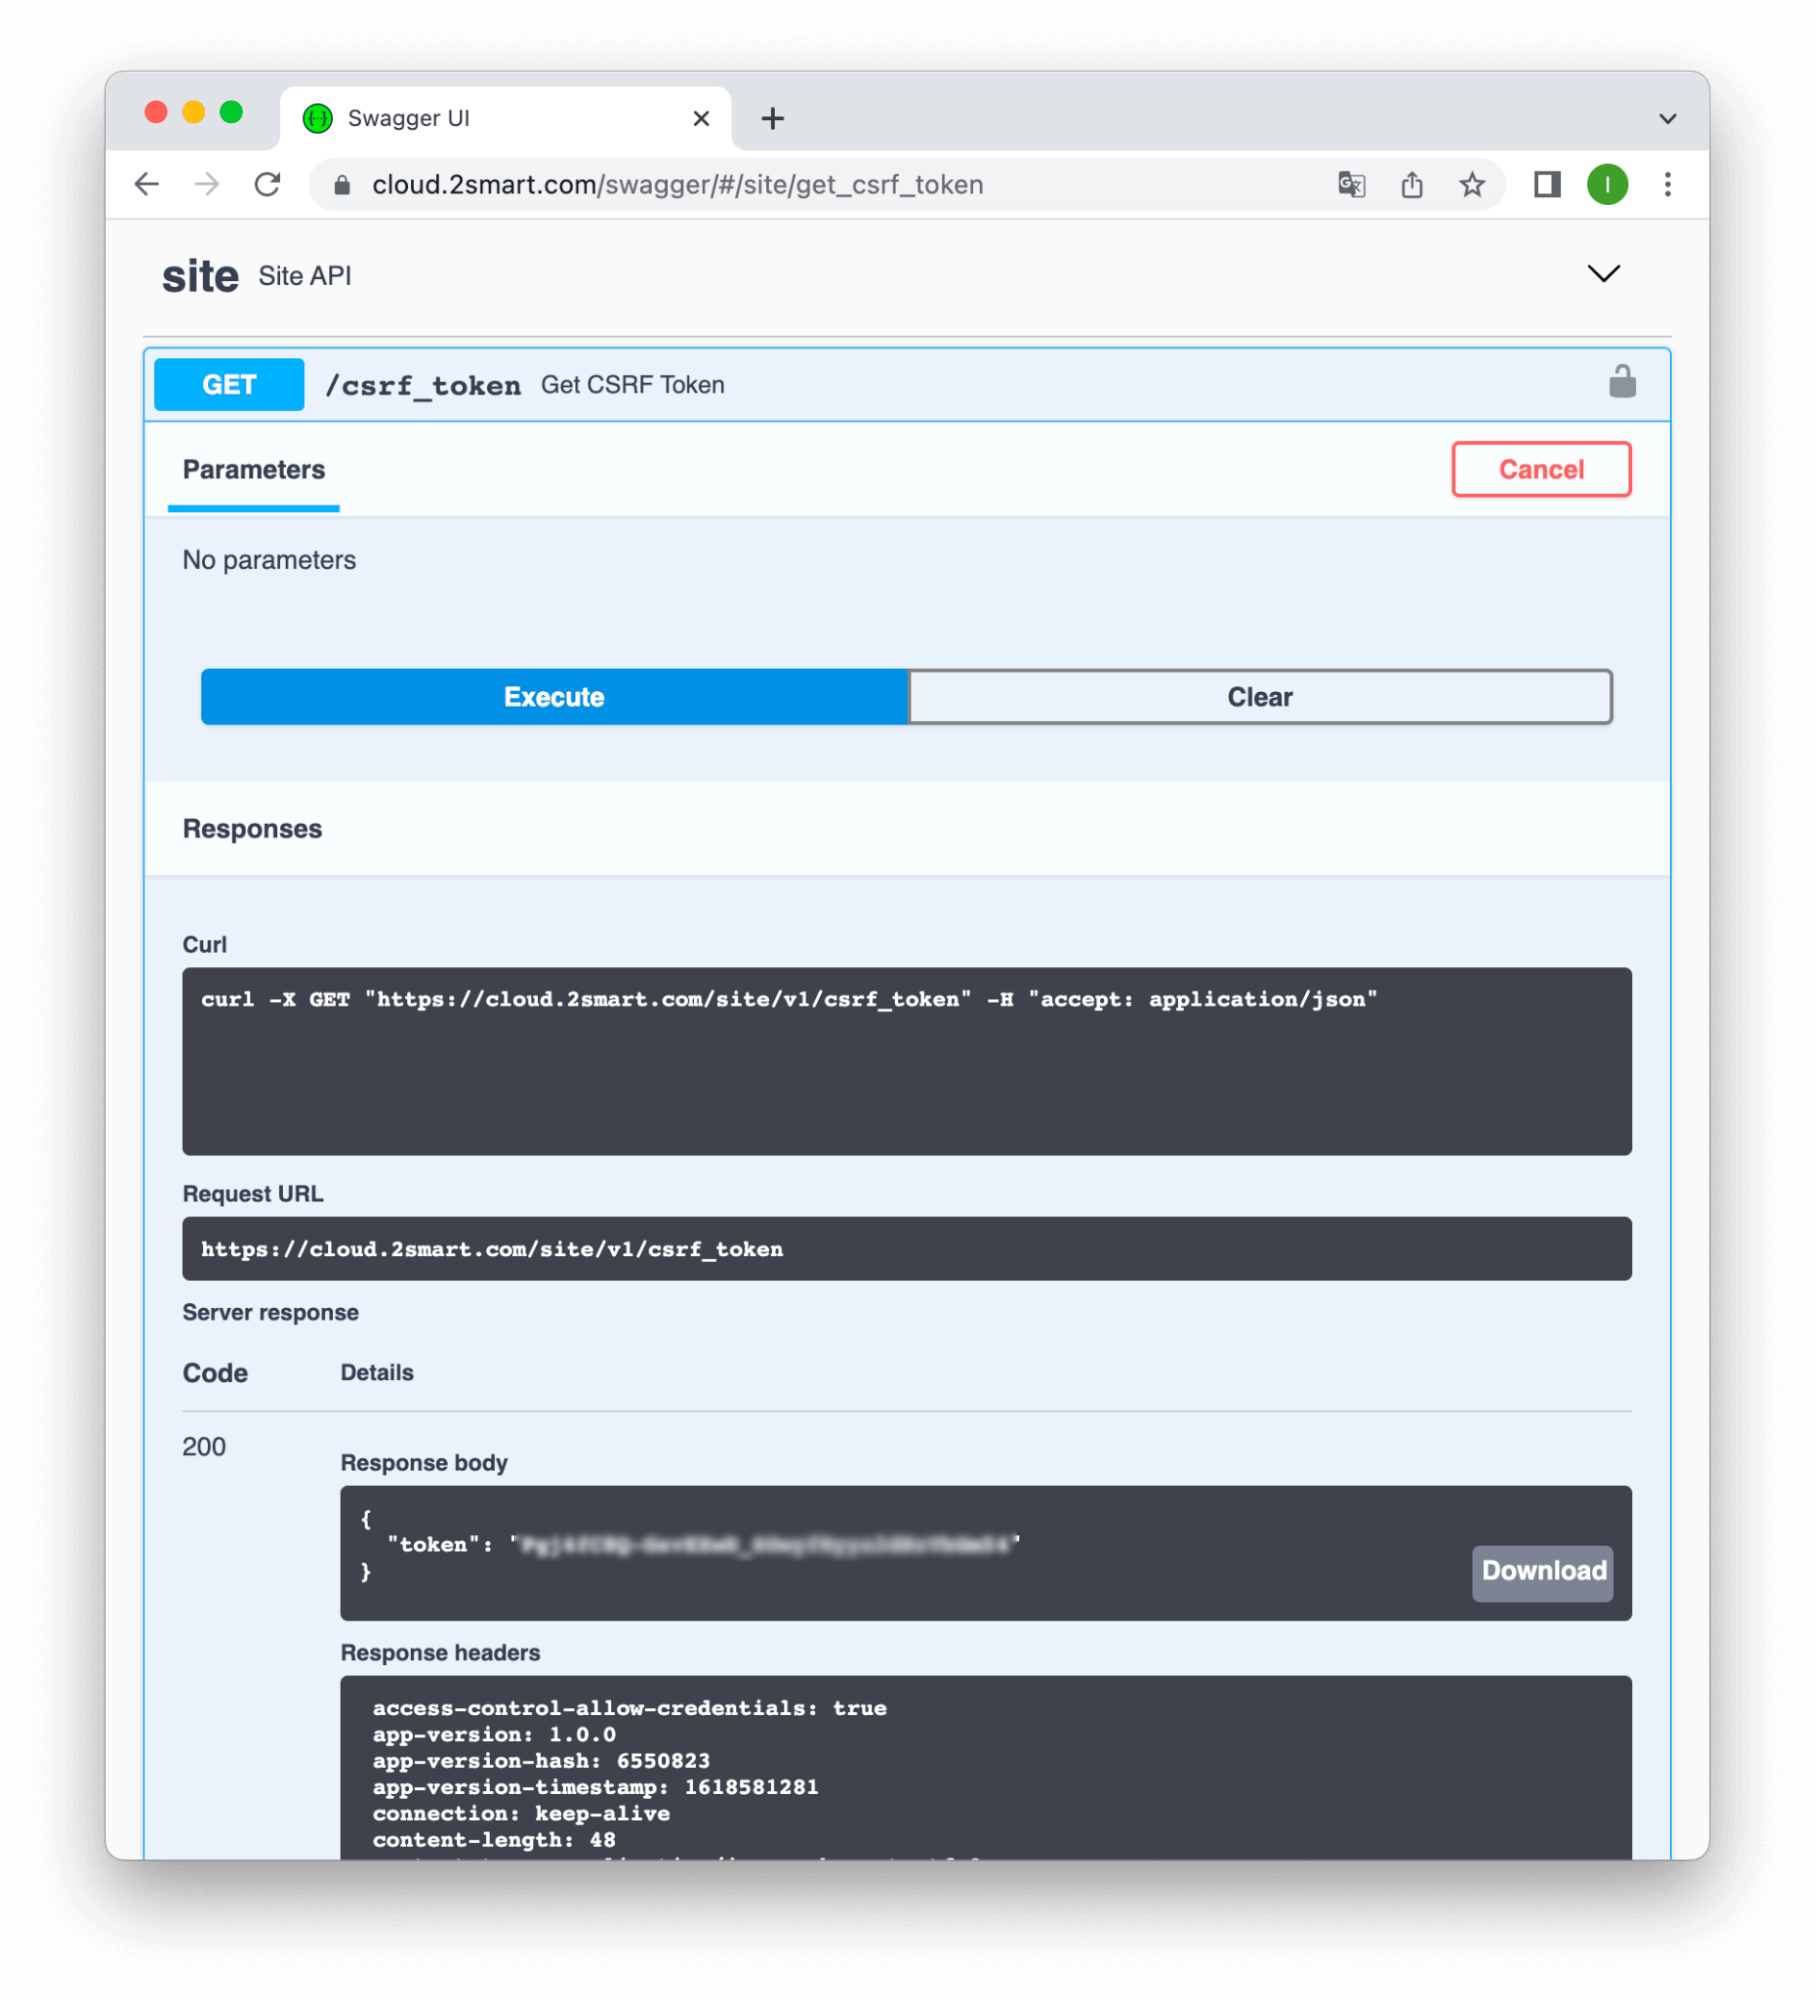
- Get CSRF Token:
- Go to the https://cloud.2smart.com/swagger.
- First of all, you need to get a CSRF Token. Choose path /csrf_token, click the “Try it out” button and then click the blue button “Execute”.
When receiving the token, copy it to the clipboard.
- Login to the 2Smart Cloud with Swagger.
Below you will see the path /vendor/login. Click on this path, then click the “Try it out” button. Paste the previously copied CSRF Token into the corresponding field and specify your email and password. Click the blue button “Execute” to log in to the system.

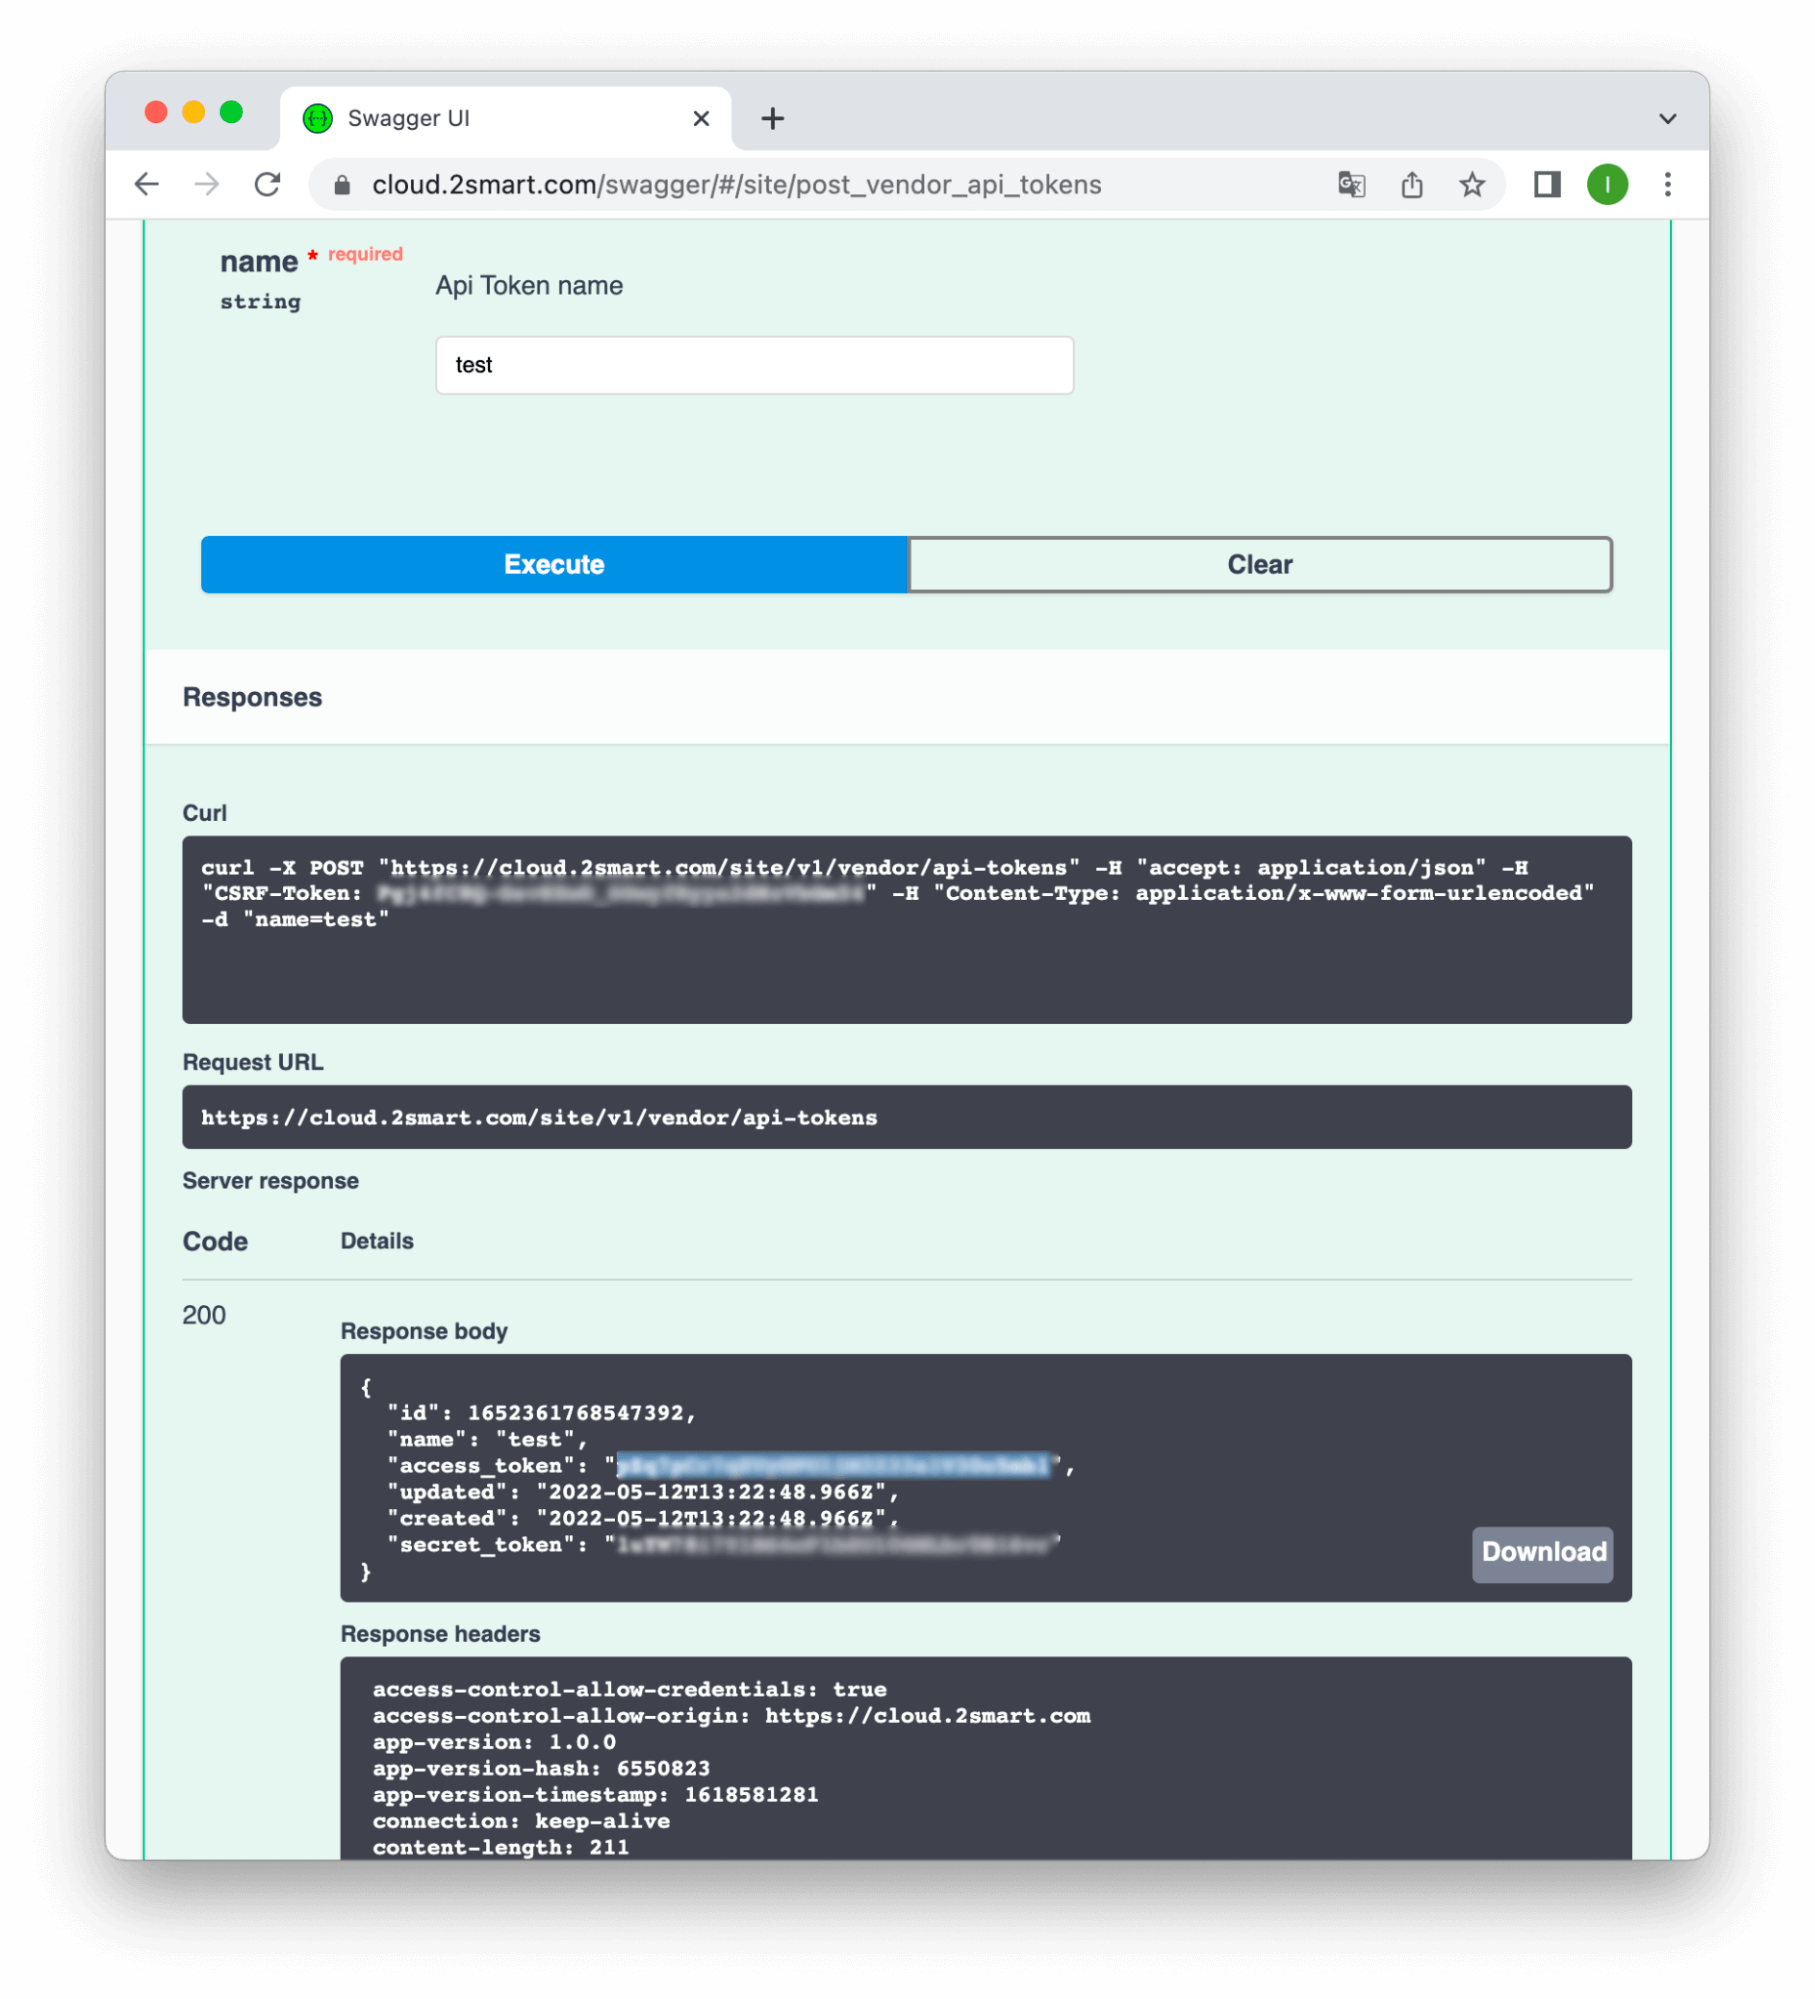
- Create an API token to connect 2Smart to the 2SmartCloud.
- Open link https://cloud.2smart.com/swagger/#/site/post_vendor_api_tokens.
Click the “Try it out” button, paste the previously copied CSRF Token into the corresponding field and specify your API token name. Click the blue button “Execute” to create an API token. Copy access_token and secret_token to notes.
Soon, this feature will be available from the interface of the 2Smart Cloud vendor panel.
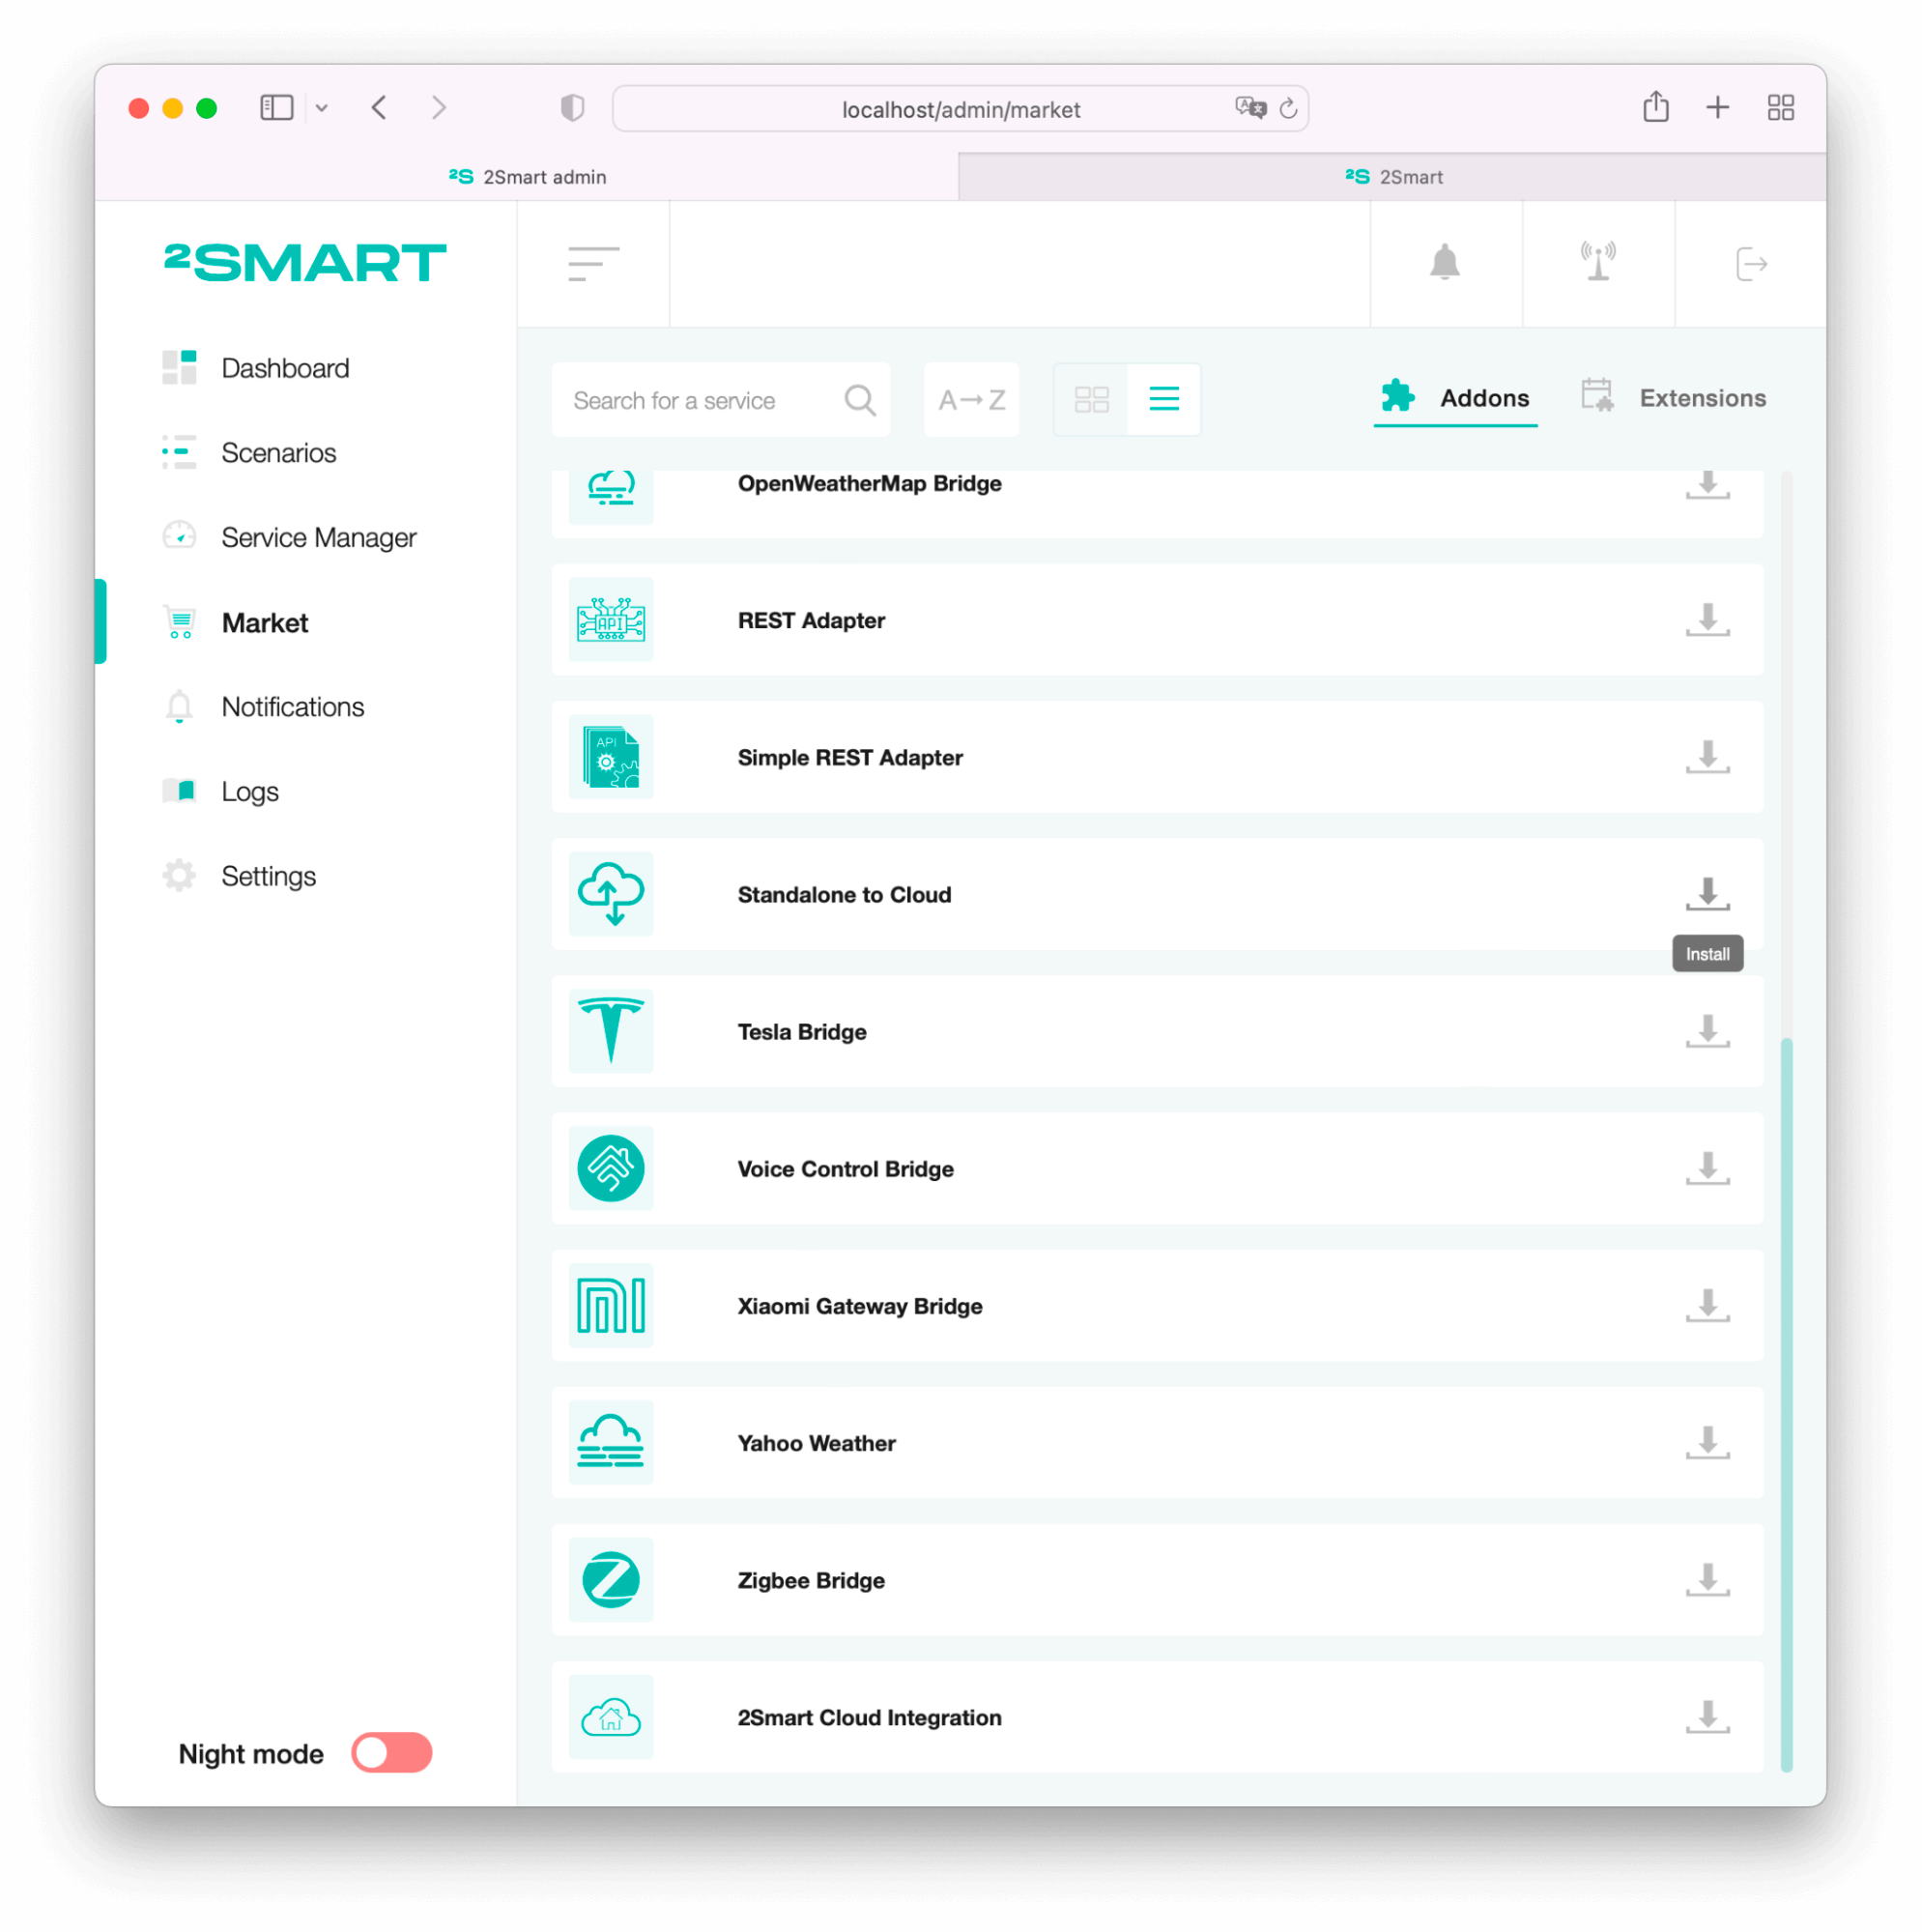
Bridge installation
- Go to the 2Smart Standalone admin panel.
- Open the Market page.
- Find the needed bridge in the list.
- Install it.
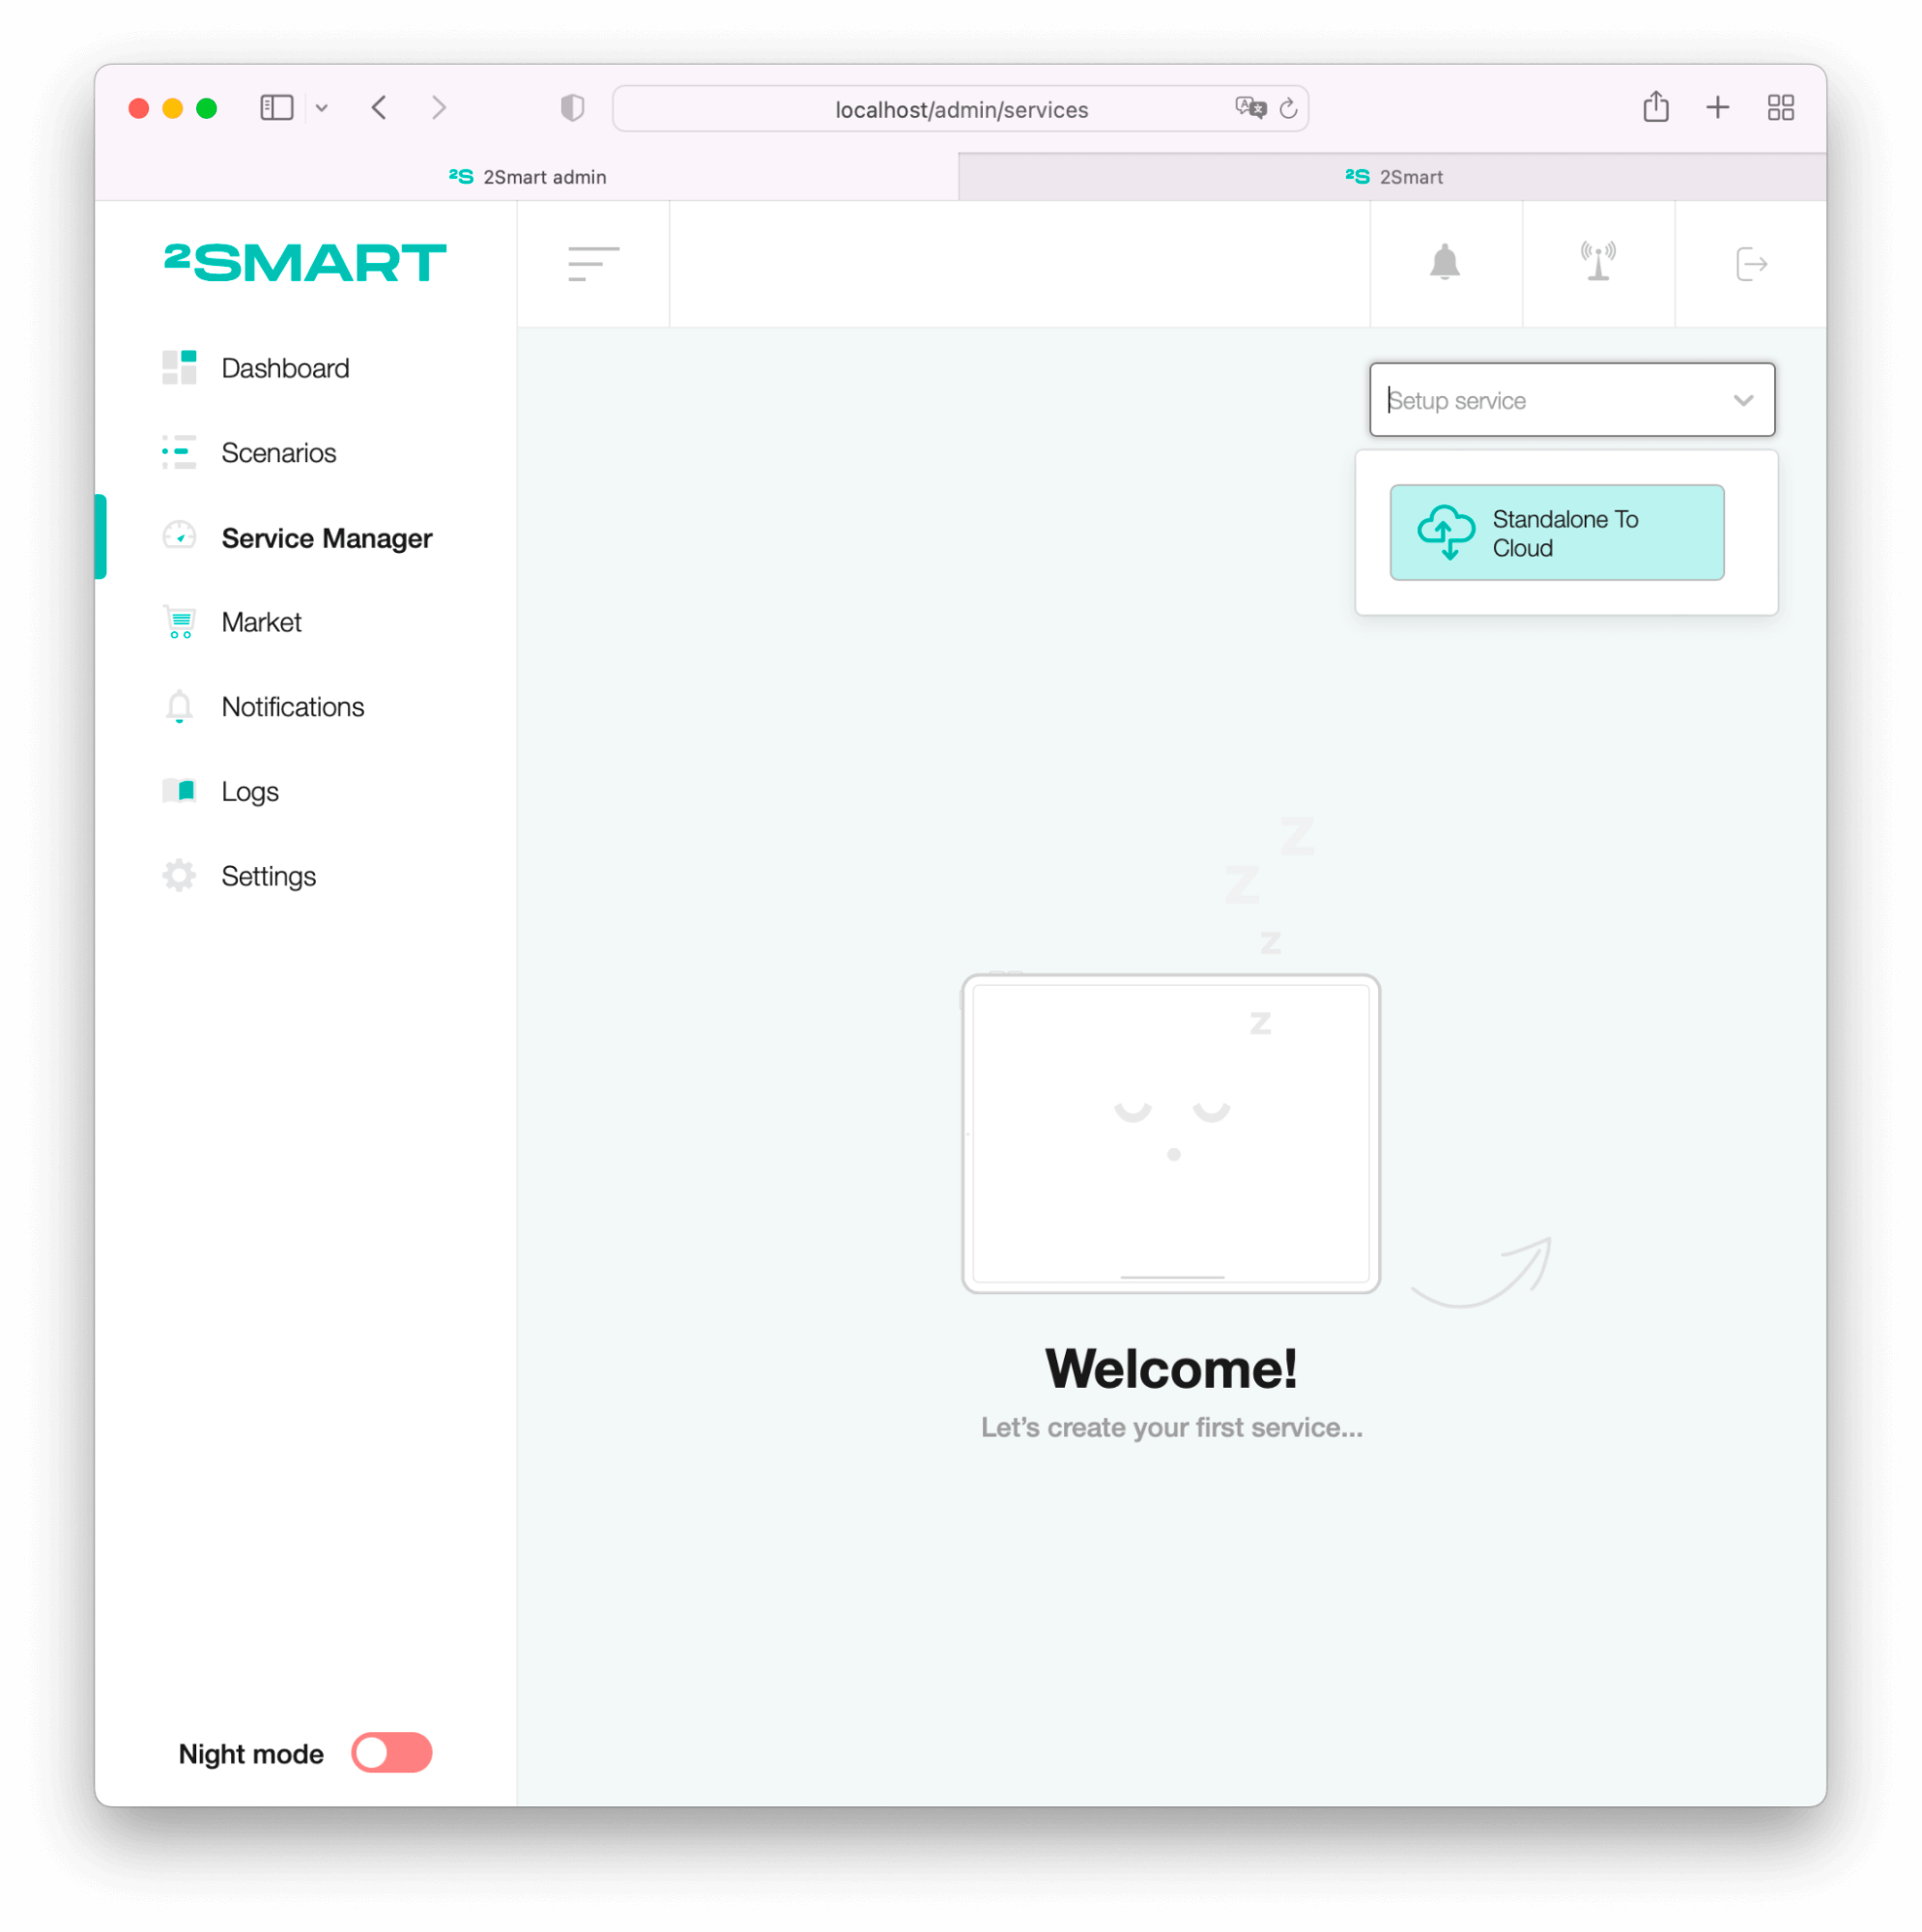
Setup
- Go to the Service Manager page.
- Click the “Setup Service” list.
Choose Standalone to Cloud.
- Paste access_token from notes into the “Cloud API token” field.
- Paste secret_token from notes into the “Cloud secret token” field.
- The Standalone pin may be empty if you don’t have security options on widgets.
Click the “Save” button to create a bridge.
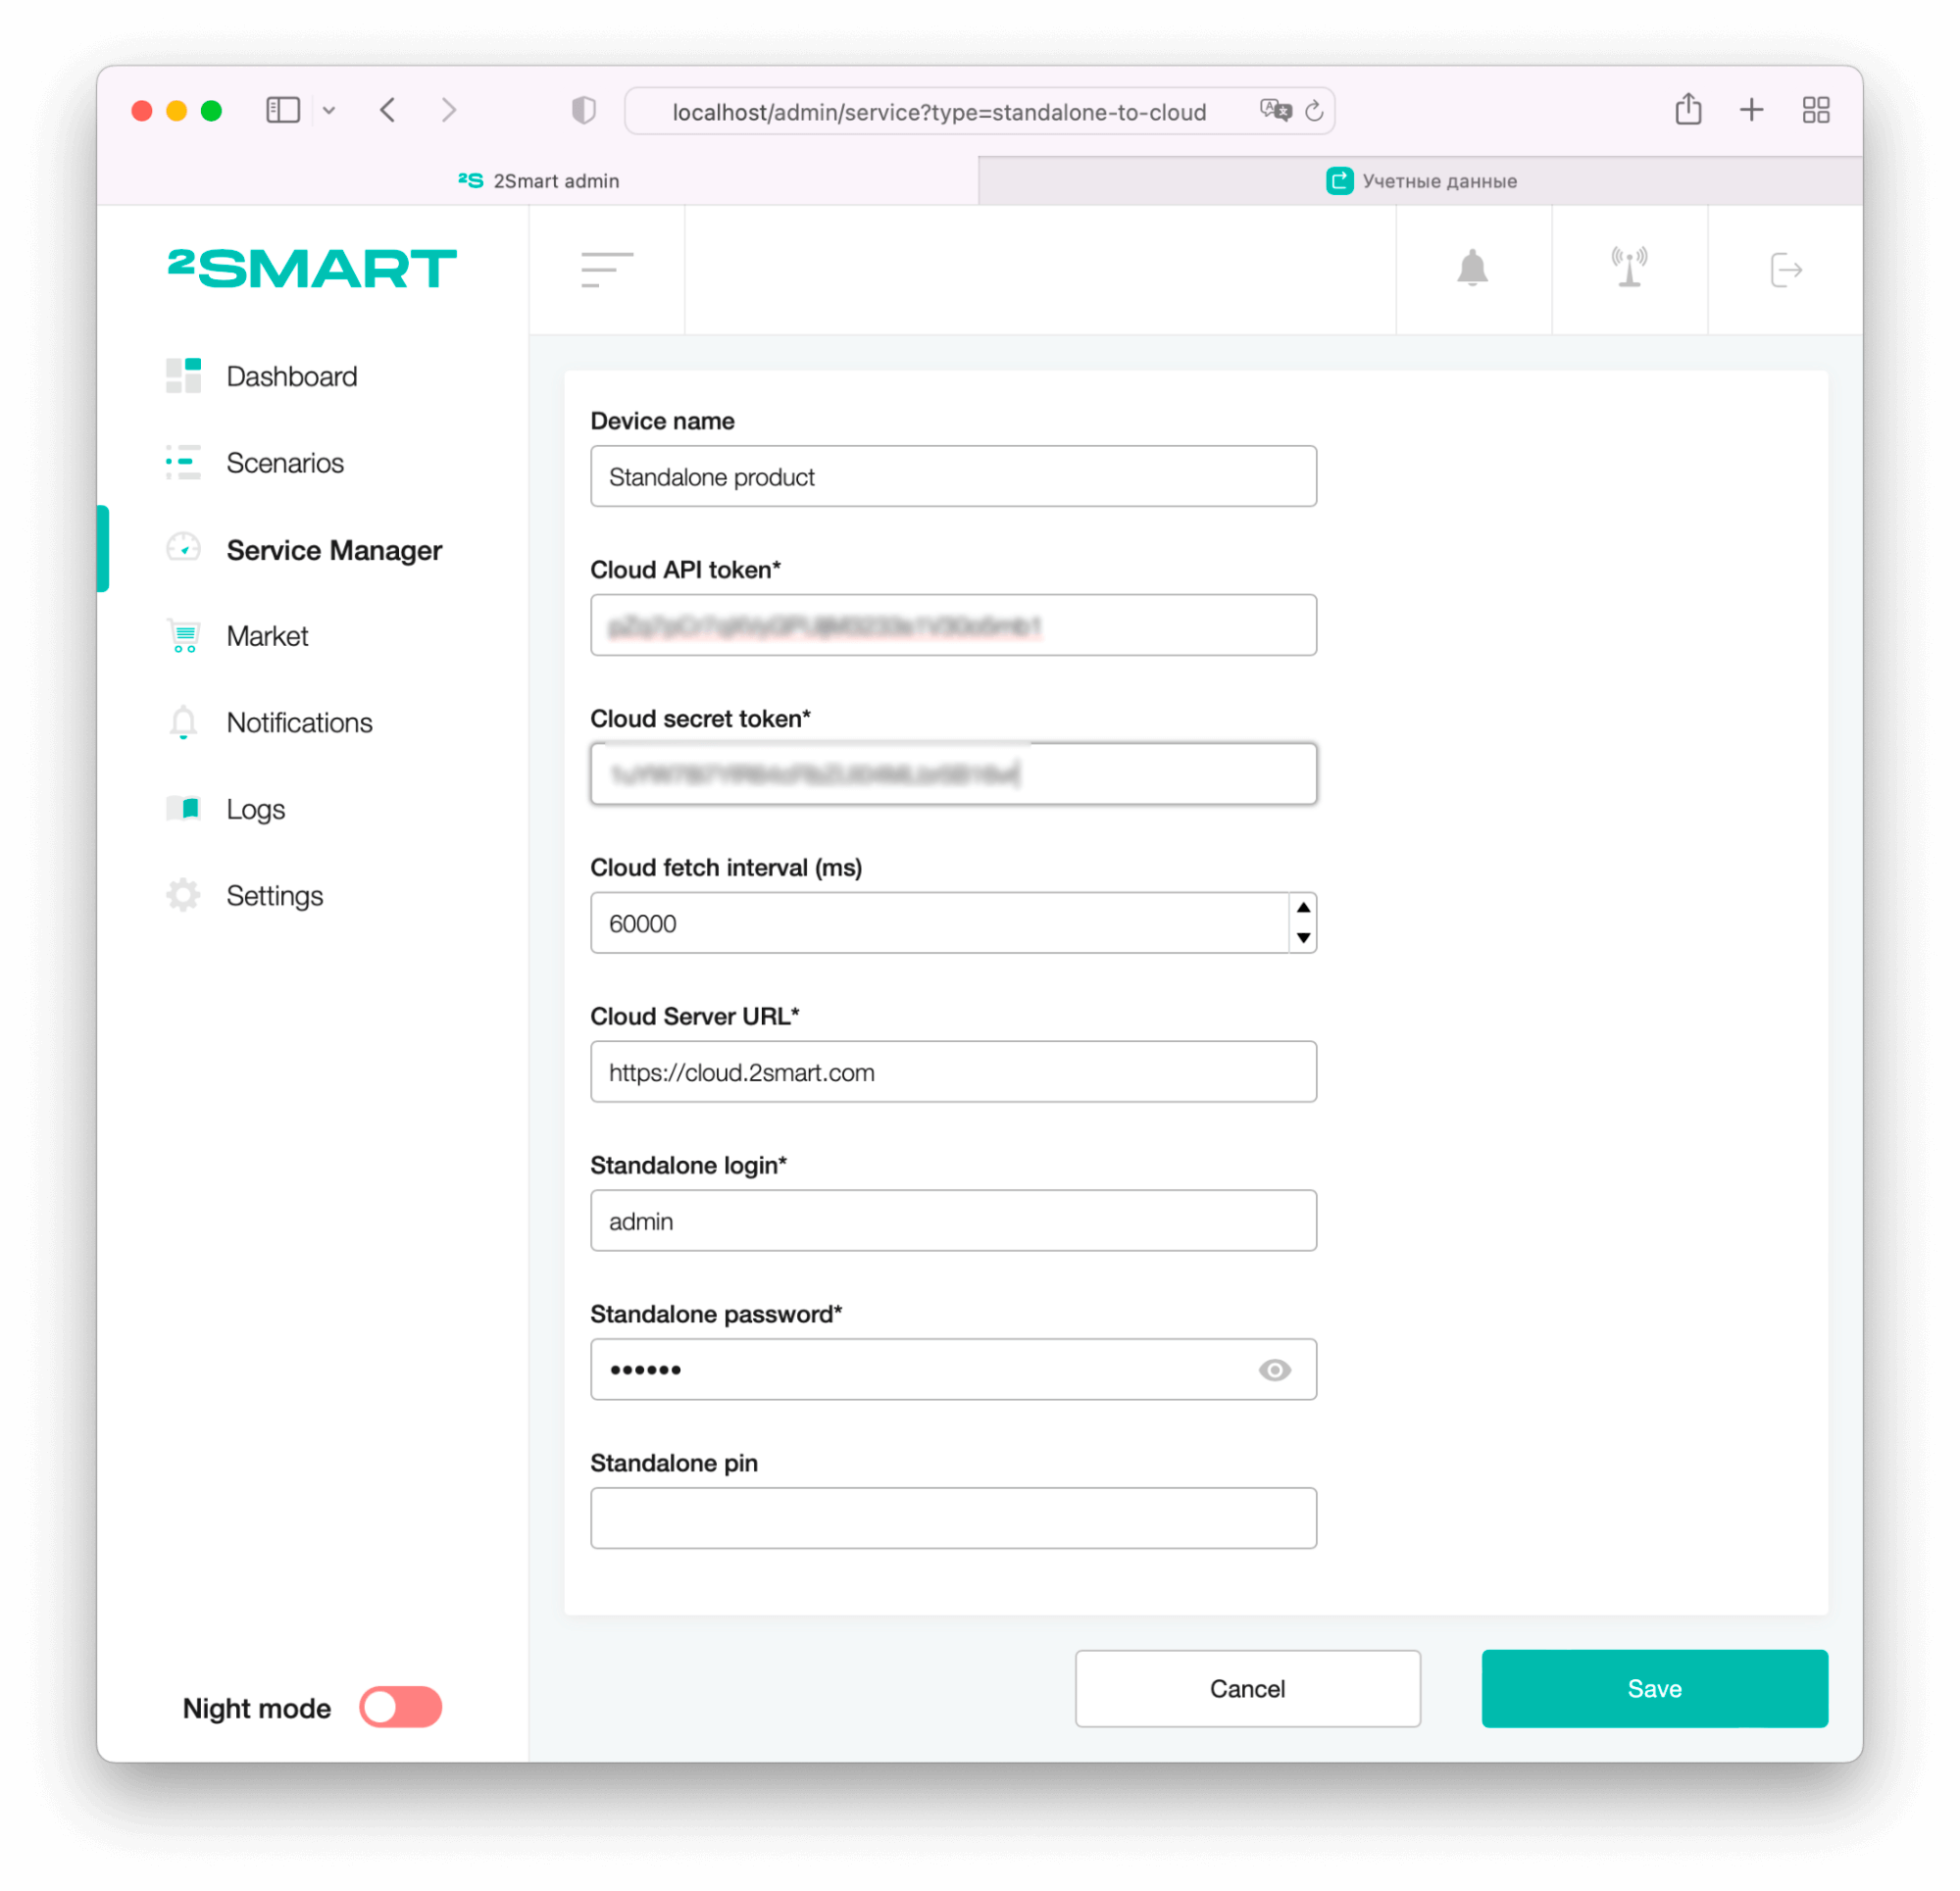
- Click on the toggle to enable the bridge.
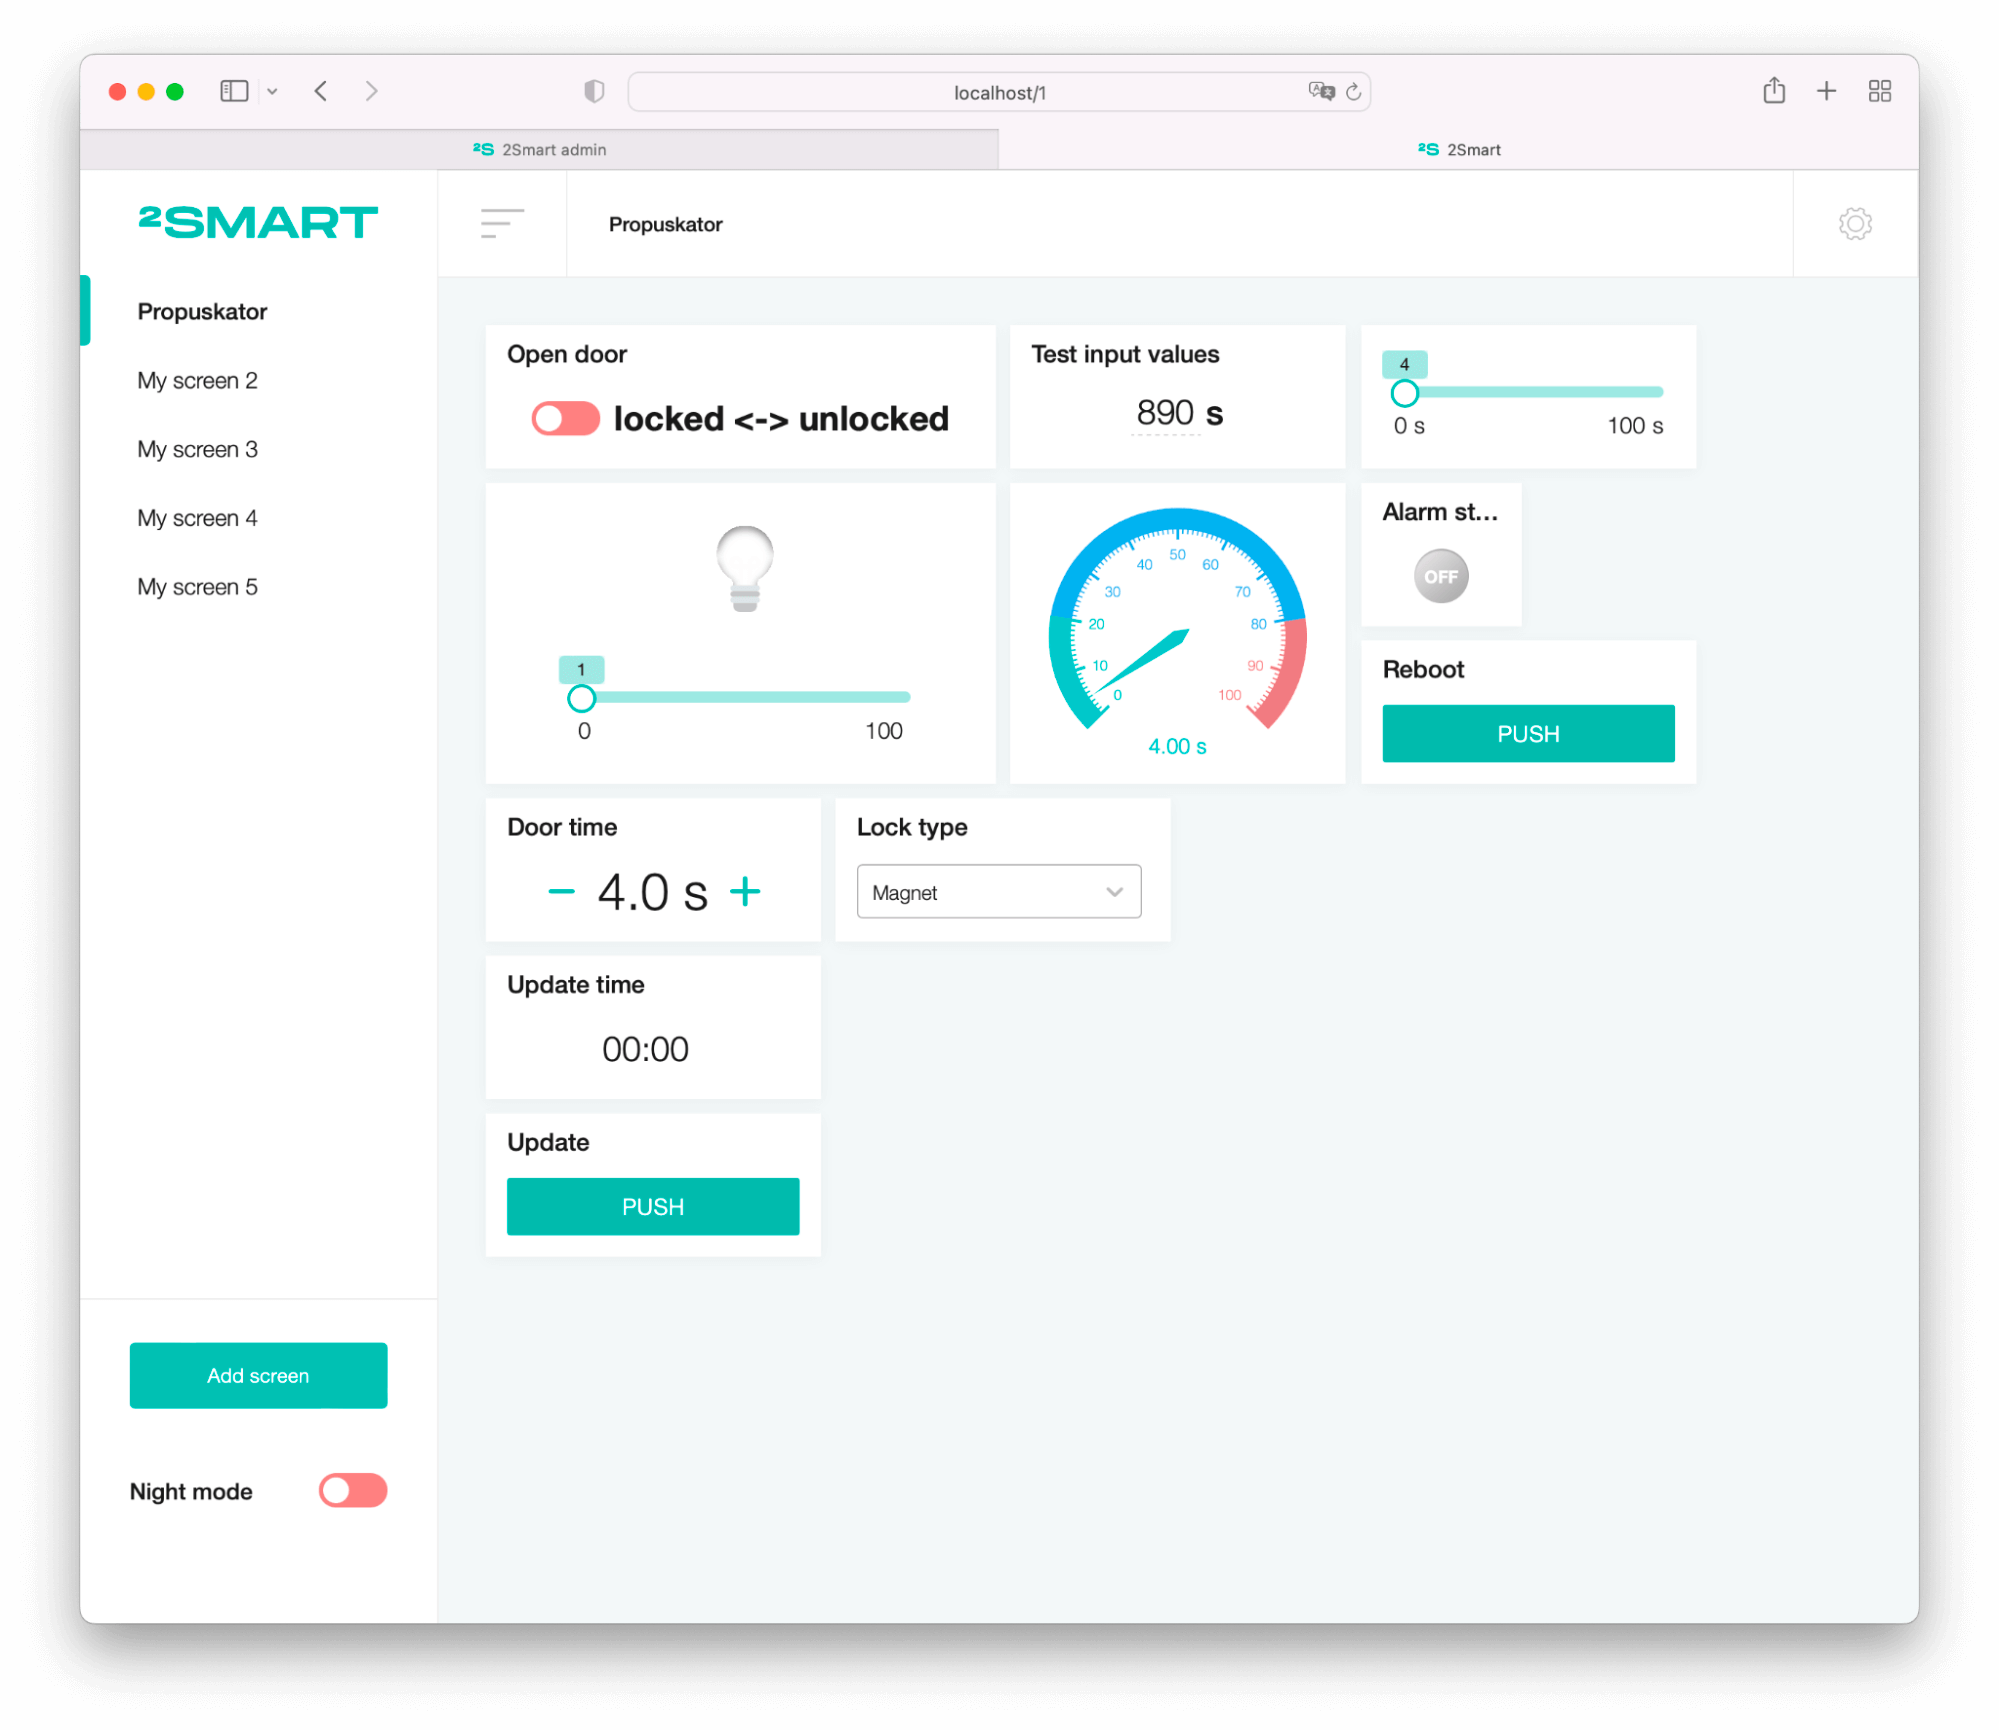
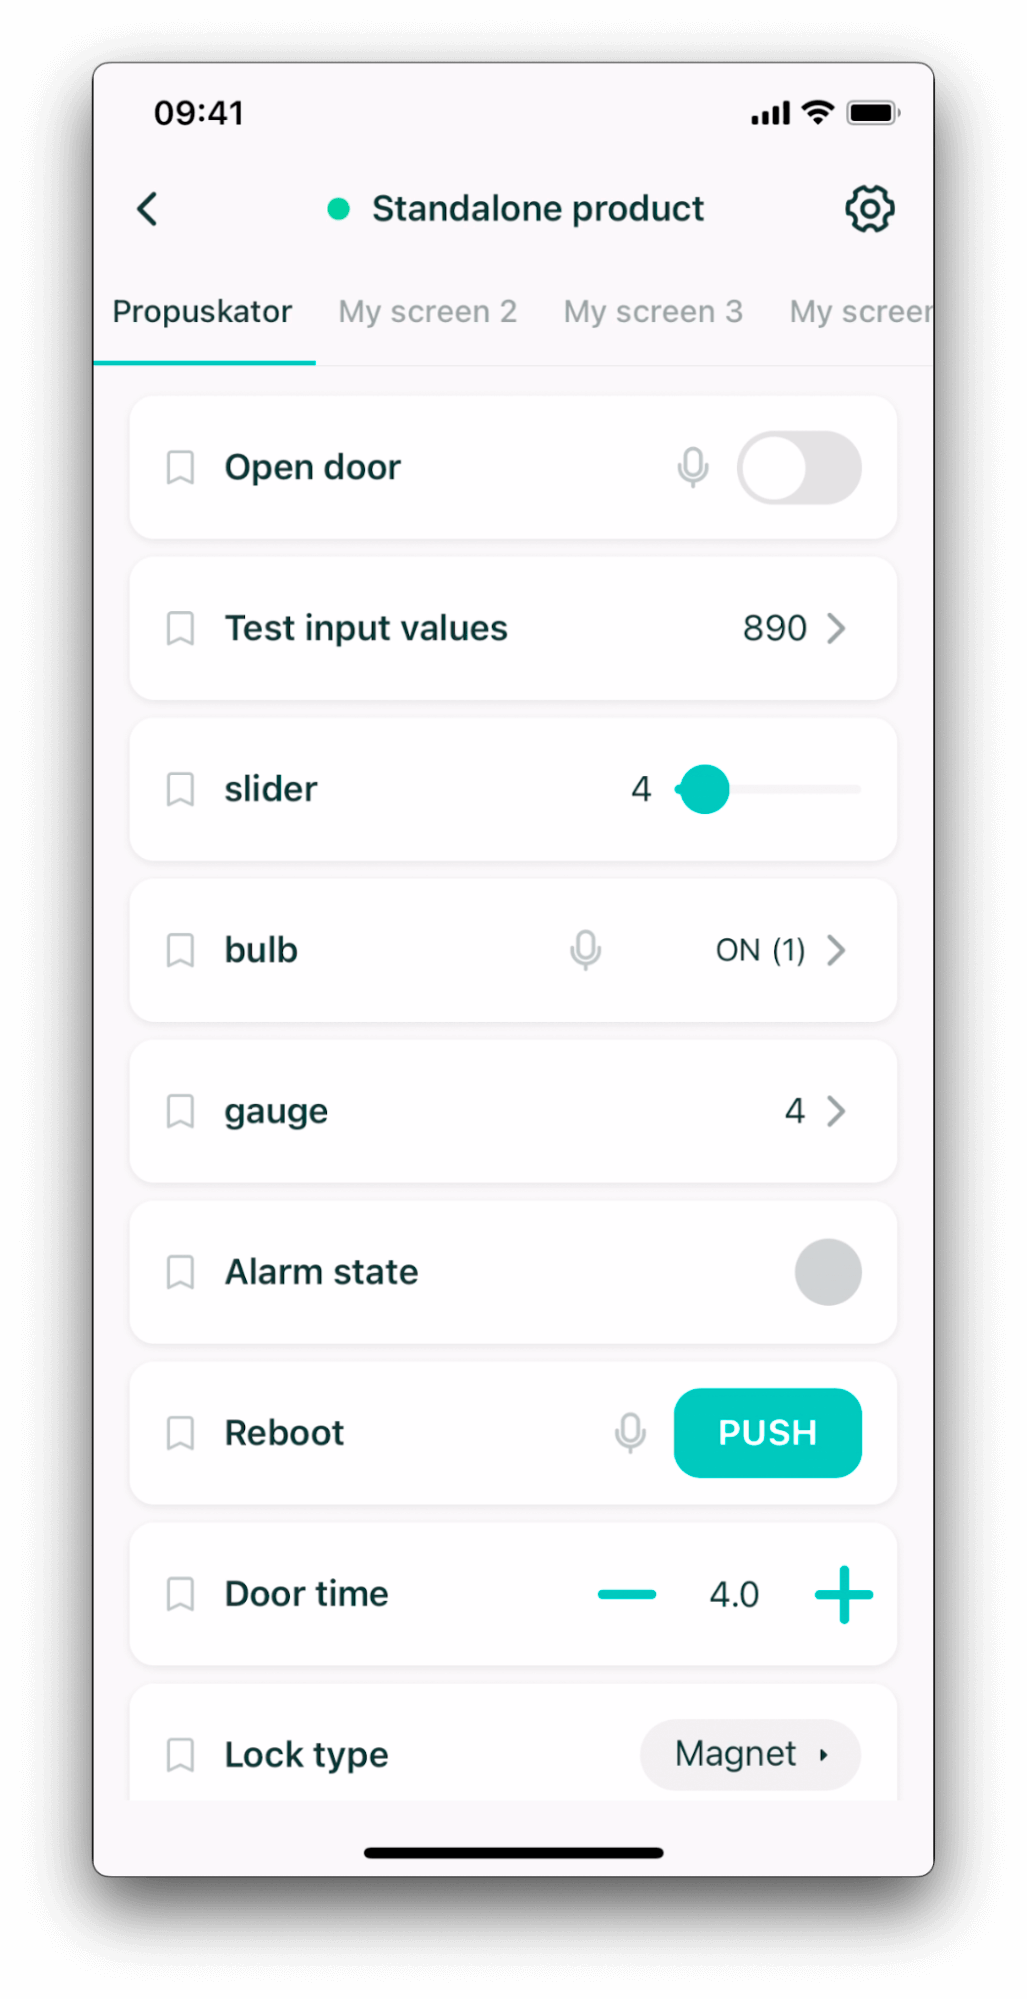
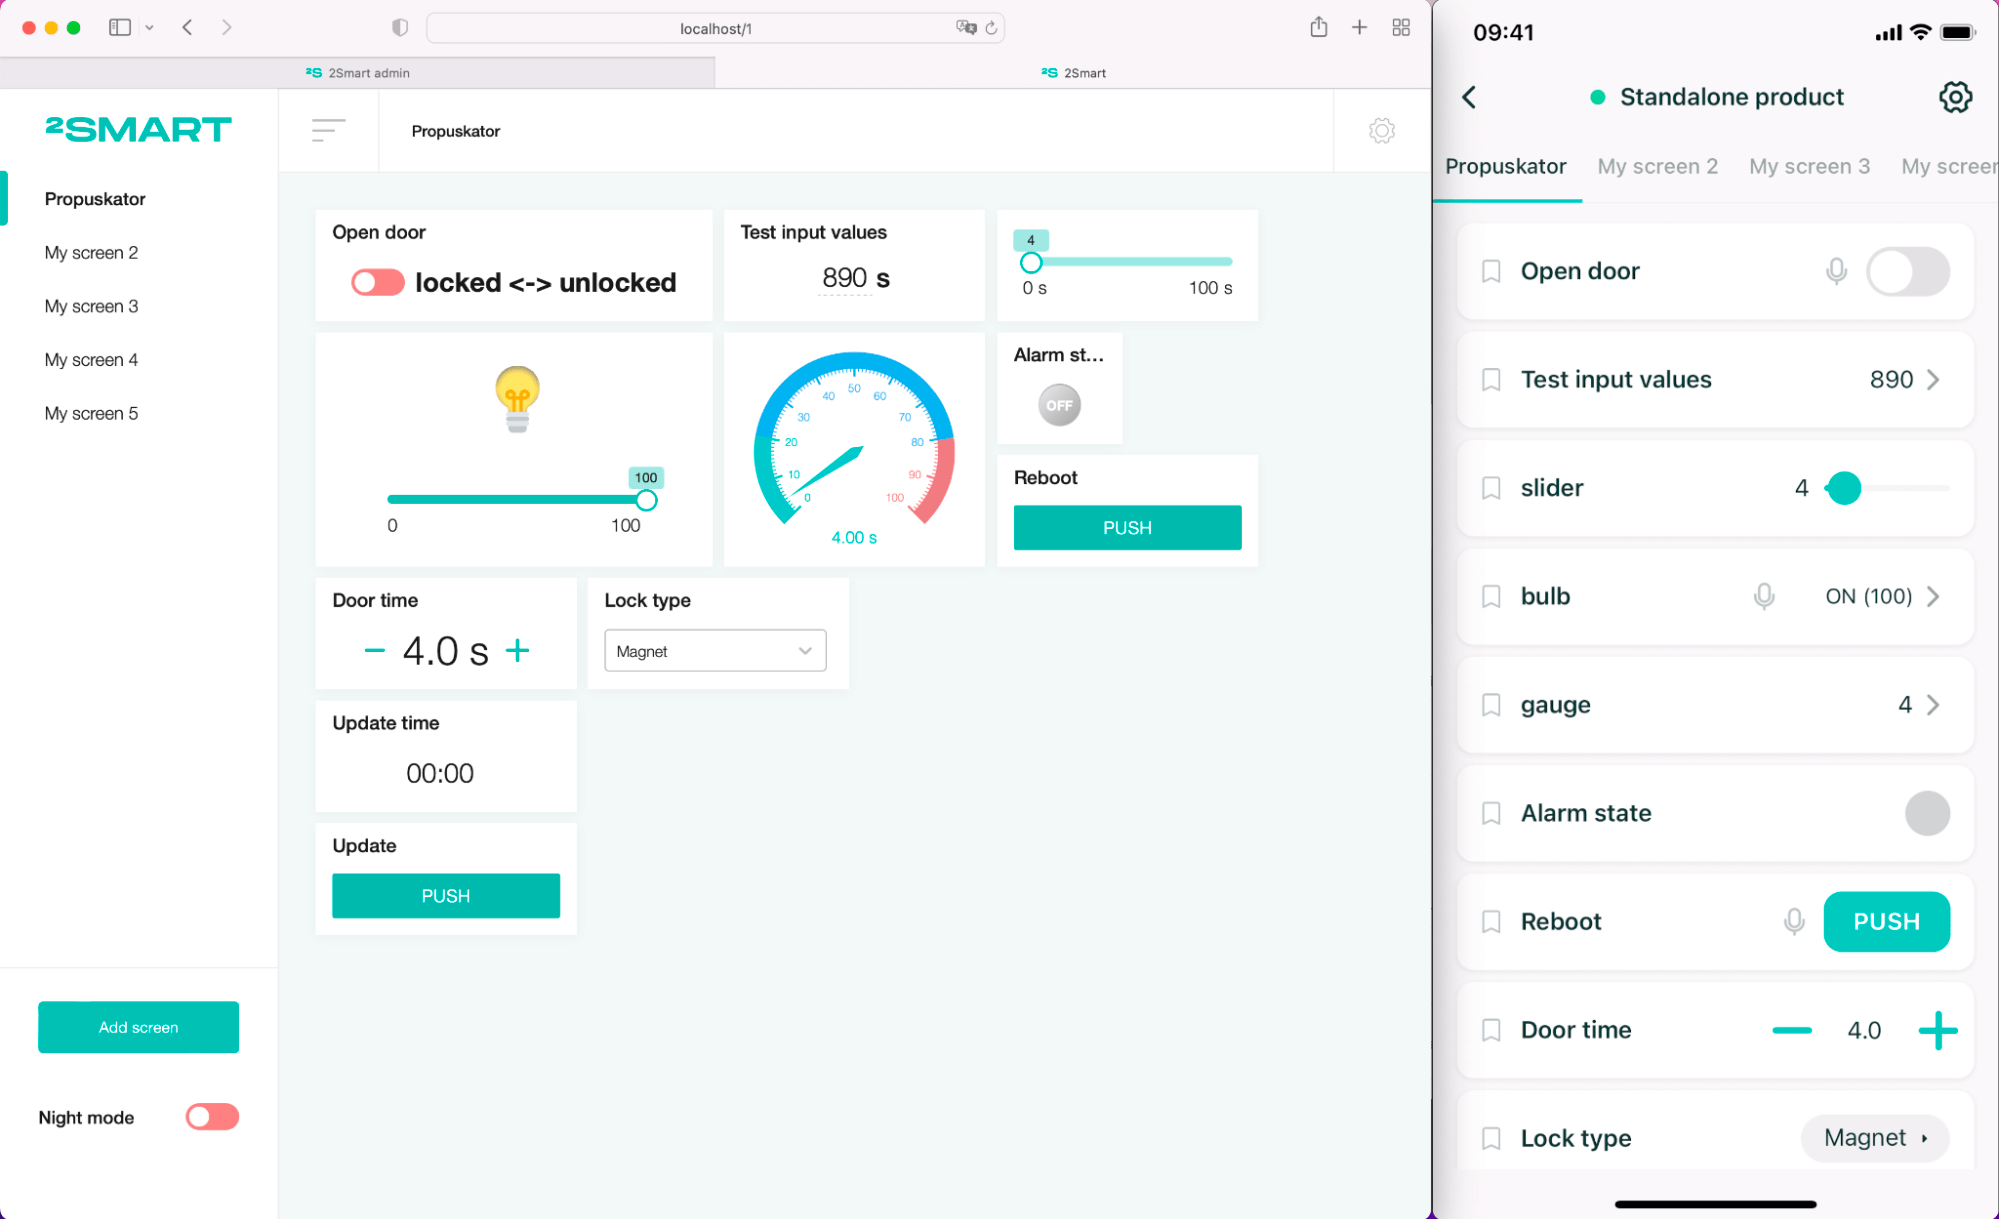
Adding widgets to the user’s panel
The user’s screen includes such capabilities:
- Add new widgets.
- Add new screens.
- Edit name of the screen.
- Edit widget layout.
- Scale widgets.
- Add pin code to the panel.
Add new widgets to the user’s panel, and they will appear in your 2smart Cloud account in a minute.